Reading Computer Center Tutorial
This tutorial page is a bonus set of helpful hints for those of us who are visual learners. I’m going to show you screenshots of how to customize the reading computer center using Google Slides.
Google Slides will let you edit the template and share the finished presentation with a URL address that you can share online.
Use these tips on your Reading Computer Center templates to add your own content, create links, and personalize it.
Before we begin:
Your purchase includes 3 main files. Let’s go over each one so you can choose what’s right for you.
- PDF – An original PDF file that can be uploaded onto computers or a school network. This file cannot be edited and has been retired. It is included as it was the original item you paid for. *Note that many flash games will become unusable as of 1/2021 per changes with Google Chrome which is beyond my control. You can follow the original directions included in your purchase download for how to use. This webpage will be dedicated to the next two files.
- Reading Computer Center Lesson Plans – An editable Google Slides version of the original PDF file. It has links to internet games, activities and stories. Most links are updated as of 11/2020, but you can edit any dead links. *Note that many flash games will become unusable as of 1/2021 per changes with Google Chrome which is beyond my control. A link to get a copy of this file is included in your purchase download.
- Reading Computer Center Template – A blank, editable Google Slides version with no content links. You can decide the content and add your own links. A link to get a copy of this file is included in your purchase download.
If you want to take what I’ve already started and make changes, choose the editable lesson plans already completed. (#2)
If you want to start from scratch, choose the blank, editable template. (#3)
Now, let’s look at how you can edit your computer lesson plans.
Start with Google Slides
You’ll need a Google account (which is free to create if you don’t have one).
You’ll also need to have downloaded and unzipped your purchase from TPT. Click the link in your purchase folder to open Google Slides and create a copy of the Reading Computer Center.
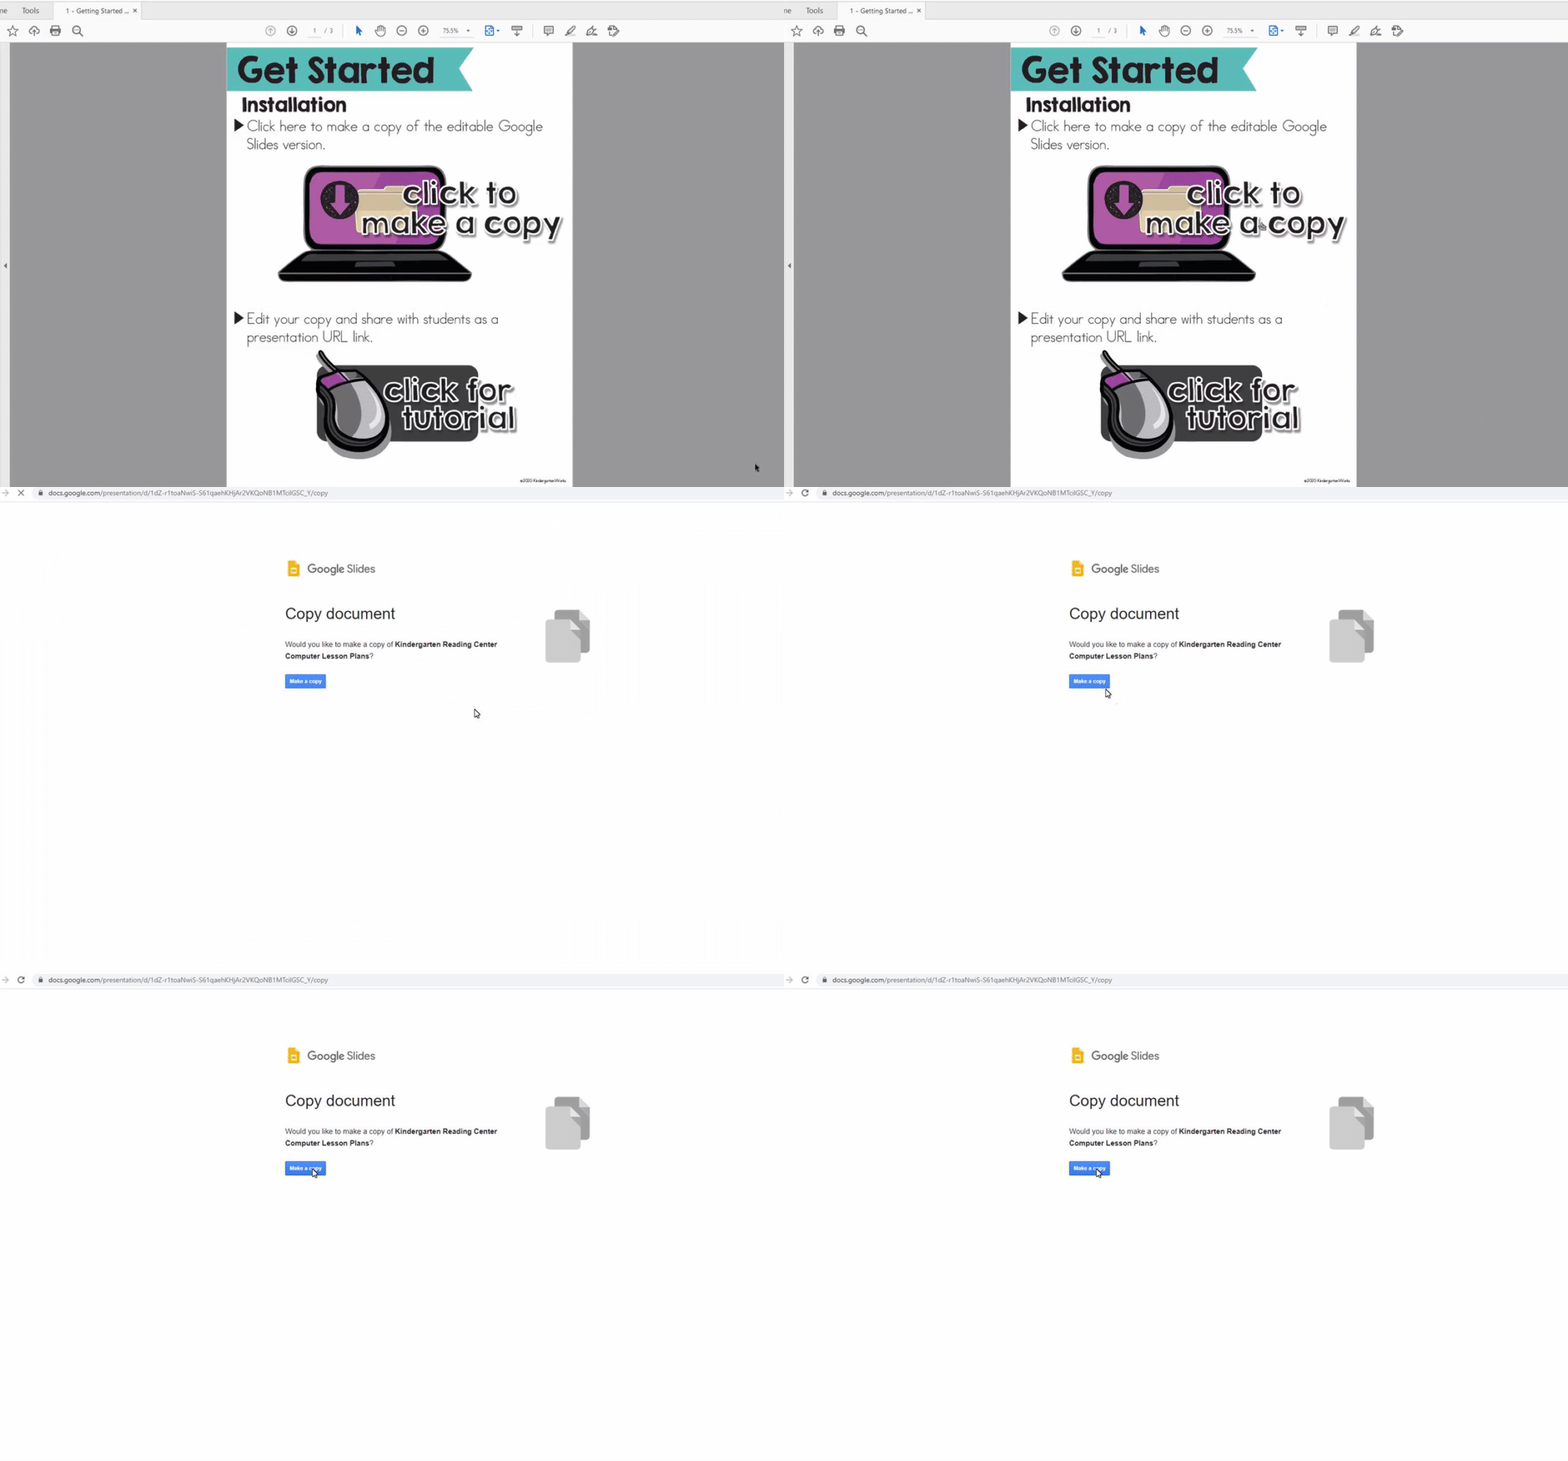
Your template is now ready to customize.
How to edit the lesson plan pages (file #2)
If you’re using the template with links already included, use these tips to customize.
To edit/replace a pre-existing link
- Click the game/activity numbered shape you want to change
- Select the “edit link” pencil icon that appears OR the “link” icon from the menu options
- Delete the pre-existing link you want to replace and edit
- Paste the URL link you want to the specific game
- Click the “Apply” button to save the new link
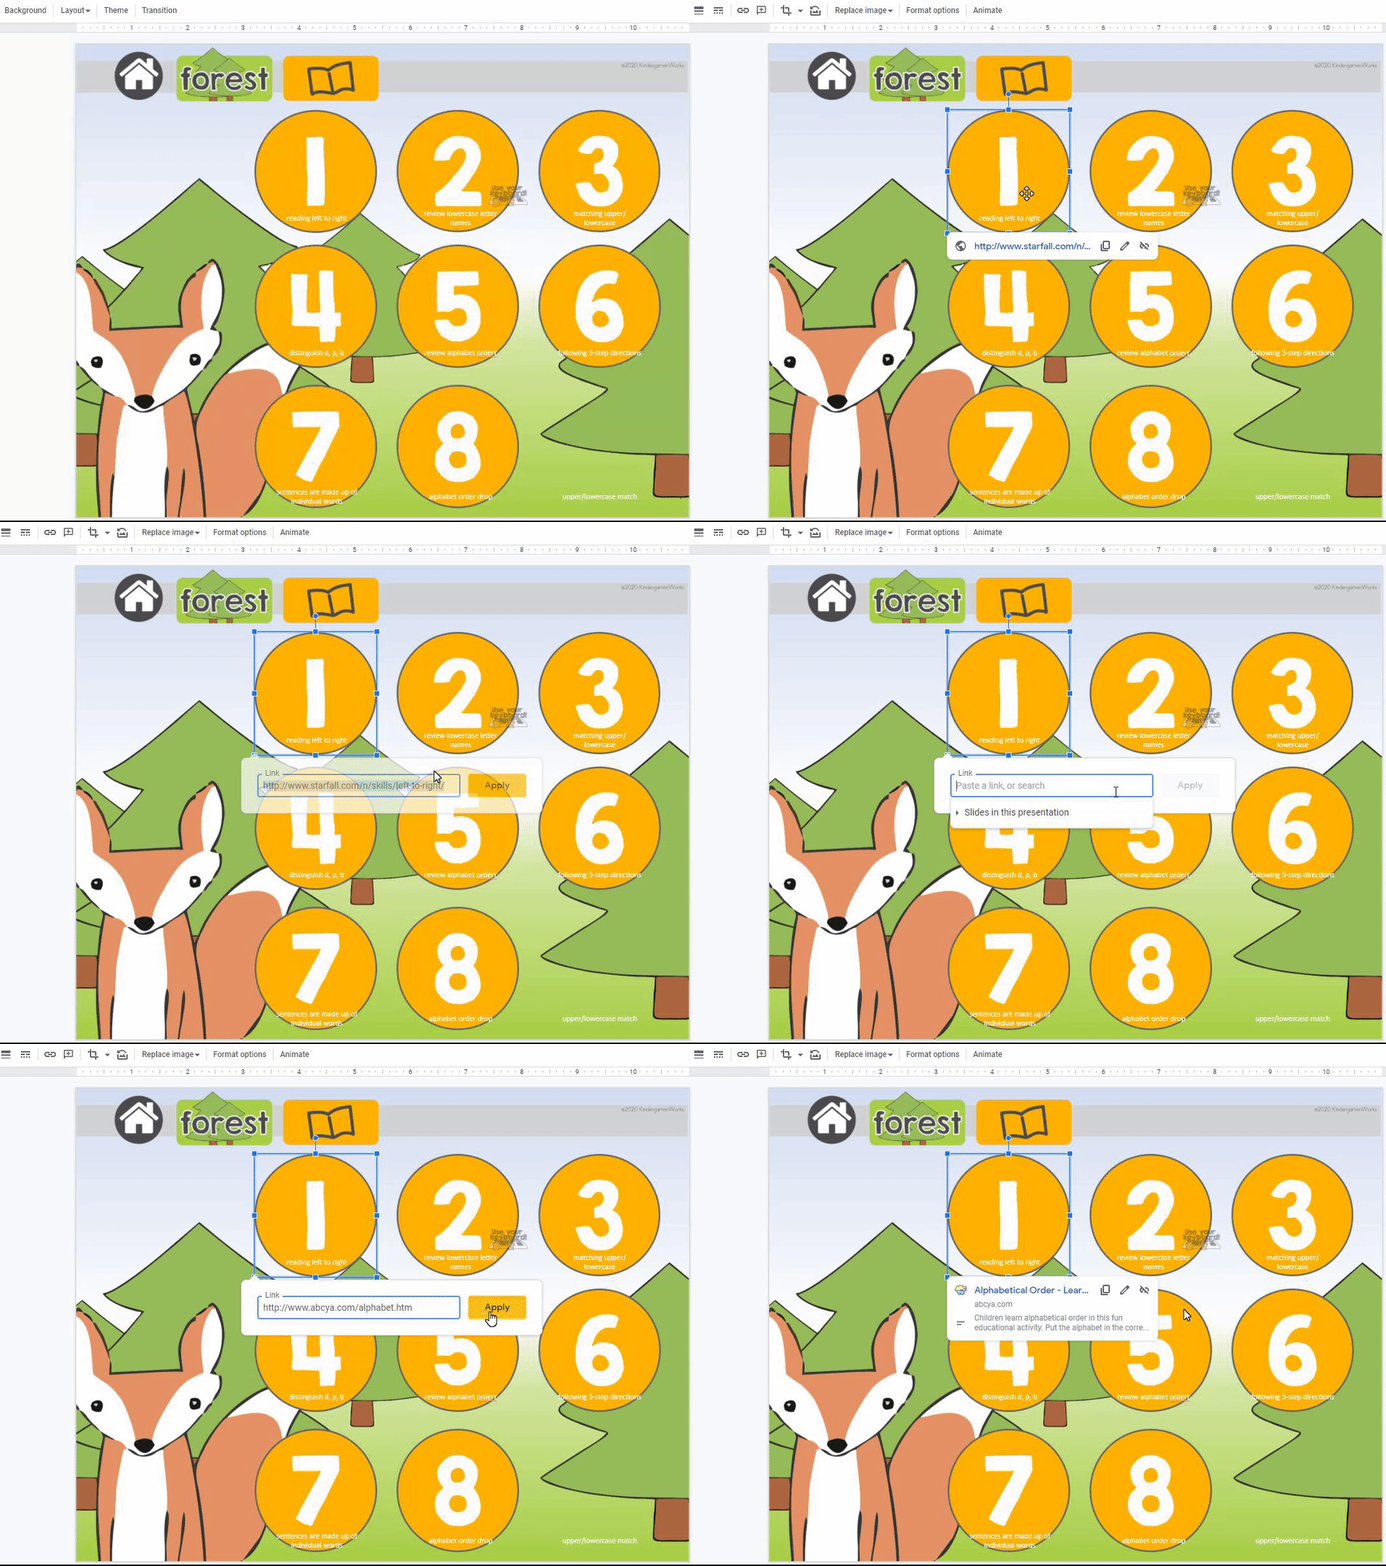
To test or view which link a game has, click the game/activity numbered shape and click on the hyperlink that appears. The game/activity will appear in a new tab.
To edit a pre-existing game/activity title
- Click the text box of the game/activity title you want to change
- Highlight the pre-existing text and delete
- Type in the game title you want to appear

You can make text boxes larger, or resize them too, if needed.
To replace a pre-existing audiobook image
- Click the audiobook square that you want to delete
- Delete it
- Click the link I’ve included in the notes section that says “Click for replacement story icons”*
- Select “Make a copy”*
- Select the blank audiobook square to match the placement of the one you deleted
- Click “Ctrl+C” to copy
- Go back to your lesson plans Google Slide and click “Ctrl+V” to paste
- Click the text box of the square to type in the title
- Click the square and then select to the “link” icon from the menu options
- Paste the URL link you want to the specific audiobook
- Click the “Apply” button to save the new link
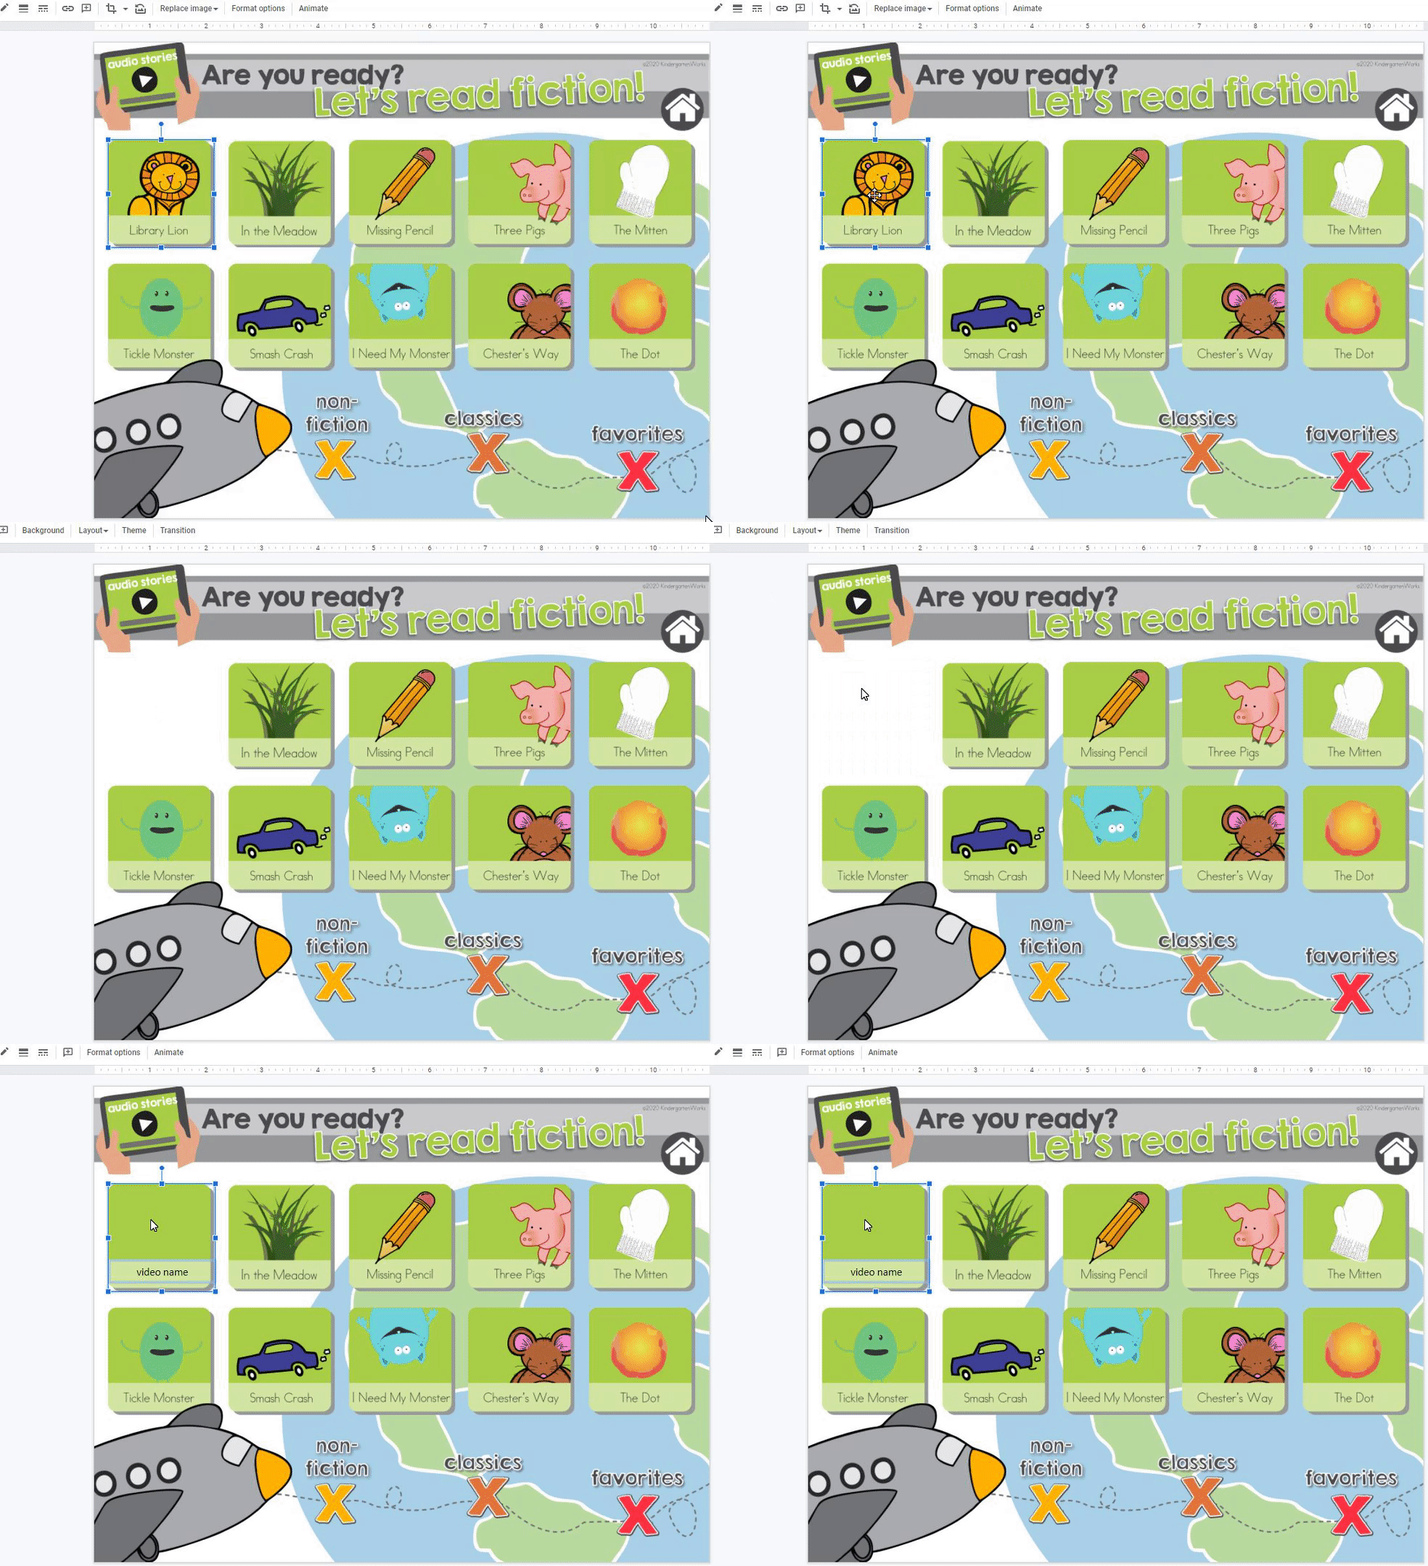
*You don’t have to make a copy of this page every time. Simply do it once and you’ll have access to your own copy of this file in your Google Drive from which you can always copy and paste.
You can also insert new images (use a screenshot from the audiobook or Insert>Image>Search the Web) if you want a picture on the audiobook square to aid beginning readers.
To delete game-specific images
Some games include little icons to help students know which level of gameplay to choose. You can easily delete these by clicking on the images to select them and then delete.
How to customize the lesson plan pages (file #3)
If you’re using the blank template with no content links, use these tips to customize.
To add a link
- Click the game/activity numbered shape you want to create a link for
- Select the “link” icon from the menu options
- Paste the URL link you want to the specific game or activity online
- Click the “Apply” button to save the new link

To add a game/activity title
- Click the text box of the game/activity title you want to change
- Highlight the pre-existing text and delete
- Type in the game title you want to appear
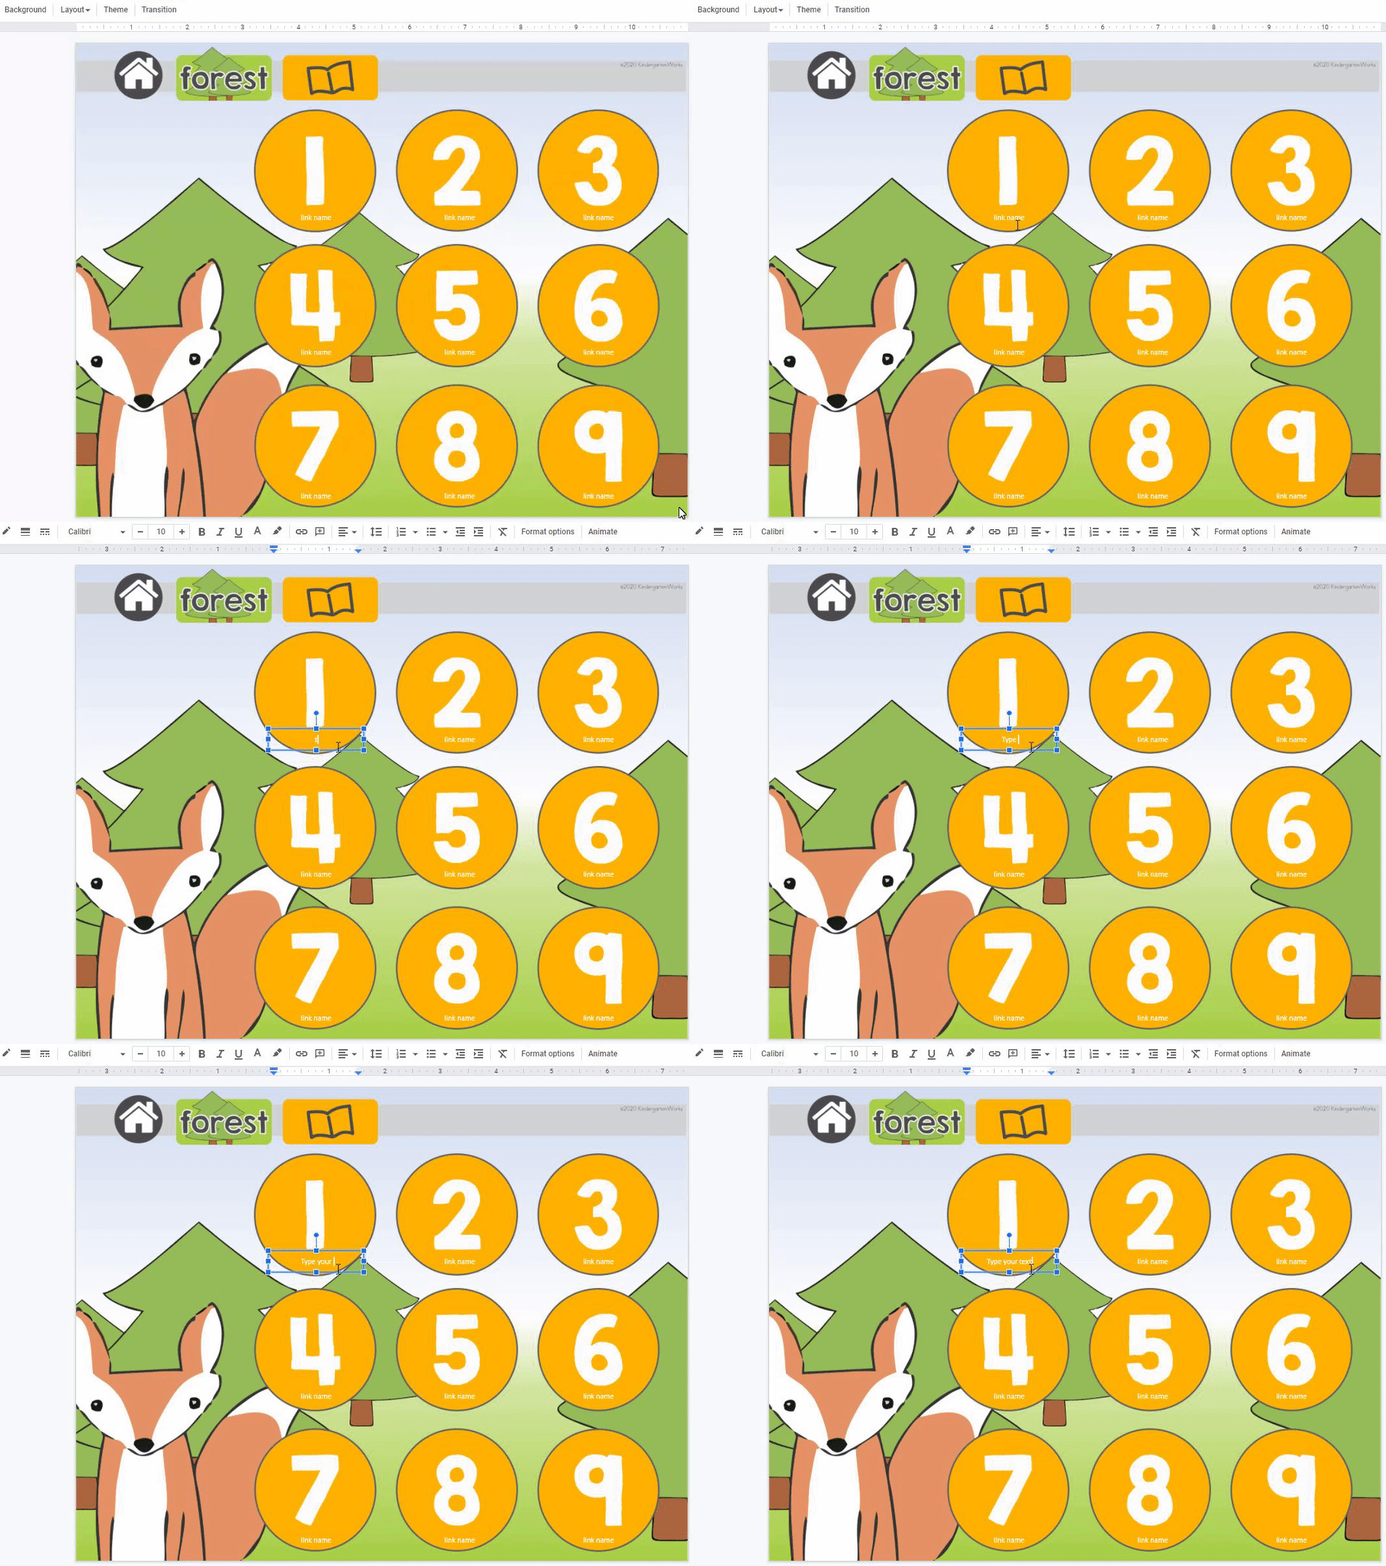
You can make text boxes larger, or resize them too, if needed.
To add images to the audio books links
You can also insert new images (use a screenshot from the audiobook or Insert>Image>Search the Web) if you want a picture on the audiobook square to aid beginning readers.
How to share the completed pages with students
When you’re ready to share your completed computer lab pages with your students here’s what you do:
When you’re done you will share this slide as a presentation with your students. This makes the links all work like buttons. Note that the links to connect pages together (making it easy to navigate through the pages of the presentation for students) have already been inserted for you.
(If you simply share it as a Google slides document that they can edit, then you lose that navigation feature.)
Step 1 – Change your sharing settings
To share:
- Click the yellow share button in the top right corner
- Click the drop-down arrow and choose “More…”
- Select “On – Anyone with the link”
- Click “Save”
- Click “Copy link”
If that doesn’t work for you then try:
- Click the yellow share button in the top right corner
- Click the small letters in the bottom right corner “Advanced”
- Select “Change…”
- Click “On – Anyone with the link”
- Change “Access: (Anyone no sign-in required) Can view”
- Click “Save”
Step 2 – Change your sharing link
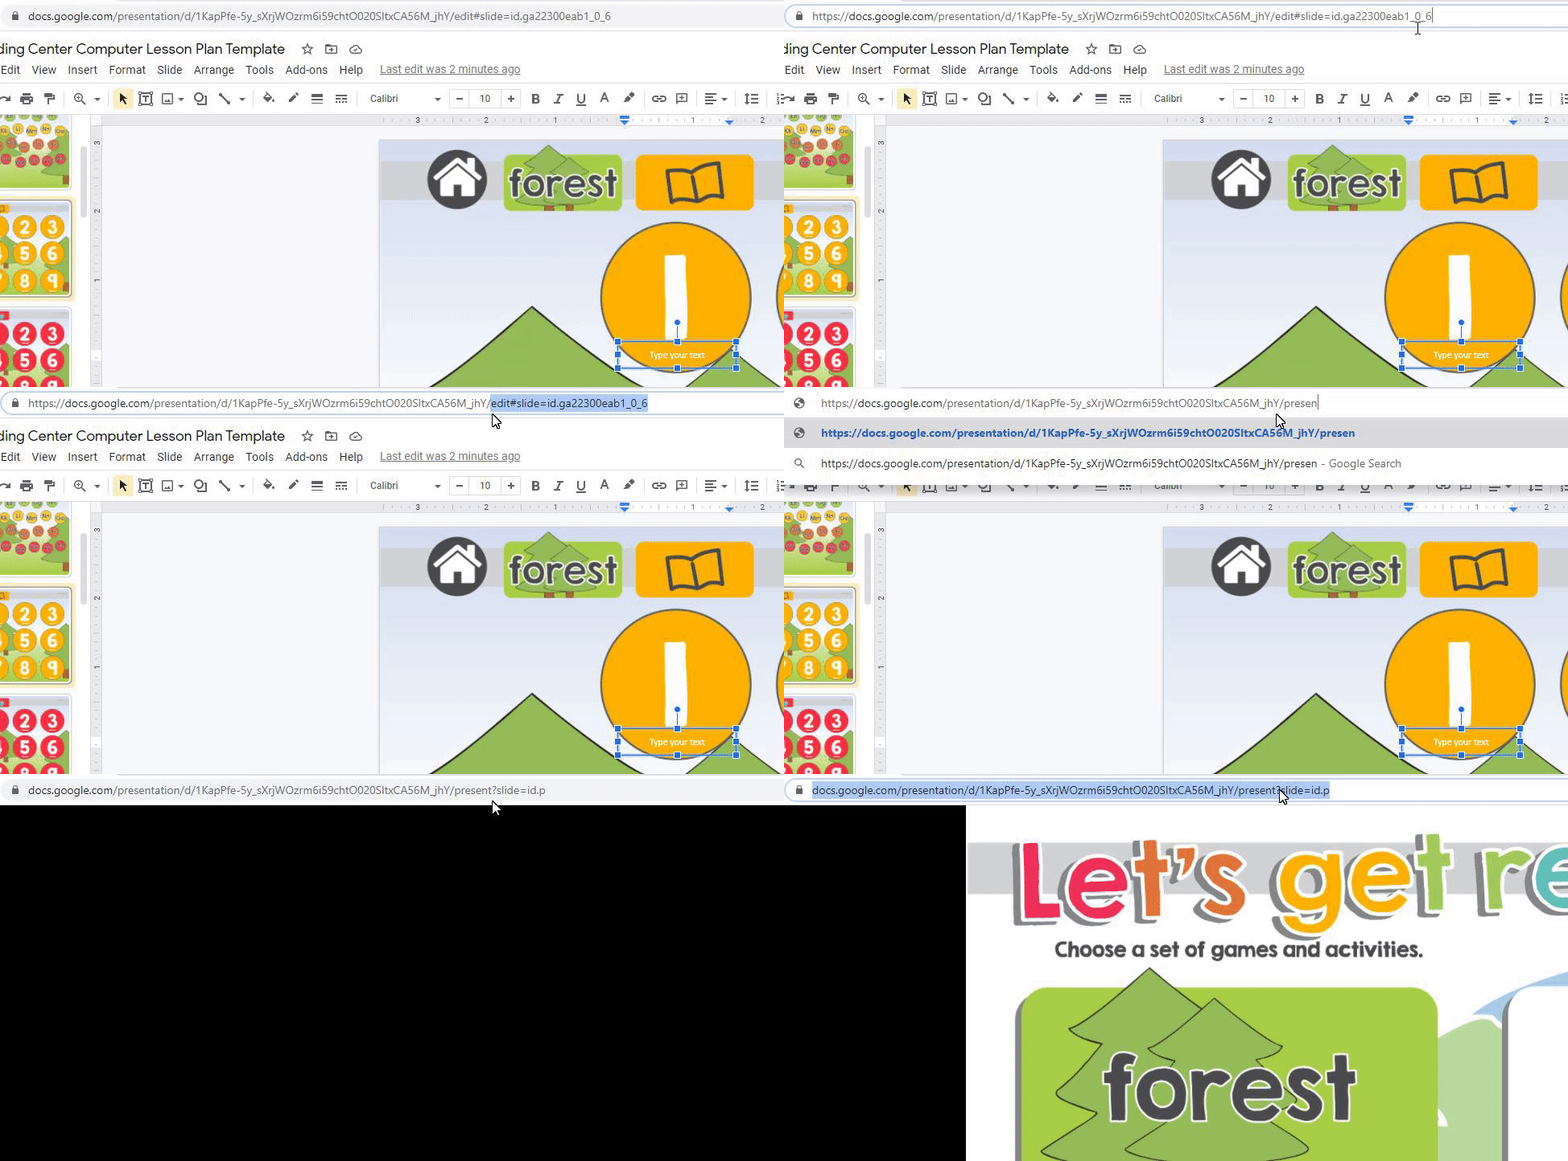
Get ready to paste the link but before you share it – change the end of the link to /present instead of /edit.
Original link: https://docs.google.com/presentation/d/1234567890/edit?usp=sharing
Change to: https://docs.google.com/presentation/d/1234567890/present
Step 3 – Share the link
Share that new, changed link however you connect with your students – for example – create a link on your computer desktops, in your school’s network drives, as a favorite bookmark in Google Chrome, etc.
If you want to test out what yours looks like – open a new incognito window (using Google Chrome) and it’ll show you what your students might see.
