
School Days Photo Overlays Tutorial
This tutorial page is a bonus set of helpful hints for those of us who are visual learners. I’m going to show you screenshots of how to complete these following tasks in PowerPoint, Google Slides and on Canva.com. I can also recommend using Photoscape (free computer software) to complete this task in fewer steps (for a class set of photos).
Tips for good photos
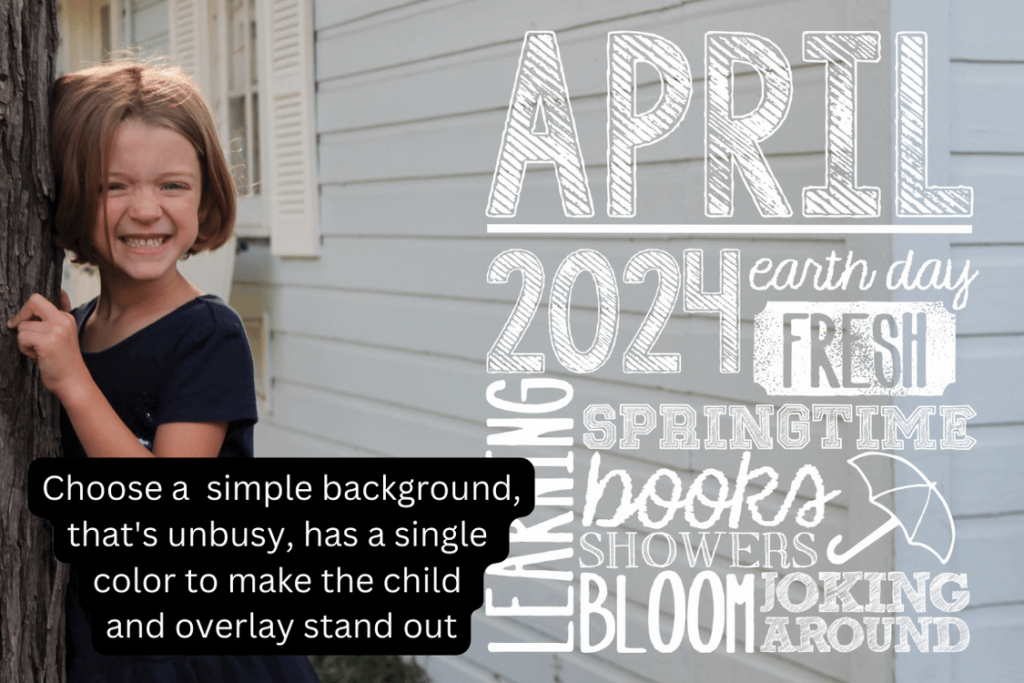
- Pick your background – simple is best
- Position the child off to the side of the shot.
- Try to keep where you place the student in the shot similar between students
- Pick an overlay that will stand out against the background. Dark photo background? Choose a light overlay (and vice versa)
- Keep all student photos for one overlay in the same orientation (all landscape like these sample photos)


Note: videos below do not have audio
Which method is right for me?
Photoscape is actually the fastest to make a class set (aside from downloading the free software) but it definitely feels the most awkward when looking at it as a newbie. But my tutorial will make it easy on you! You can do a whole class set in a minute.
The next least-time consuming options are PowerPoint (5-10 mins) and then Canva (5-15 mins). Both can download your finished photos in batches.
Google Slides takes the longest and you have to download every image individually once complete. (10-20 mins)
Place overlays using Photoscape
If you want to try a photo editor that will place the overlay on top of every photo in the exact same location in one fell swoop you may be interested in using Photoscape (free download).
1. Select “Batch Editor” from the main menu list.
2. Copy and paste all of (or select on the left-hand side) the photos to the “Drop your photo here” area.
(You can preview any photo you’ve chosen by selecting it from the list of photos that appears above the “Drop your photo here” area.)
3. Select “Object” from the right-hand side menu.
4. Select the checkbox for “Photo 1.” Choose “Photo” from the popup choice.
5. Select the overlay you want. (Note: It will be huge!)
6. Grab and move the overlay to where you can find a corner to click and drag it to the size you want. Move it to the location on the photos. (Note: It will lock into the same position on each photo.)
7. Select “Convert All” in the top right corner. (It will put the overlay on all of them with this one click!)
8. Decide where to save your pics. (I usually let it create an “output folder” – the first option – for me so I can save the updated photos all together.)
9. Click “Save.”
10. Click “OK” on the conversion completed confirmation. Go see your new photos where you saved them. (If you choose the “output folder” like I did in step #8, then you’ll see a new folder created called “output” where your photos currently are.)
Place overlays using Powerpoint
Place overlays using Canva
These directions are for using Canva on the computer. You can do the same thing using their free app from your phone, but the directions vary slightly.
1. Take a horizontal photo of the student posing off to one side of the camera’s screen. You want empty space in the photo for the overlay.
2. Go to Canva.com and sign in (or Sign up for free – if you don’t have an account). Choose “Create a design.”
3. Select “Custom size” and change the measurement dropdown from “px” to in. Enter your page size width and height. You could do 6×4″ or 10×8″ which are typical photo sizes. Select “Create new design”
4. Rename your project and hit enter to save. (ex: Class Photos December 2024)
5. Upload student photos by choosing “Uploads” from the left-hand side menu. Then select “Upload files” and choose all of your student photos from your computer to upload.
6. Drag one student photo from the uploaded images and to the edge of the white design page. It should fill the background automatically, but you can click the corners to resize the student photo if needed. You can also right-click on the student photo and select “Set image as background”
7. Repeat step 5, but this time, upload your overlay.
8. Click on the overlay photo from the uploaded images. Click the overlay that appeared on your page, then:
- Drag to move the overlay
- Resize the overlay using the four corner-grabbing points
9. Once your overlay is where you like it, on top of the student photo, click the “duplicate page” button. Do this for the number of students you have.
10. Go to page 2 of your designs and drag the second student photo from the uploaded images to the edge of the white design page. It should automatically replace the first student photo.
11. Repeat – go to the next page and drag the next student’s photo to replace the background. Do this for each student.
12. Go to “Share” and choose “Download >”. Choose PNG for your file type. Click “Download”
Place overlays using Google Slides
1. Create a new Blank Google Slides presentation with 1 blank page (Delete any text boxes that come pre-loaded) Go to File > Page setup. Change Widescreen 16:9 to Custom. Then input either 6×4 or 8×10 dimensions. Click Apply.
2. Go to Insert > Image > Upload from computer (or wherever your photos are). Pick one student photo for on the first page/slide. Resize to fill the page/slide.
3. Go to Insert > Image > Upload from computer. Pick your overlay. Resize to go on top of your student photo.
4. Right-click on the slide thumbnail and select “Duplicate slide.” Create the same number of pages/slides as the number of student photos you have. (1 per student)
5. Go to page/slide 2. Right-click on the student photo and select “Replace image” and choose your next student photo. It will replace the original student photo on page 2 with the new student photo. (This will work best if student photos are all the same size and orientation)
6. Go to next page. Select next student photo and repeat “Replace image” on each slide. Repeat for each student’s page/slide.
7. For each page/slide – Go to File > Download > PNG image (.png, current slide)