
Guided Reading Binder – Guided Setup
Keeping your guided reading materials, lessons, observations, running records and such can be overwhelming for new teachers and more experienced teachers alike! My school, my first year of teaching was binder happy (I’m sure some of you can relate!) and so naturally I worked on a system to keep all of my materials in a binder.

Looking back, I am super thankful for the binder-mindset, because it makes for a breeze to flip to my lessons, reading logs, running records, etc. It also makes for an uncluttered table, which I love! I’ve revamped it as I’ve learned how to simplify.
How to Set Up a Binder
Here are a few guided steps to how I set up my guided reading binder.

1. Insert front cover into binder and spine
The pictured chevron version is super cute and my current favorite, but you know I’ve got your back with a free download guided reading binder cover that is fun too
2. Place velcro onto the binder’s inside front and back covers
On the inside front, velcro a calculator (place it so you can still access it when pages are open) and for a pen and highlighter (I’m right handed- so I keep mine on the right) in the back.

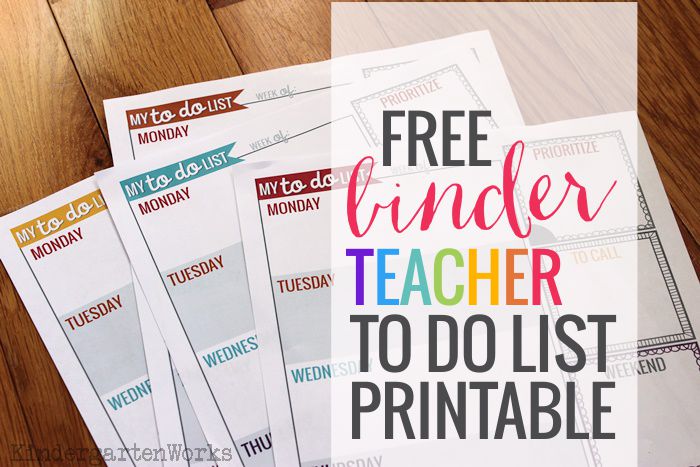
3. Keep lesson plan pages handy
I keep a file on my computer in a quickly accessible plate for weekly updating. These are my daily lesson plans/observation pages.
I am able to change the grouping and dates to plan for the next week. I don’t plan farther than that in advance since they grow and change so much in the strategies they try!

Tip! Bind all old plans together using a binder clip to the group’s divider tab to turn to today’s lesson plans quickly.
It’s a place for me to write the title each group will be working on and a place for me to do multiple things:
- highlight kinders I want to do a running record on
- make anecdotal notes of what they did during their reading
- write what we focused on, had difficulty with, need to work on next time
I use a lot of my own version of shorthand to take notes quickly.

4. Keep tabs on each student
Insert a (affiliate) writable tab divider {such a great invention!} for each student.
Label with your student names. These are super friendly for moving around when re-organizing your flexible groups and you can re-use next year. Just erase!

5. Keep only what matters for each student
Avoid having way too much paper by keeping your student tabs relatively empty. Just use these two sheets to stay on top of tracking individual growth. You may not even need these pages unless you’re turning in data.
Hole punch an individual reading log for each student on the right side of the paper. (Shows reading growth at a glance, last time you took a RR, what books they’ve already read, etc.) Great for documentation!

Tip! On each child’s tab use double-sided tape to stick their indiv. reading log. So when you turn to their tab, it automatically takes you to both their log (to fill out each day as you read with that group) and their RR pages in one flip. Add student name to the top.
Hole punch two running record sheets (copied double-sided) for each child. This way you are set with eight blank running records records to use at the drop of a hat!
6. You’re set from year to year
At the end of the school year or over the summer, I can pitch the group lesson plans and running records. I can even set up my binder for the next school year just by making enough copies and refilling the binder.
When I return to my classroom in the fall, it’s refreshing to find it practically ready to go once my kinders have their foundational concepts in place. All I have to add is their names!
Do you want these forms all ready to print and put into your guided reading binder? I’ve got them ready for you. Print as many as you need!

When you get the Guided Reading Pack – you’ll get every form you’ve seen in this post and more since I know we all have a little different style when it comes to taking notes or writing out lesson plans.
What tips do you have for setting up your guided reading binder? If you like what I do here on KindergartenWorks, then be sure to subscribe today. I look forward to sharing ideas with you weekly.


I love the planning sheet pictured in #3 above. Are these planning sheets included in your Guided Reading Pack?
Hi Ann,
Yes, planning sheets are included in that Guided reading pack. However, they are not exactly like the picture in #3. That is my own personal copy that included the standards we worked on in our district by quarter.
Thanks, Leslie
I love all of your tips and tricks. I teach in a half day program and we just don’t have the time to do a guided reading group like you do. My students aren’t nearly as high as yours seem to be either. We work on letter recognition until December and we just started cvc words. I get four hours with lunch to make it all happen. Any suggestions would be appreciated.
Hi Missy, You’re right that time is extremely tight in a half day program. I taught it for 2 years before I switched to full day in my last school. When it came right down to it, I had to pick and choose where to spend my time that made the most sense. While we had to cover it “all” I really did allow myself to donate a lot of time to small groups since I felt I could make the most headway with students where they were at and that would benefit them the most. We gave 45 mins – 1 and 15 mins. to literacy centers/guided reading during a half day program. That’s a huge chunk! Here is a post I wrote that may help you consider how to get the most out of the time you do spend with your groups (not matter how much time you decide to donate): https://www.kindergartenworks.com/guided-reading/modified-guided-reading-groups/.
Thanks,
Leslie
What font are you using in your templates? I love it!
There are quite a few! ABC Print is one of my favorites.
Where do you put notes from the groups session? I can’t decide
Normally, I jot notes by each student’s name so that I can record specifics about their progress or lack thereof. See the fourth picture in this post. Hope that helps!
– Leslie
Thanks for replying so quickly. I am unsure if i shld put in behind a tab that for that group’s records or under the individual student’s names…I see there are multiple names on one sheet. what dividers to you have I your binder ??i cld only think of lessons and running records and I bought numbered dividers for each students running record
I usually only keep running records behind the child’s tab since I don’t like flipping tabs during a group lesson all that much. I just write the notes in the whole group’s tab and then behind that groups tab I keep all of the kids in that group – their tabs.
We JUST had a training about organizing our Running Records and Notes. I will GLADLY pay you $10 for your starter package. One less thing for me to worry with. THANK YOU!!!!
Thanks – hope your training will coincide wonderfully with the packet!
– Leslie
This is great! Thanks so much for sharing!!!
Thanks Jenn!
Awesome thanks! Where did you get your visuals posted behind your table for decoding strategies?
Hi! Those are posters that I created! http://www.teachersnotebook.com/product/KindergartenWorks/guided-reading-strategy-posters-for-kindergarten Thanks! -Leslie
KindergartenWorks
once again, this shall help tremendously! I have a LOVE for organization, but I try so many different things that I just can’t get the right mix just yet! I will add this to my list of Organization To Do’s :0)
Thanks Again!! (I’m blog-stalking you now!!)
I’m so glad you find this helpful! I too have a love for organization… now if I can only apply that to my home sphere too. 😉 Welcome and thanks for blog-stalking!
Just purchased this! I can’t wait to try it out! I was so excited to see your from South Bend. I went to school at Saint Mary’s and did my student teaching at Prairie Vista! Thanks so much!
http://mrsshiningersblog.blogspot.com/
Thanks Katie for your purchase! Let me know your thoughts once you get a chance to use it! What a small world.
Thanks for sharing! I am always on the lookout for things that help me make my life easier!
I just added “Create individual guided reading logs” on my never ending To-Do List. Thanks for sharing and giving me some great ideas! 🙂
http://LittleMissGlamourGoesToKindergarten.blogspot.com
I just added “Create individual guided reading logs” on my never ending To-Do List. Thanks for sharing and giving me some great ideas! 🙂
http://LittleMissGlamourGoesToKindergarten.blogspot.com
Thanks for sharing! I am going to send your link to my class.
Erica Bohrer’s First Grade
According to Ashley said, “Very nice — I do something very similar. Each group has a binder (Grapes have a purple binder; Blueberries have a blue binder, etc). In the front of each binder, I have very basic plans for each session (date, any word work, title/level of book, what we will do that day – whether it’s activating prior knowledge, making predictions, doing a picture walk OR actually reading and retelling the story). I also have some assessment data in the front so I can see what most of the students in that group need to work on. Then each child has a tab. Behind their tab, I have a sheet where I write the data, the book read, and any observations. It works very well — I have 23 students and a not-so-great memory!”
I’m not sure how I deleted your comment Emily when they sent me an e-mail- but I’m sorry! Here it is…
“Great organization, I love this! I’ve been trying to find a good (organized) way to take observational notes during my guided reading and I love your ideas 🙂
p.s. I found you through the link party!”
Gina and Plant Seeds, Thanks for taking the time to comment!
Thanks for sharing! I am always on the lookout for things that help me make my life easier!
wow! So inspiring! I will start this soon b/c it will force me to be more honest with my record keeping.