How to Make a Year-Long Playdough Word Work Literacy Center
You can create a playdough literacy center that lasts all year long. This is how I set up, organized, and maintained a playdough word work center in my kindergarten classroom.
First, can I explain that it’s my belief that students learn faster and are more successful when they can manipulate things. This same belief applies to literacy skills.
When students can manipulate objects (not just handling paper or worksheets) it feels more like play and is more age-appropriate.
It begs the question – how much more manipulative can you get than play dough? Seriously.
I was determined to create a literacy center that taught students some key things… and not just how to play with playdough (which I knew if not carefully constructed, they would default to).
So – let’s get to it. Let’s set up, organize and maintain a literacy center that uses playdough as the key component to improving word work skills in kindergarten!
How to set up a playdough center
To make this a smart literacy center – we’ll need to set up this center for success. Here’s what we need to think through:
- Students need to access and use all materials correctly, independently
- Students have to clean up this center without teacher intervention
- Students should learn while manipulating playdough using guiding workmats, cards, and playdough tools
Remember – the reason why we create literacy centers is so that students can continue to learn on their own – that it allows you, the teacher, to meet with students in small groups.
So, the setup for this playdough center needs to be simple, age-appropriate, and also offer choice.
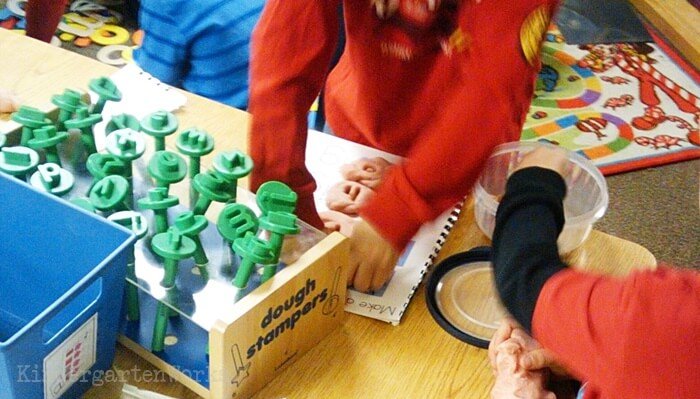
If you don’t offer students choice – you end up with behavior problems, lack of motivation and students won’t differentiate work for themselves.
Let’s break it down into pieces that help accomplish all this.
Give visual directions with a directions poster
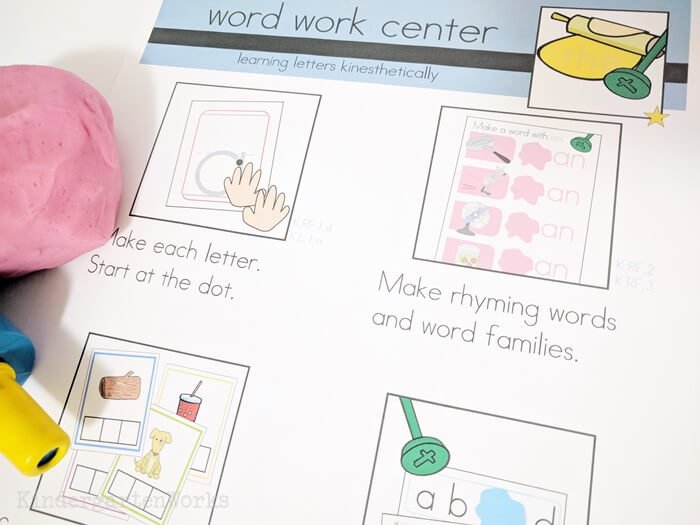
Let’s start with the directions and offering choice. I put all of the options (though I don’t teach every option at once) onto a literacy center poster.
The star at the top of the poster indicates that students have a choice as to which activity they pick when they come to this center.
Each of the activities listed is standards-based. It’s included in the Playdough Word Work Pack.
Eventually – they won’t really need this poster – but it’s super handy. I use it every day when rolling out centers at the beginning of the year, it’s helpful to substitute teachers and administrators during walk-throughs, and it allows me to redirect students simply: “What are you going to work on today?”
This poster and the picture icons help me to teach exactly what to do (and what not to do) at this center so that all students can use the materials correctly and – ta-daaah – independently.
Give materials (like workmats and cards) to keep them focused
If you give a kid just playdough, they’re gonna play. Which is alright during choice time, but not what we’re going for during literacy centers.
So, you need to give them guidance without you being there.
How do we do that?
The answer is workmats or work cards.
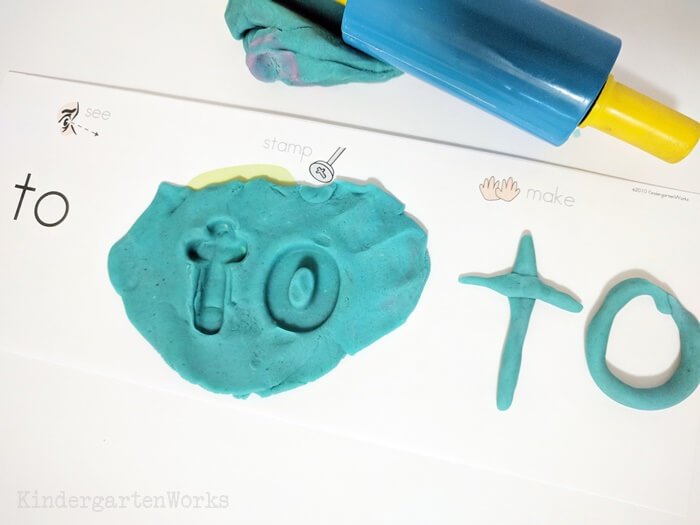
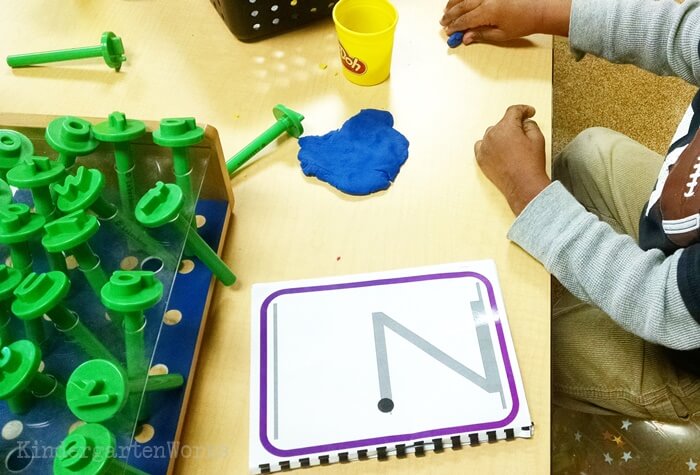
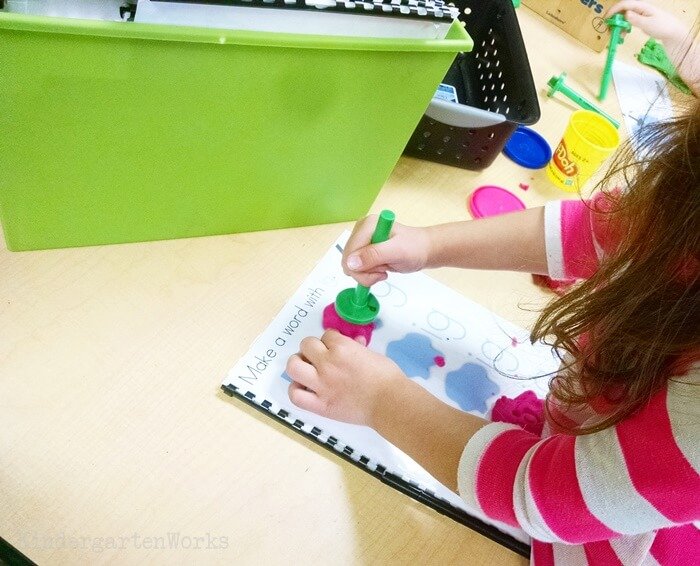
By using laminated work cards and workmats – we can let students stamp or put playdough right on top of the guide so they can stay focused.
I created five different activities for students to use while at the playdough word work center. You can have them too!
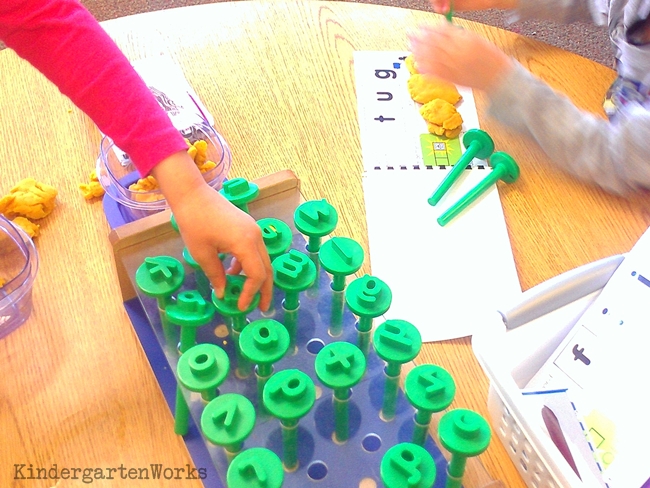
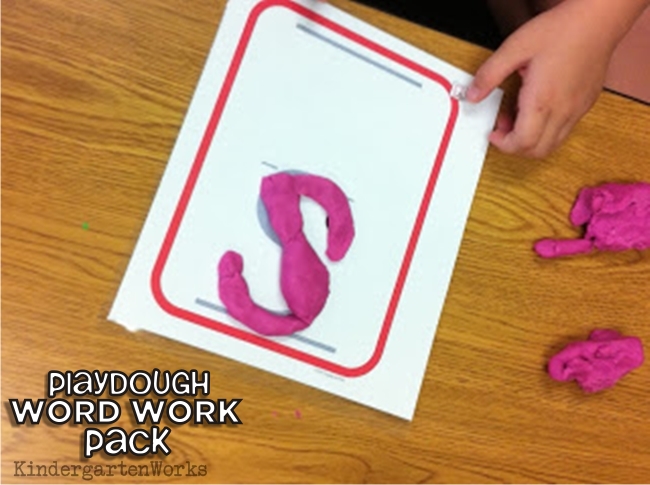
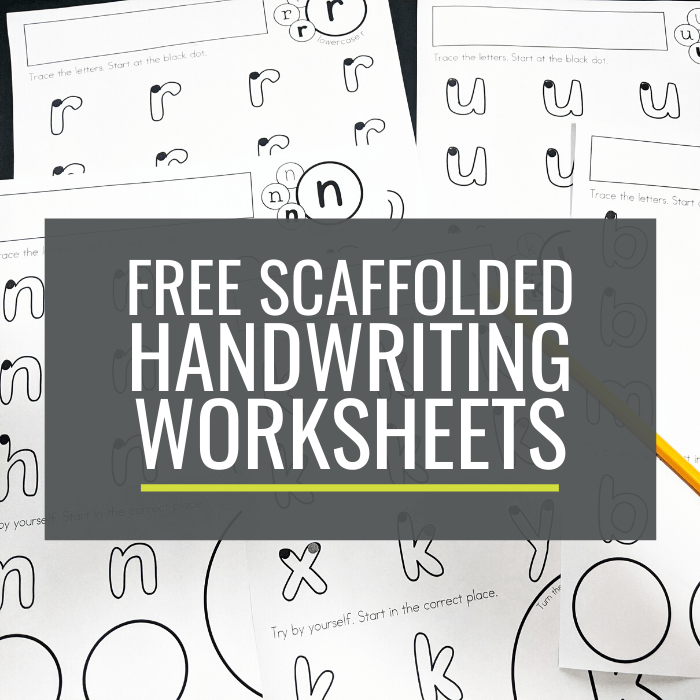
The most simple activity to introduce at the beginning of the year is forming letters. Kinders use the workmats to form the letters using playdough “snakes.” Black and gray dots show how many strokes and where to start.
The five activities cover:
- letter formation
- abc order
- sight words
- cvc word building
- rhyming or word families
Having such a broad range of skills that students can work on means that they can use playdough in this center all year long.
Boom.
Smart teacher. Smart kids.
“So fun for my students to use during stations. I use different parts all through the school year.” – Laura D.
Now let’s look at other tools to help focus this center on learning.
Keep just the basic tools available
Remember to keep the center simple – but offer the correct tools so that students can do this center and learn without you.
I really can only recommend:
- playdough (store-bought or homemade – see my recipe below)
- small rolling pins
- lowercase letter stamps
Students can always flatten playdough with their hands, but using a small rolling pin (affiliate link) can make the work feel more fun.
But skip any playdough shapers, knives or shape cookie cutters for this center. That sends a mixed message on what they can do at this center.
You only need lowercase letter stamps to make this center last! I want my students to focus on lowercase since that’s what they’ll see most often in print.
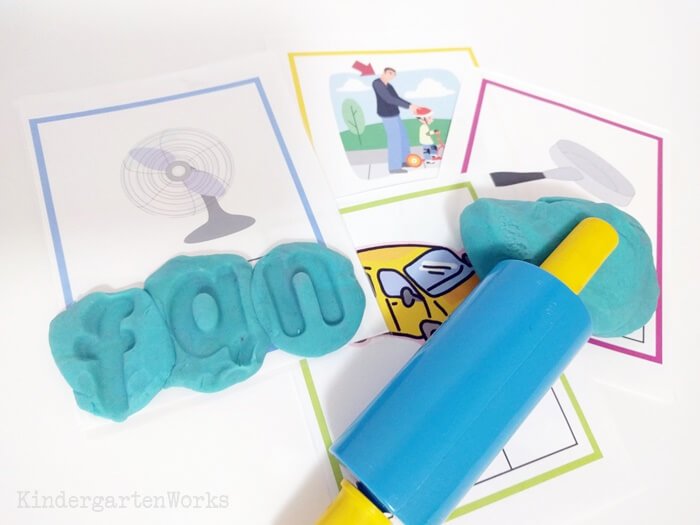
Lots of readers have asked me about my letter stamps.
Mine are these Lakeshore letter stampers and they are great quality. But here is another kind of playdough letter stamp I’ve found that’ll work great too on Amazon (affiliate link).
For cleaning up this center – you might not need much at all.
Teach them to check the floor for big pieces. Though it does require less cleanup long term if you can set up this center over a tiled area instead of a carpeted one.
Teach them how to use a ball of playdough to stamp up other small pieces for quick clean-up. If it’s part of what you teach up front, then they will do that too.
Yet, if tables seem gritty afterward (some playdough kinds break down faster than others), teach students how to use wipes (if your school has them on supply) or a spray bottle with 1-2 drops of dish soap and a paper towel to clean their tabletop workspace.
They are totally capable of doing this without the teacher’s help.
Model it, teach it, expect it.
“One of the best purchases I’ve made! Great for practice, very well made and a HUGE bang for your buck!” – Stacie M.
How to organize your center to last all year
The key to organizing a playdough literacy center is to make it age-appropriate.
You’ll love that it doesn’t take much for this center to come together.
Here’s what I recommend:
- basket or bin(s) for rolling pins and workmats/cards
- tupperware or zip-tab baggies for playdough
- some type of holder or container for letter stamps
Remember – the goal is the use of tools and clean-up without teacher intervention.
So, whatever you choose, make it simple so that students can do it on their own.
I liked to use a basket for workmats and work cards. I liked to bind cards or mats together to make sets.
I personally liked to use 4 tupperware to hold the playdough in separate tubs for students. Pick ones that are easy-open, easy-shut. But you could easily use zipper-top baggies too. The kind with the actual zipper slide tab, not just regular ziploc baggies.
We had a letter stamp holder from Lakeshore, but those aren’t available anymore. I found this replacement playdough letter stamp stand that’d work pretty well. I think you could also use paintbrush holders or scissors stands to work similarly.
Remember – you only need to store lowercase letters!
You will add workmats and cards as the year goes on, so you don’t have to start with everything out and ready right away.
How to maintain a year-long playdough center
I’m not one for making new centers all the time. That’s why I try to work smart. I want this playdough literacy center to last all year long.
I don’t mean completely set it and forget it – but a little maintenance can make the work we do to teach a center go a long way.
Here’s how I believe we can keep the center from feeling stale for my kinders, yet, makes it smart work for me.
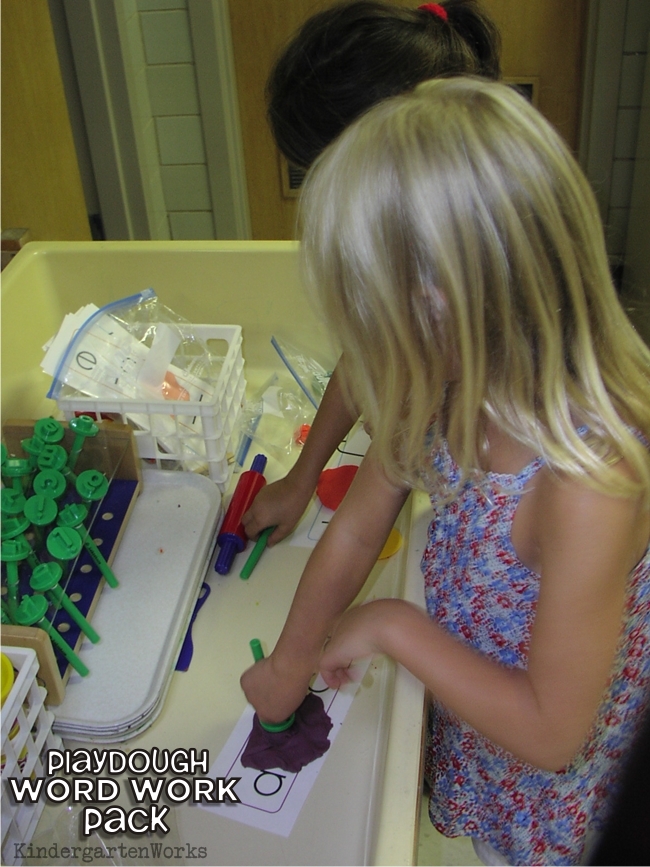
So, with this particular center, I would introduce forming letters first, followed by ABC order work cards.
But I’d only put out a handful of letters and a small set of ABC order cards to begin.
As time goes on I’d:
- add more cards or trade them out
- teach a new activity
Other than adding or replacing cards and keeping a fresh playdough stash – once you’ve made this center – it’s pretty much ready to go.
Make it open-ended
I feel like it’s worth mentioning how I make this center open-ended.
Someday I’ll write a post about how if you have “fast finishers” or kids saying, “I’m done. What do I do next?” then you’re doing it wrong… but for now, let me explain how I set up this literacy center (as I do for all of them) to be open-ended.
First, students keep working at their literacy center until I signal it’s time to clean up. This means they stay and continue working. What do they do until the time is up?
The choose which activity from the directions poster they want to do. If they tire of that one activity, they simply pick another.
Offer activities for different skill levels
Often students will gravitate towards their own comfort level of activity in the playdough center.
Students who need to work on letter names and sounds will stick with the letter formation cards and ABC order cards. Students ready for more will work on more.
When you offer activities for different skill levels, students will work on what interests them, is engaging and often just the right level of challenging. This keeps them working and engaged in learning for longer periods of time.
Some students may want to stamp out sight word sentences, like, “I like my dog.” I always gave that type of extending-their-own-learning my stamp of approval.
But if you have some higher-level students – or have students ready for more, then I’ve got your back. I’ve created a playdough extension pack that has more sight words, and focuses on manipulating letter sounds in short words and letter fluency.
We usually used the extension pack after Christmas.
And with my students who were reading at a second-grade level, I had them stamp their own individual spelling lists in the dough in place of using the sight word cards.
Tip! If you let students transfer their work onto a clipboard (or dry erase board) it becomes a portable way to share and show off their work to the class during share time.
Build and keep a classroom stash of playdough (+ free classroom playdough recipe)
Playdough only lasts a couple of months before it needs to be tossed out.
So, homemade playdough was always my go-to way to keep this center stocked. Usually, we had parent volunteers make the playdough for us – which was amazing.
A fresh, new batch of playdough was always a highlight.
Soft, squishy, fun.
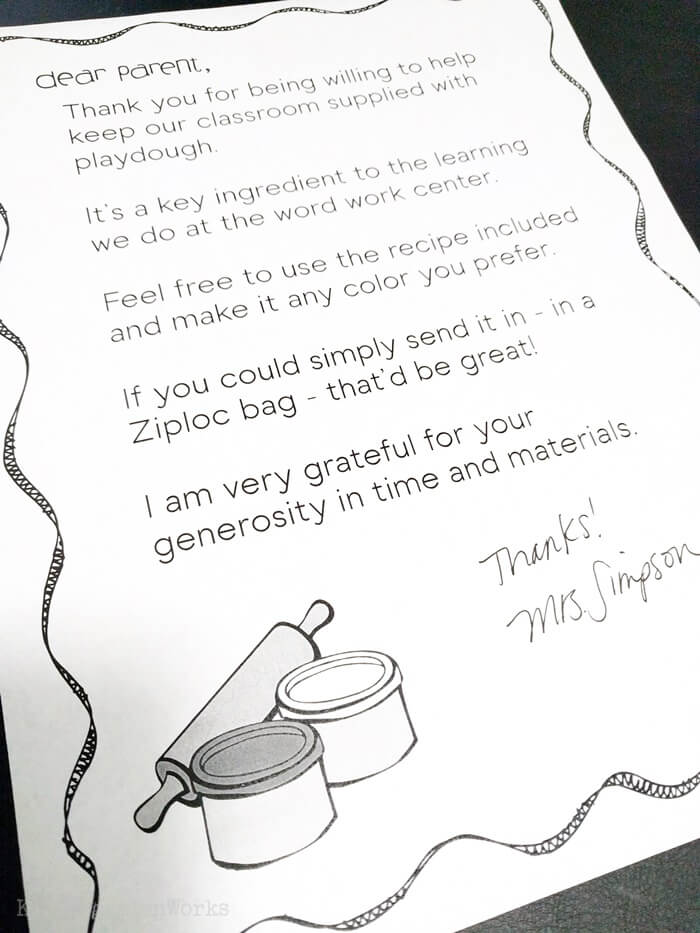
To make it easier on you (and your parent volunteer) here is a quick, free printable you can use to thank your volunteers and give them a recipe that is perfect for the classroom.
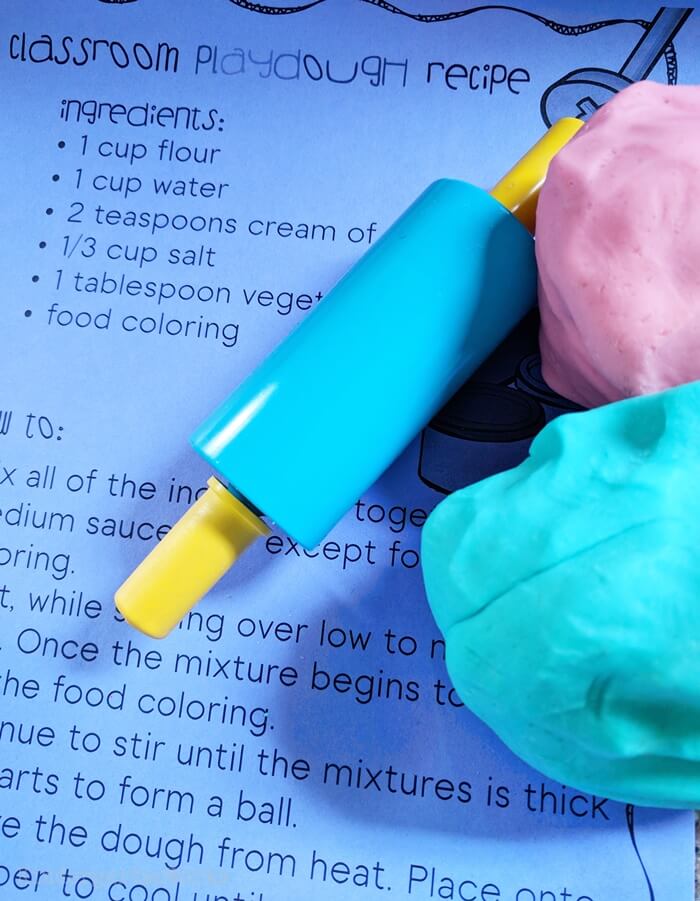
This playdough recipe for the classroom will hold up for at least a month of being played with every day.
It’s a great recipe and just perfect for your word work center.
One batch is enough for 2-4 kinders to share – which was always the number of kids I had in a center at one time. You can easily store it in Dollar Tree tupperware or opt for zipper-top slide baggies.
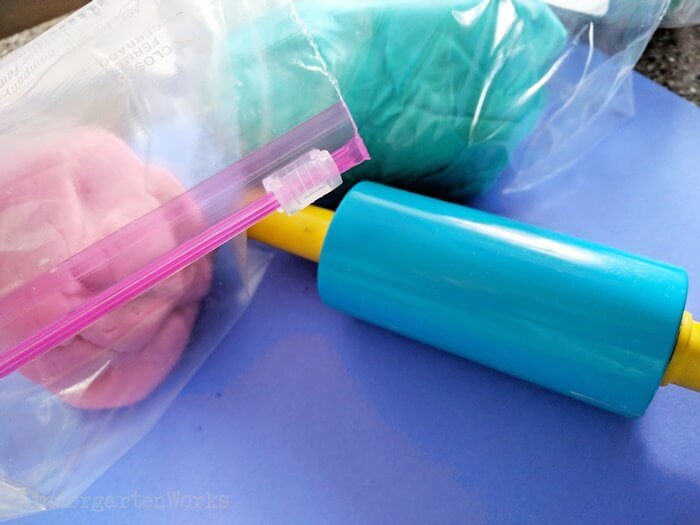
I only ever had out one color at a time – just to make it easy – but do whatever works for you.
Tip! You can always add a tiny bit of water to help rehydrate playdough. Just work it in really well before handing it back over to students.
What teachers like you are saying
Want to see what other teachers have said that have purchased my playdough pack that has the directions and printable activities?
With my playdough pack you’ll easily get the foundation you need to set up, organize and maintain a playdough center that is simple, age-appropriate, and also offers choice.
Are you ready to get playdough into your classroom and take hands-on literacy learning to an independent level?
Then get your Playdough Word Work Center Activities Pack today!
Let’s wrap it up
Remember – the reason why we create literacy centers is so that students can continue to learn on their own – so that it allows you, the teacher, to meet with students in small groups.
So be sure to set up your playdough literacy center with these things in mind:
- Students need to access and use all materials correctly, independently (plan the setup and have only basic tools)
- Students have to be able to clean up this center without teacher intervention (plan the maintenance and teach expectations)
- Students should learn while manipulating playdough using guiding workmats, cards, and playdough tools (have age-appropriate activities and offer choice)
There you have it – I hope that my walk through of how I set up, organized, and maintained a playdough word work center in my kindergarten classroom was helpful.
If you don’t have a center like this already, you too can do it successfully!

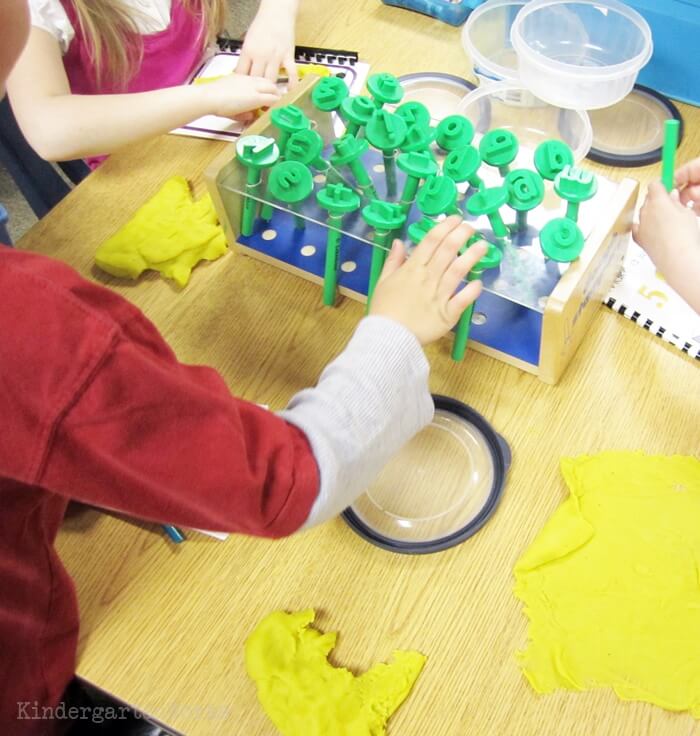


I have this set of stampers too. But all that I’ve used it with is a mat that I made bordered with all of our sight words for students to work with. I love your missing letter mats! But I don’t love the Lakeshore holder for these stamps. My friend has one and the stamps are always leaning over and tangling up with the other stamps. My dad made me a holder based on the design of the wooden scissor racks. The stamps are suspended in the holes. The holes are just spaced out a little more. I’m planning on ordering a second set of these stamps this year.
Very cool – thanks for sharing Donna!
Man, I thought I was good with incorporating dough but I am in love with this. Now that I am home schooling just my one kiddo with special needs, this is a perfect way for her to work on just the literacy skills without having to put out too much energy on the motoric ones. I have other centers for that! THANKS:)
Thanks for sharing your thoughts Nicole! It’s great to hear how you can use it in your home. Hope she loves it!
– Leslie
Hi! I just purchased your play dough unit and I am also missing the three letter word mats. Thanks for all you do! Also, I was curious, do you make a few books with the pages lamenated and bound or a class set?
Hi! Take a look at the file while on your computer (page 4) and click on the image to get the link to view what I use in my classroom. It should lead you to a dropbox file that you can view. I generally make 3 sets (so up to 3 kinders can do the same activity together) and have them bound a few pages at a time. I have a few letters bound together, a few sight words and a couple of CVC pages. You’re welcome. Thanks for taking the time to touch base!
I found them! Thanks again! I have so enjoyed reading your blog and getting further insight from a veteran kinder teacher!
I purchased your play dough unit and I went to Lakeshore to get the letter stamps, and my students love this learning station.
Thanks for sharing your inspiration. I will be purchasing some of your other units in the future.
wow this is such a great idea! thank you for sharing.
Caroline:)
Thanks for the awesome ideas! My word work center is going to be so much fun when we get back from vacation!
I ordered your word work packet from Teacher’s Notebook and love it! I found the rhyming cards you created here on your blog but did not see the cvc cards. Is that someting I need to purchase as well? Thanks for sharing!
[email protected]
Hi Kcal! Thanks for asking, see if the link works on the bottom of page 4 (click the picture of the cvc cards) on the pdf you purchased. Id that doesn’t work for you, I’ll be glad to email you so you can view them as I created them for personal use within my classroom.
Leslie I’m still hoping to get your CVC letter books. My students love the other play dough centers and keep asking me what the other picture is on my sign (from your unit). If you could email it my way I’d be very grateful!
Lindsey
[email protected]
I am in LOVE with these ideas! I’ve always had playdough as part of my fine motor center, but I love the mats you created. Thank you so much for sharing!!!
Katy
Kindergarten Katy
Woo hoo! I just ordered your packet from TPT and gave my printer a late night workout. I can’t wait to use these with my class!!! The CVC words didn’t come through though. Can you email them to me? Thanks soooooo much!
Sure thing Sophia – just emailed you!
Thank you! My kiddos love this!
Hello,
I am new to this website. My cousin, who is also a teacher just introduced me to it. How do I buy your play dough center?
Hi Julie – welcome. This is just my blog where I share ideas and freebies and whatever I feel like writing about 😉 So I hope you find a few things of value on here as you look around. My playdough word work pack is available here: http://teachersnotebook.com/product/kindergartenworks/playdough-word-work-pack-literacy-center-activities. Have a wonderful day – and thanks for touching base!
I love your playdough word work center! I really liked the spelling three letter words cards, but I couldn’t find how to print them off. Is there a link to them or can I get them from the TPT site? Thanks so much… I love it!
So glad you love it!
I can’t wait to try the playdough word work!! I need to run by lakeshore first! 🙂 Could you please email me the CVC pages? I ordered the set and they didn’t come through. Thank you so much for sharing all of your ideas!!
[email protected]
Amy, I sent you an email!
Hi Leslie,
I just ordered your word work set ( most of it is cut and laminated already)! And I picked up the stampers at Lakeshore today! I didn’t get the CVC cards. How do I get those? Thanks!
Carmen,
I sent you an email!
Hi! I’m printing out the books now for the start of school in 2 weeks- could I trouble you for the cvc sheets too? Thank you!!!! I love it!
[email protected]
I am missing the cvc words from my download. Would you please e-mail it to me? We love your work! Thanks for sharing!
Nicole
[email protected]
I ordered your dough packet a few weeks back. Just realized that I did not see the cvc words?? It looks like others are getting it through email? Also….have your created the same thing for math. I also have the number set from Lakeshore. I was going to make my own but didn’t want to recreate if you have already done the same for numbers.
Thanks,
Deb
[email protected]
I will email you.
Thanks for the dough packet. I just downloaded it and I love it. Could you please email the cvc word cards to me? I can’t get them to download.
Thanks,
Lorrie
[email protected]
Sure thing Lorrie – your email is on its way!
Hi,
I bought your Play dough center , but can’t find the three letter words on your website. Can you help me?
Thanks,
[email protected]
K teacher
Tonia in Redlands,CA
Sure thing Tonia! I am emailing you right now!
It’s my favorite center!
Thanks Susan for sharing!
hi- thanks so much, love this pack, purchased it, loaded up my ink and printed out to laminate. i was wondering is there a special way to get teh CVC cards, i was able to get the rhyming ones but i’ve tried so many times to open up the CVC ones and can’t. please let me know, thanks, chrisitna
I am sending you an email Christina!
I just loved your word work with playdough activities. I am so excited to get it ready to use in my classroom. I tried to click on the extra mats you get for free and it wasn’t coming through. I was wondering if you could email it to me? I got the word family one, but the one where they stamp the letters for the words would not come up. My email address is [email protected]
Thank you…
Lindsey,
They are all in a pack on TPT, Teachers Notebook and AtoZ. You can get them wherever your preference lies! Thanks! So glad you’re excited!
Cindy, Thanks spells volumes. You’re welcome!
Lindsey,
They are all in a pack on TPT, Teachers Notebook and AtoZ. You can get them wherever your preference lies! Thanks! So glad you’re excited!
Thank you so much for inspiring me to order the stamps and put this in place right away in the fall! I love it! In the past all I had was my kids making letters and I had not thought about the rest of what I could do! Do you have the mini letter books and cards on TPT or on google?
Lindsey
http://www.whytewater.blogspot.com/
I am going to have to find a more powerful word than THANKS to show my appreciation for your hard work! But for now…THANKS Leslie!
Hi I just bought your playdoh word work. I love it!! But I can’t get the freebies 🙁 (The poster, rhyming/word families and parent playdough letter are all downloadable free) I clicked on the picture but nothings happens. I have signed on to my account. Could you send them to me by email?
[email protected]
Thanks Mrs. Morris and Mrs. Berg! So glad to hear that it gives your first graders the “focus” they need. Mine sure do sometimes!
-Leslie
I love how you created work mats for the dough stampers. I teach first grade and have this in a center as an early finisher activity. The work mats are great for giving them more direction as to what to stamp. LOVE IT! Thanks for sharing =)
First Grade School Box
I love this! I wish I had thought of this when I was teaching Pre-K!
Thanks Lauren – I hope your kinders love them like mine do!
I love these activities! I just bought them and can’t wait to share with my students!!!
Thanks Stephanie! It all depends… Some I make from scratch, most that I find, I modify to fit my kinders’ needs 🙂
I LOVE YOUR CLIPART!!!! Where do you get it from??
Hi Caitlin,
On page 4 – click on the image for the CVC stamping word sheets (bottom row, middle picture). That should take your directly to the download so you can see what I created for personal use within my classroom. Let me know if you need any more help via e-mail ([email protected])!
I can’t find the spell the 3-letter word sheets. I bought and downloaded the set on tpt but don’t see them. Am I just missing them?
Wow – thanks Kristen! So glad you love it – my kinders do too! I sent you an e-mail tonight. We’d love to be a part of what you share with your followers. Fun!
I just bought your Playdough Word Work Pack on TPT, and OMG!!!! I LOVE IT!!!! I would love to feature you guys for a giveaway on my blog. I think more teachers need to know about your stuff. I am using it in my first grade class!!!! Great stuff! Let me know if you would be interested in a giveaway on this pack. Kristen
first-grade-teachers.blogspot.com
make-my-blog.blogspot.com
I’ve packaged the materials together on TPT based on your requests. Thanks ladies! Here is the entire pack – enjoy and we’d love to see pictures of your kinders learning!
-Leslie
http://www.teacherspayteachers.com/Product/Playdough-Word-Work-Pack-Literacy-Center-Activities
WOW!! I LOVE this!!! Is all of this on TpT??? I have to have it! It is the perfect addition to my Word Work Daily 5 choice!!! 🙂