Free Handwriting Strokes Posters for Kindergarten
Teach handwriting easier with these free handwriting stroke posters.
Group letters together by their similar strokes and you’ll be surprised how quickly kindergarten students will learn to form letters correctly.
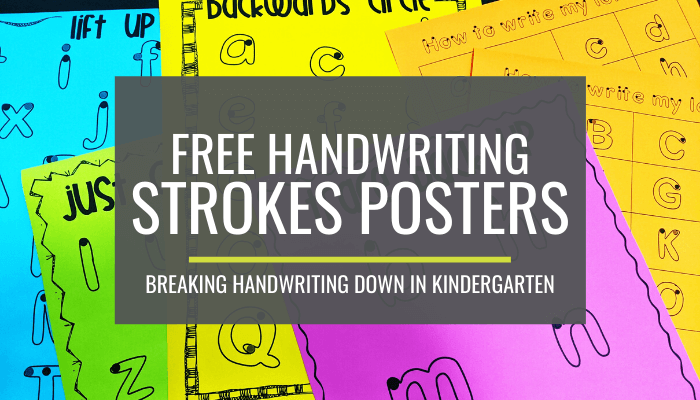
What do you think is easier: learning “the rules” for how to make 52 letters (because we’re talking both uppercase and lowercase) — or — learning 4 main letter formations and applying them to the letter you are going to write?
Learning 4 main letter formations is definitely the easiest – and why I ditched my handwriting curriculum. And it’s why I created these posters.
Let me share how this all works.
Handwriting to a beginning writer
Let’s think about how to teach handwriting in kindergarten using the perspective of a kindergartner or beginning writer…
Most often a new kindergartner is trying to recall what a specific letter looks like when they attempt to put their pencil to paper. They are then processing how to move that pencil to make marks that will produce a similar set of marks to what they recall the letter looking like.
That is a really big deal!
And something I think we easily overlook in kindergarten, as teachers. At least, I know I did.
Now, I say all of that – not to say that learning to handwrite 52 letters is too hard for kindergarten. Because I believe the exact opposite to be true.
They can learn to write all their letters – in both uppercase and lowercase forms using correct strokes.
They can indeed.
If we simply break down how to form letters for them – their attempt to make marks on a paper that resembles the letter they are thinking of – will be easier and simply become a matter of building fine-motor muscle memory.
If you want to know more about how I approach handwriting using this method, then you’ll want to read: Breaking Handwriting Down – How to Teach Handwriting in Kindergarten.
Get focused
When I decided to get laser-focused on teaching handwriting, it became clear to me that I needed to practice in smart ways.
I wasn’t going to spend time teaching 52 different letters as the handwriting curriculum book wanted us to.
I figured if using an alphabet chart and sight word chart work for teaching whole group… why not a handwriting chart?
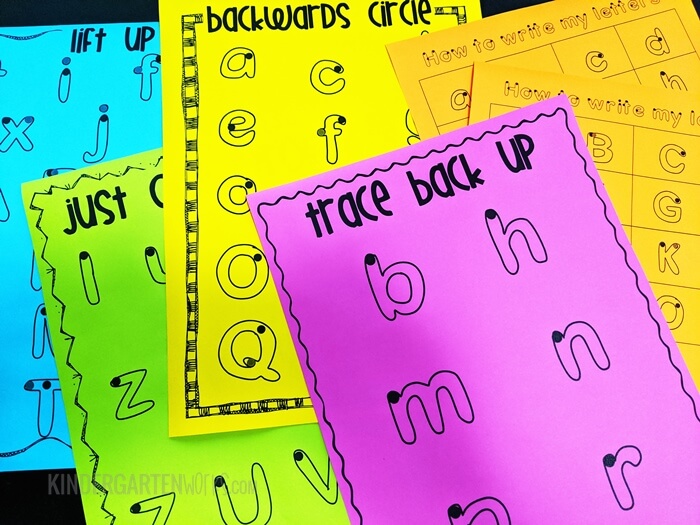
So I made a few handwriting posters.
Really.
I used our school’s copy machine to blow up 8.5″ x 11″ copies of these handwriting charts onto full 12″ x 17″ pieces of construction paper to make posters.
They were large enough to use whole group and were great for hanging up for reference as the year progressed.
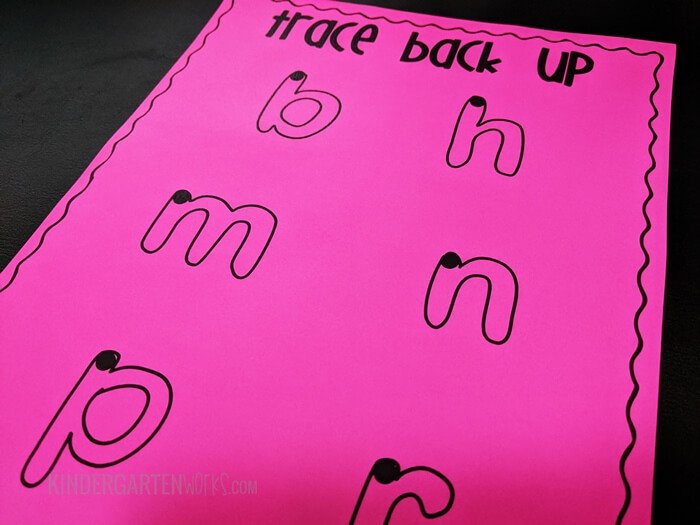
The feature black starting dots (these are key to my instruction) so students know where to start each letter.
How I used these
We used one poster a week as a focus.
So that pretty much means we took 2 mins each day to work on handwriting whole group for a month. Since all of this happened early on in the school year – I consider the payout of time to be worth it.
We invested the time up front so that we didn’t have to work on it all year long.
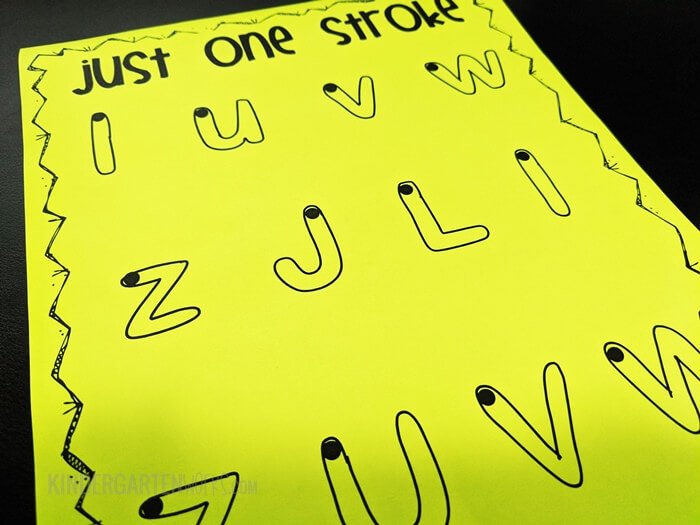
To help students learn the letter formations – we got moving.
Skywriting
Do you know what skywriting is? It’s drawing in the air with large, overexaggerated motions.
Here — try it:
- Extend your arm.
- Point your pointer finger.
- Now “draw” or “skywrite” a letter S about half the size of your body.
You felt the S – you felt the curves, you imagined the starting point, and you felt the ending point before you snapped/bent your elbow to show you were done.
Try it again with an uppercase D. Can you feel where you lift up your finger (because you bent your elbow) to create a second stroke?
Handwriting is all done on such a small fine-motor muscle scale that often students can’t “feel” how these letters are formed when they are first learning to write.
Skywriting overexaggerates all of the strokes, making them easier to feel and learn.
Plus, there is a lot of fun when you change it up to use noses, toes, elbows to draw in the air. Lots of giggles will ensue. Talk about the best well-spent 2 minutes on handwriting.
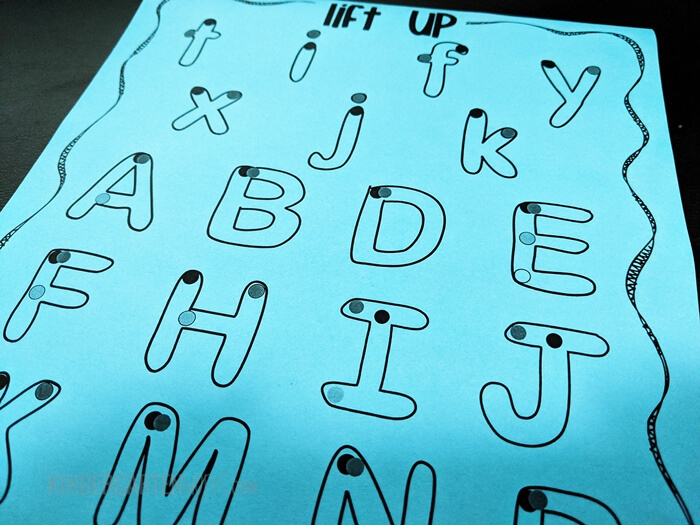
The trickiest part, as the teacher, is modeling skywriting. {wink}
Because normally we are writing backward for our students to follow and trace what our finger is doing in the air. That can be hard to learn at first but the more we practice, the better we get!
Sing-songy strokes
I also used a sing-songy way to describe handwriting strokes.
It became easier to remember how to then form each letter as you worked your way through the poster.
Each letter would have a similar sing-songy description piece that matched the poster.
Want to see what I mean? Check out this video and see how all of these letters – b, h, m, n, p, r – can be learned by starting with the same style of stroke.
Learning, “Go straight down, trace back up…” makes it easy to master not just one letter – but 6!
Read more: Sing-song strokes >>
Handwriting hunt
After they are pretty good with one of the posters – take your students on a 2-minute hunt around the classroom.
- Have them look for letters that have the pattern you are practicing.
- When they spot one – they put one pointer finger on their nose (to signal quietly) and their other pointer finger points to where the letter is spotted.
Hang up for reference
I hung up the posters that listed the entire alphabet (uppercase and lowercase) for reference. We didn’t go over those whole group.
Small group work
I also made 8.5×11″ copies of the full alphabet pages to use with my small groups.
If you want to read about how I used them in small groups, then you’ll want to read: Tracking Handwriting Progress: The Simple System that Works.
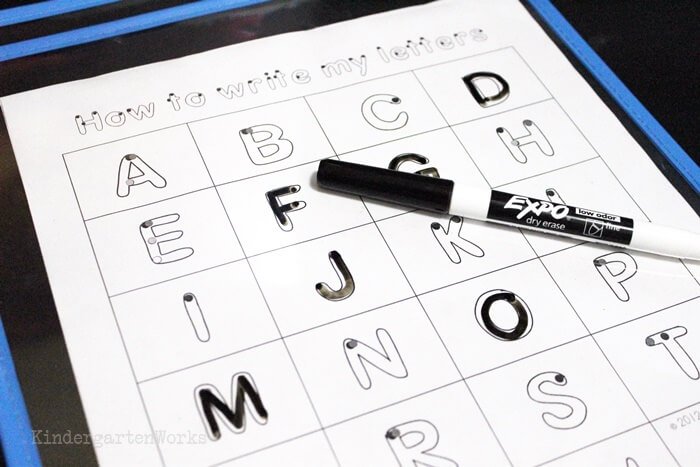
But you could also print a copy for students to keep in their writing folders.
I mean, that’s when we really want them to use the correct letter formations, isn’t it? In real-life application!
Download the posters
Use these posters – they transfer what they’ve learned by drawing in the sky to putting it down on paper.
Use the sing-songy stroke chants – they recall the order of strokes to form each letter.
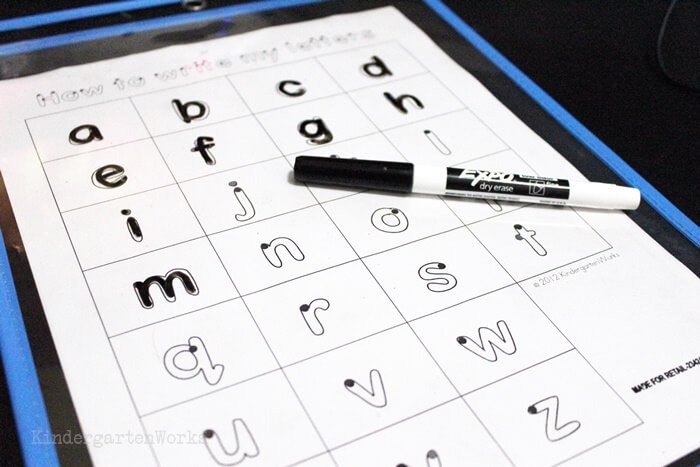
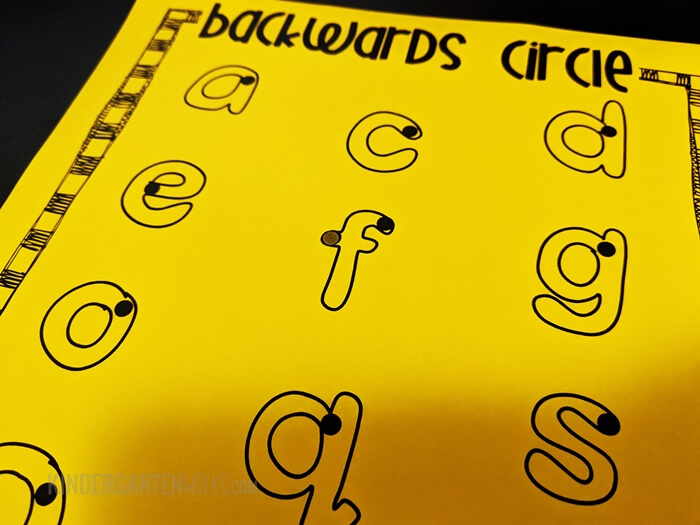
It’s so neat to see them learn that just by learning how to make a backward circle that they can form 14 letters! That is pretty powerful stuff.
Conclusion
They can become lean handwriting-machines and write letters fluidly in kindergarten. This means that writing sight words, stories, and all that jazz become easier to do.
And for me – that’s exactly what I want handwriting to be.
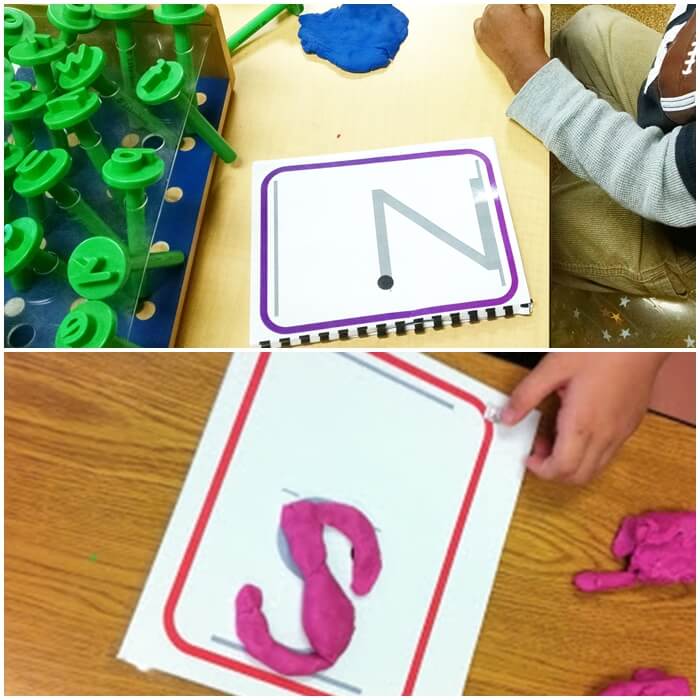
If your students need more hands-on practice, then you’ll love these handwriting letter formation playdough cards. I made them just for kindergarten!
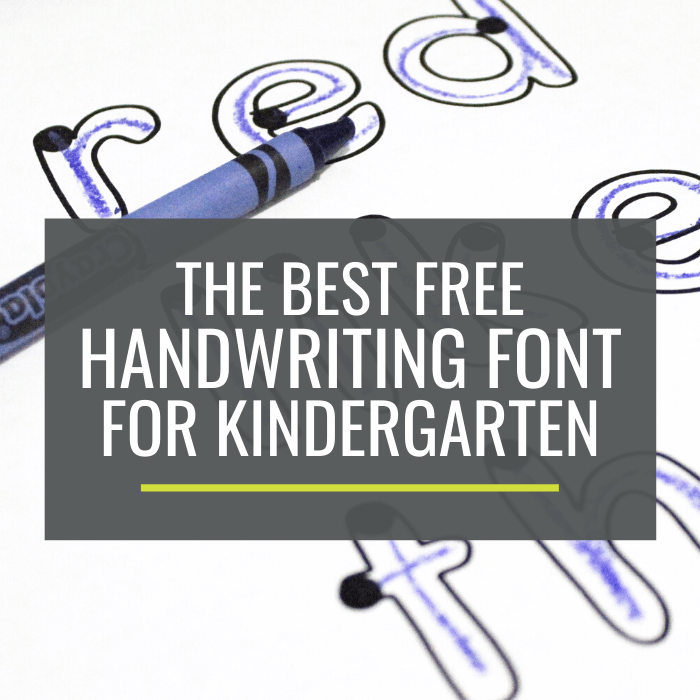
Love the font that is featured in the handwriting strokes posters? I have a simplified version that you can download.
I think it is indeed The Best Handwriting Free Font for Kindergarten. But, I may be biased {wink}
If you like what I do here on KindergartenWorks, then be sure to subscribe today. I look forward to sharing ideas with you weekly.


Have you thought about making four worksheets to match the sayings for the posters? I’m a school based OT and have the Kindergarten teachers on board for trying this out next year, because our Handwriting book is awful. I really wanted to print off everything for them by the start of the next school year, but it is bothering me that the worksheet has combined the lift up and just one stroke letters. I’m going to try and make my own, but thought I would check if you have something already made you would be willing to share.
Hi Leslie!
I love how you break down the alphabet into strokes. When I click on the link to open the posters it says there is an error. Are they posted anywhere else?
They are only available here. You might want to try again or try a different browser. Thanks for sharing how you like the idea of breaking handwriting down into strokes. It helps!
– Leslie
Thank you so much! I am always so grateful to find something that someone has generously shared that I can use as a beginning FDK teacher!! Thank you.
A: go straight down to the left, straight down to the right and connect them in the middle makes an A
a: circle all the way around, go up, straight down
B: go straight down, boomerang around to the middle, to the bottom
b: go straight down, trace back up, boomerang around to the bottom
C: Backwards circle all the way around, stop
c: backwards circle all the way around, stop
D: Go straight down, lift your pencil up , boomerang around to the bottom
d: backwards circle all the way around, go up, straight down
E: Go straight down, lift your pencil up, go left to right and left to right and left to right
e: left to right, backwards circle all the way around
F: Go straight down, lift your pencil up, go left to right go left to right
f: backwards circle, go straight down, lift your pencil up, go left to right
G: Backwards circle all the way around, stop, go in
g: backwards circle all the way around, go up, straight down, give a hook
H: Go straight down, go straight down, connect them in the middle left to right
h: go straight down, trace back up, make a hump
I: Go straight down , left to right, left to right
i: go straight down, lift your pencil up, make a dot
J: Go straight down, make a hook, left to right
j: go straight down, make a hook, lift your pencil up, make a dot
K: Go straight down, lift your pencil up, slide in, slide away, that’s the way we make a K
k: go straight down, slide in, slide away to make a k
L: Go straight down, left to right
l: go straight down
M: Go straight down, lift your pencil up, slide down, climb up, then straight down
m: go straight down, trace back up, humpety hump
N: Go straight down, lift your pencil up, slide down, climb up
n: go straight down, trace back up, hump
O: Backwards circle all the way around
o: Backwards circle all the way around
P: Go straight down, lift your pencil up, boomerang around to the middle
p: go straight down, lift your pencil up, boomerang around to the middle
Q: Backwards circle all the way around , lift your pencil up, slide down
q: backwards circle all the way around, go up, straight down, give a hook
R: Go straight down, lift your pencil up, boomerang around to the middle, slide down
r: go straight down, trace back up, hump
S: Backwards circle, slide down, hook back up to make an S
s: Backwards circle, slide down, hook back up to make an S
T: Go straight down, lift your pencil up, go left to right
t: Go straight down, lift your pencil up, go left to right
U: Go straight down, curve back up
u: Go straight down, curve back up , go straight down
V: Slide down, climb up
v: Slide down, climb up
W: Slide down, climb up, slide down, climb up
w: Slide down, climb up, slide down, climb up
X: Slide down, lift your pencil up , slide down
x: Slide down, lift your pencil up , slide down
Y: Slide down, climb up, lift your pencil up, go straight down
y: Slide down, lift your pencil up, slide all the way down
Z: Slide left to right, slide down, slide left to right
z: slide left to right, slide down, slide left to right
Your handwriting sheet does not match your sing songs for the uppercase I. On your practice sheet there are no horizontal lines at the top and bottom; however, on your sing songs you have them. I have a student whose name is Iliza and the first two letters of her name look exactly the same. How would you handle that
I teach the letter I both ways so students learn to identify it (just like we mention that the letter q sometimes is a straight stick in print and sometimes it’s seen with a hook instead). I would encourage Iliza to use the uppercase I with the horizontal lines to make it the easiest for everyone to read.
Thank you so much for sharing your strategies and resources!
Thank you so much, it helps my son a lot. I am interested in the Sing-Songy Stroke Lyrics. Do you mind to tell me where can I get it?
Sure thing! They are all in the video on this post: https://www.kindergartenworks.com/kindergarten-teaching-ideas/breaking-handwriting-down/.
Thanks,
Leslie