
How I Used Dollar Store Placemats To Hide Things Above My Classroom Cupboards
It can be tricky to store bulky classroom curriculum when you’re trying to make your classroom look pretty or at least non-cluttered.
Here’s how I used placemats – for a dollar a piece – to hide my giant science curriculum boxes to improve the look of my classroom using the empty space above my cupboards.
Why I need to store my science kits
Hiding my science kits is a challenge for me.
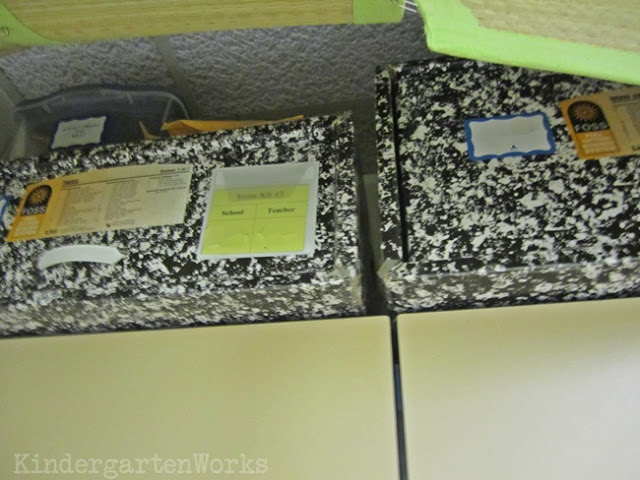
We have three giant boxes to make up our year’s curriculum and while not in use, I definitely want them out of sight. And I don’t need to be able to access them. But it’s up to me and my classroom to store them until needed.
I say that they are an eyesore, and that’s mainly because I tend to dislike clutter and things that aren’t functional… but that’s just me.
On my ‘shopping for school’ day, I found these placemats at the Dollar Tree and loved their simplicity and green border. They would coordinate with the room without standing out. I’m trying to disguise my science kits, remember?
I figure I could use them… not to figure out how.
A no-sew solution to hanging placemats
I don’t sew.
I need a way to hang these placemats in front of the science kits above my cupboards.
So in my non-sewing, own crafty way, I decided that I could safety pin them together and then somehow attach them to the ceiling.
Somehow.
Just then I ran across these shoelaces that matched my classroom color scheme and I knew I could figure out the logistics of getting things to hang using the shoelaces and safety pins once I got into my room.
Side note – insert my sad face for all of you who have a fire marshall who doesn’t let you hang things from the ceiling.
How to hang placemats above cupboards
So here is my step by step process that took me about 45 mins working in my classroom.
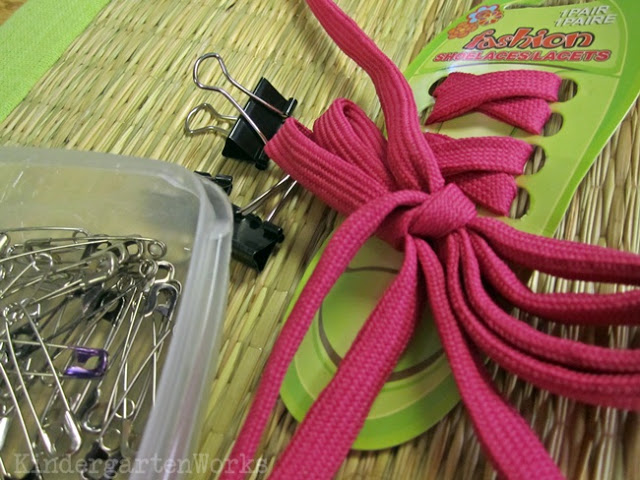
I completed this project with:
- placemats
- safety pins
- binder clips
- shoelaces
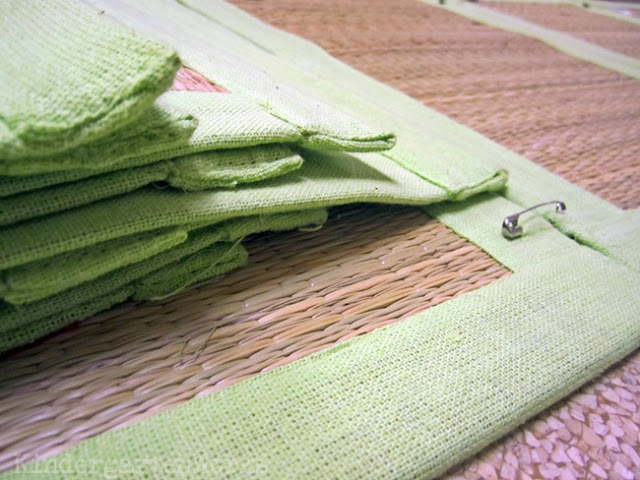
I began by pinning all of the placemats together on the floor to see how many I’d need to fit the space above my cupboards and to hold them all in place while I worked.
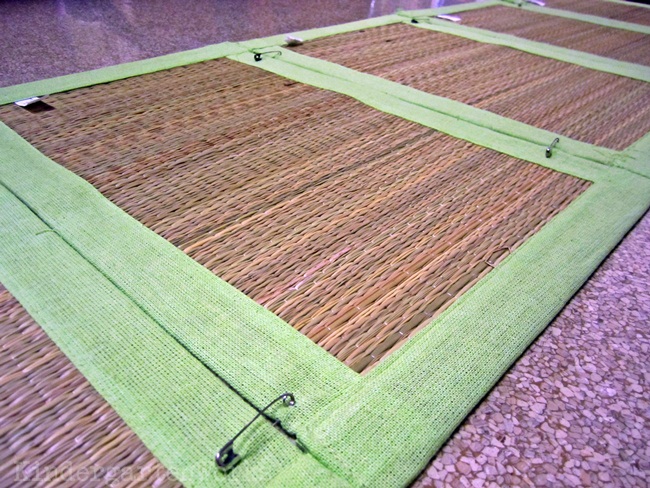
I situated the pins to hold the pretty tightly to each other, without much gap in between.
I also put a pin in on the top outside corners of the placemats at the ends.
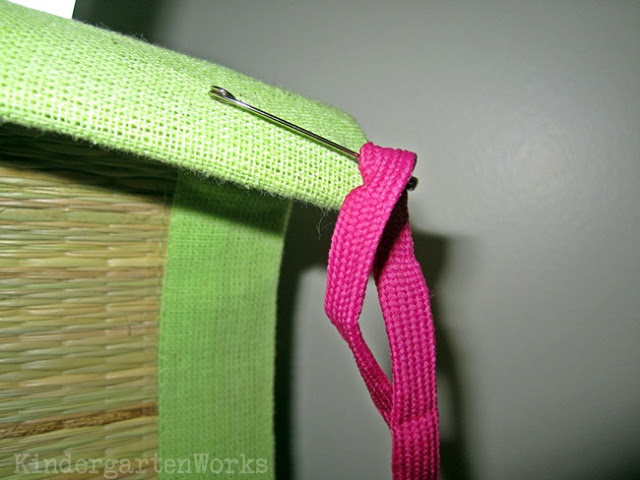
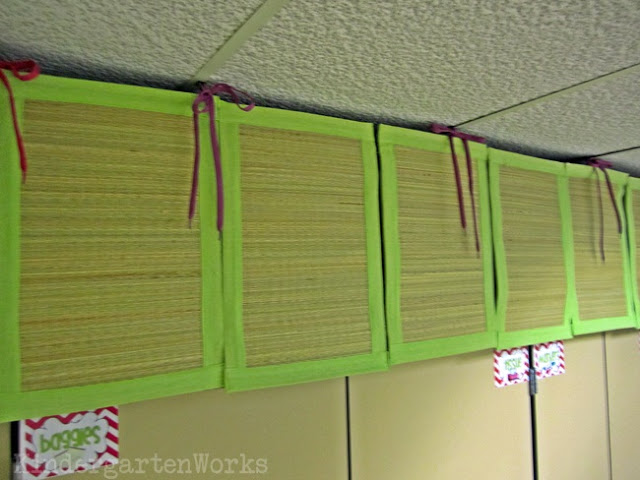
Here you can see this corner tie (on one of the end placemats) is about 1/2″ from the top and I’ve pulled the shoelace through it.
Then I added the binder clip onto the shoelace and will use this to hold this placemat up to the ceiling.
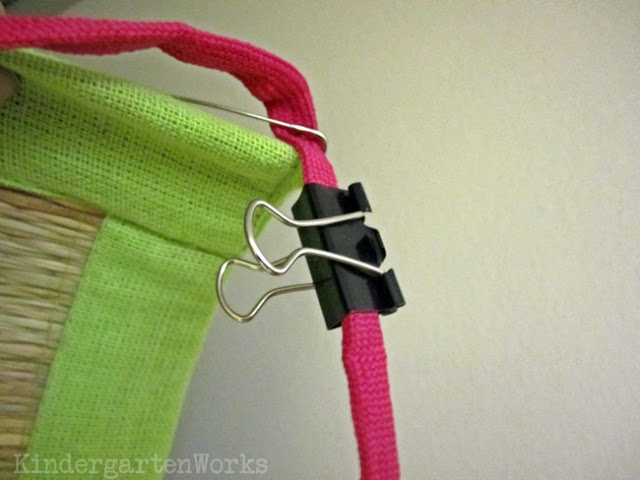
I clipped it straight onto the drop ceiling frame.
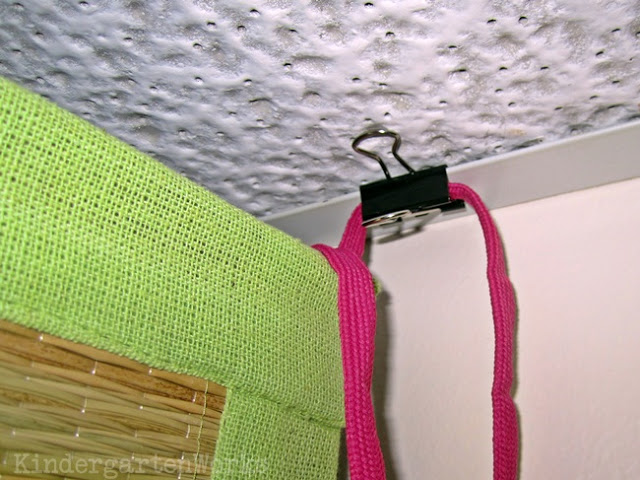
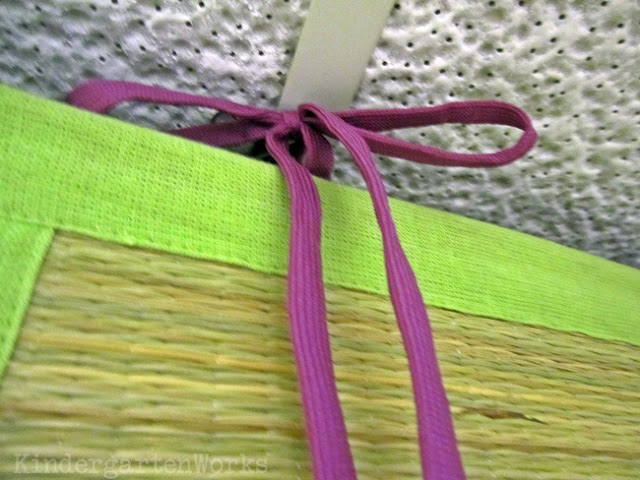
Then I tied the lace pieces into a bow and that was really it.
I added more pins along the top wherever there was a drop ceiling frame. This way it wouldn’t sag and would have multiple points which it was hanging from.
So I:
- Stuck in a pin where the placemat would hang from the frame.
- Thread a shoelace through the pin.
- Slip one end of the shoelace through a binder clip.
- Clip the binder clip onto the ceiling frame.
- Tie the shoelace to tighten the placemat to the ceiling.
- Repeat this process all the way along the top of my cupboards
The finished product
Here are my hidden away items.
Now you seem them…
Now you don’t!
Conclusion
There you have it. Using placemats, shoelaces and some safety pins I was able to successfully hide my eyesore science kits above my classroom cupboards.
I think if I had to do it again, I’d look for an all-natural color placemat so that the eye isn’t drawn to the storage area at all.
If you like what I do here on KindergartenWorks, then be sure to subscribe today. I look forward to sharing ideas with you weekly.
Nice job but that wouldn’t work for me 🙁 Fire inspector would have a cow! We have to have 18 inches empty from ceiling to top of cabinets. And our Supervisors of Science want to SEE the science kits in our room whether we are using them or not. We aren’t even allowed to put them in the closet…
Wish we all had as much flexibility! Thanks for commenting.
– Leslie
I think this looks AMAZING! I have been away so long! Where has the time gone. I pinned your fabulous idea and I can’t wait to do it in my classroom! Thank you!!!
Thanks Deedee! I totally just shared your math fluency pack pages with my fellow K teachers at an inservice last week. You’ve been repinned there, my dear! Thanks for stopping by – I know that as bloggers it takes extra effort to get reading and commenting sometimes!
– Leslie
soo creative!! Your room looks so nice! I wish mine looked like that, it’s coming along.
teachingwildalaska.blogspot.com
Thanks Laura! Are you feeling settled by now in your room?
– Leslie
We use those same since kits!! A little off topic, but this is my first year teaching with that curriculum…any advice?!
Hi Kelly,
I’ve had to learn to make it my own, so I’d encourage you to do the same. I try to incorporate more trade books and writing (journaling/observing) than the centers that they mention, and that works for me. Plus, I also supplement with science work that I love and we study the life cycle of apples, pumpkins and butterflies too to beef it up 😉
Wow! That looks great!
Wow! That is awesome Leslie!! And you didn’t have to sew a thing! That’s my kind of craft! 🙂
Nicole
Rowdy in Room 300
Thanks Nicole – since I can’t sew… totally the only thing I could try!
– Leslie
What a great idea! Thanks for sharing!!!