
How To Make An Everything Board
Here is a project that I saw pinned and brought to life using duct tape.
I call it our “everything board” and it’s essentially our check-in and out system.
We use it to take attendance, lunch count and I use it to keep track of students leaving the room.
Here’s how to make one and my personal confession about why I made it with duct tape.
{Yes, duct tape}
Materials for An Everything Board
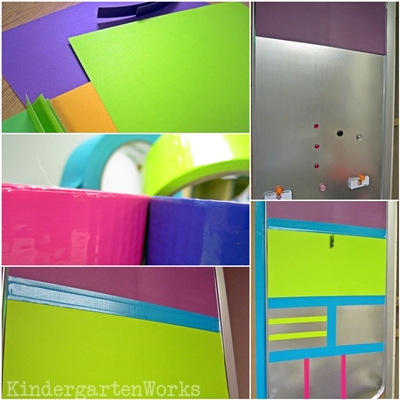
Grab a giant oil pan – as found in the automotive section of a big box store. Mine was under $12.
To separate the spaces visually I wanted to use something that would hold up – so I chose duct tape. Bright duct tape from the Dollar Tree (or maybe Big Lots) – the cheapo kind. It worked great with our classroom color scheme. Go for a neutral if you don’t have a color scheme or don’t want to change this up in a year or two.
I picked duct tape to bring the colors of my classroom together. It seemed like an easy choice to use it to create sections for this project too – and it worked!
Pick a few 12×12 squares of scrapbook paper if you want to create sections with a color background. I would recommend laminating the papers so that the magnets don’t drag and create smudges. Learned that one the hard way. {wink}
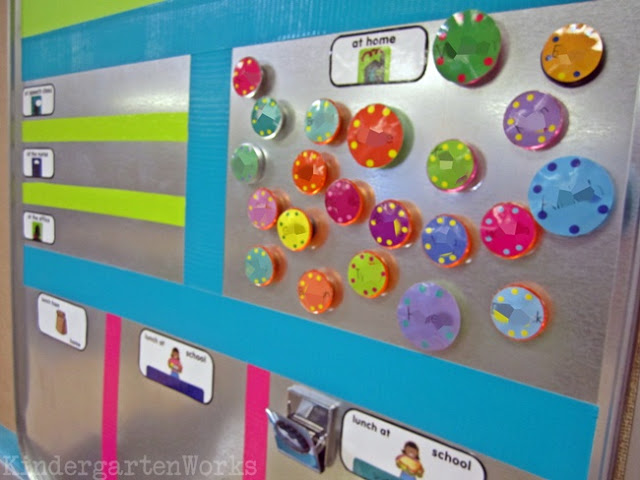
Grab some magnets that protrude out, allowing little hands to grab and manipulate easily. I scored mine at the Dollar Tree (6 for $1). The flat face was going to allow me to put their student names on top. They lasted for more than a year.
With materials in hand – it is time to make.
Decide Your Sections
I knew I was going to need a way for students to:
- check in (essentially take attendance)
- take lunch count (with a few options: hot, cold, sandwich)
- sign out briefly if they went to the office, speech or to the nurse’s office
- check out when school was done
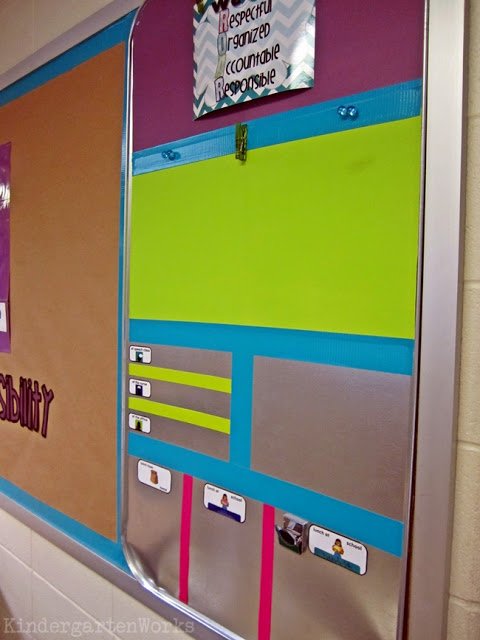
So, I needed to plan out sections for each of these to use with their magnets. The largest section needs to be when everyone is not at school – that will hold all of the magnets at the end of every day.
The next largest sections need to be for lunch options since those have to hold a large portion of magnets.
My kinders can only reach the bottom half of the oil pan since I mounted it onto half of my bulletin board, so I decided the top portions would work well as display space.
Create Your Sections
Lay out your scrap paper (to get sections the same size) or scrapbook paper and use magnets to temporarily hold the paper in place to help plan out each section size.
Place real-life objects into each space to be sure that it will hold what you need. Gonna display your lunch menu? Be sure the space is large enough.
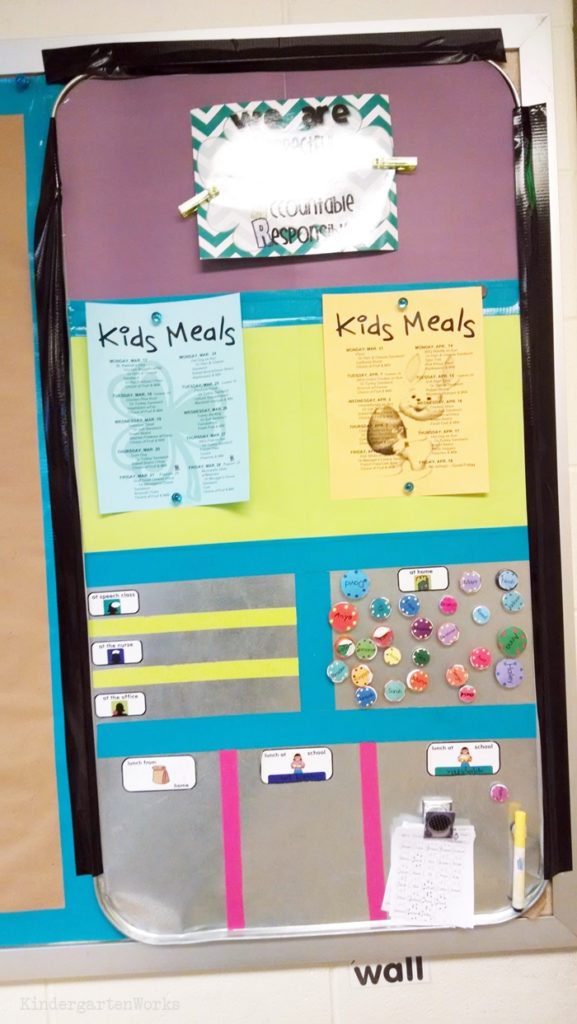
I chose to display our lunch menu and our school’s PBIS acronym.
You could easily use your spaces on top for posting other things like:
- a sight word password
- morning tub choices
- classroom jobs
- morning routine icons
- daily folder papers
Once I laid out my sections and liked the spacing, it was time to lay down the paper (for the top display-only sections) and lay down the duct tape to both separate the sections and adhere the scrapbook paper backgrounds.
I had to cut the purple scrapbook paper at the top corners to fit the rounded corners of the oil pan. You may have to do the same. Adhere it with rubber cement, double-sided sticky tape or use the edges of the duct tape to hold it in place. I used the duct tape.
Tip! Cut your duct tape in half length-wise to create thinner separations – like you see with my lime green and bright pink duct tape lines.
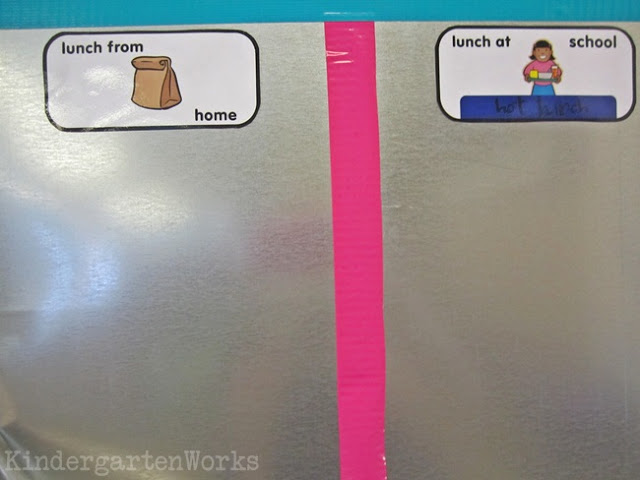
Add Labels
Once you have your sections finalized it’s time to label them so students can use it independently as part of their daily routine.
When my kinders arrive at school, they will move a simple circle magnet with their name on it from the “at home” section to selecting their lunch choice.
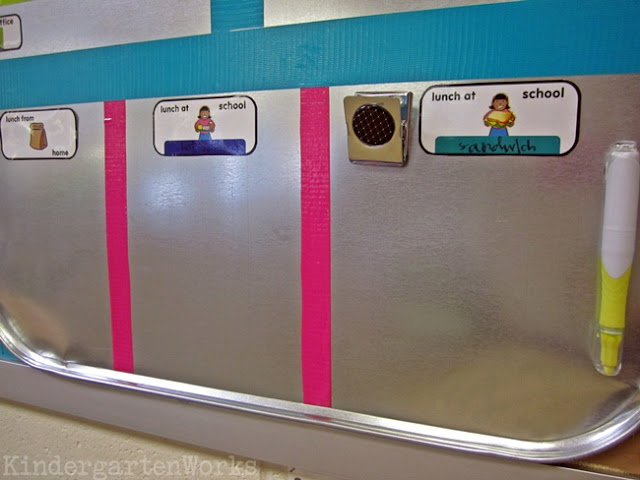
In our school, students can also order a sandwich from the cafeteria, so we have that third option. I added a strong clip to hold a bunch of class lists stapled together like a note pad. I also adhered a magnet to a highlighter to go in this space.
They highlight their name on the class list if they choose this lunch option. This list is given to the lunch staff by one of our students performing a classroom job – and it’s also a classroom job that someone puts all the magnets back at the end of the day, signing everyone out.
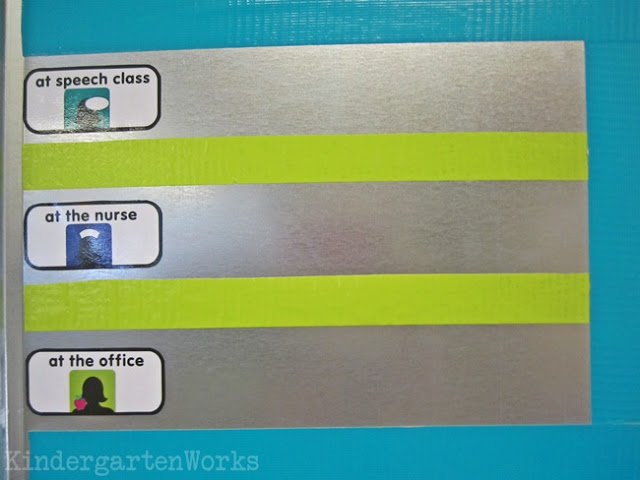
This board also helps me track who is in and out of the room and students can move their magnets to these other options.
Hence why I am now dubbing this my “everything board.”
Now I don’t have to second guess where so-and-so is when I can’t remember that they left the room to go to speech twenty minutes ago. Because we all get busy and forget things like that. Right?!? Maybe it’s just me.
Questions About the Everything Board
Have some questions about the board? Let me see if I can help!
Do you have the labels to share?
Do you want to make this too?
Here are my labels in case they are helpful in getting your project going. You agree to these terms of use upon downloading.
How did you make the name magnets?
I measured the magnets that I purchased.
I made round circle shapes in a program like Powerpoint to match the size and added colorful polka dots. (I was kinda going for a Chicka Chicka Boom Boom feel). I chose lots of colored backgrounds so it made it quick for students to identify theirs every day. Then I added my student names once I had my class list. I printed and laminated them and stuck them on with rubber cement. One year I used double-sided sticky tape.
At the end of the year, I pried them off and stuck new names on the following year.
Where did you buy the tape from?
I think it came from Big Lots and Meijer – but be sure to look for cheap duct tape at Walmart and the Dollar Tree too for your colors.
I’ve never tried making anything so crafty {yes seriously} but I’m loving how it turned out.
The cheapo duct tape really was forgiving as I moved it around and straightened out the lines… who knew?
What kind of oil pan is it?
I honestly can’t remember if I bought it at Walmart or Home Depot – but it was that kinda store. I recommend shopping around a little bit to find one that is the size you need and one that has a flat surface.
A reader reminded me to get one without embossed letters is key – and she is right! Get one that has a flat surface to make all of your space useable and easy to mount.
How did you get it to mount to your bulletin board?
I was gifted some crazy strong double-sided sticky tape (in a huge roll like 12″ wide) that I covered the entire back with. It was like from a wallpaper store or something.
But it didn’t last all year long {sigh}
So, as a quick fix (albeit not pretty for the next few days) I simply used gorilla tape to make sure it didn’t fall down again.
My suggestion is to talk to your school (and in my case the janitorial staff) about the best way to get yours up on the wall.
Another teacher recommended using heavy-duty Velcro to attach it to any smooth surface.
Remember to keep kid-friendly heights in mind!
Final Thoughts
Attendance, lunch count, headcount, display space… brightly colored and fully functional. I think that’s my style!
So with some colorful duct tape, scrapbook paper and the oil pan we now have a colorful, shiny, mutli-purpose board.
Our “everything” board.
If you like what I do here on KindergartenWorks, then be sure to subscribe today. I look forward to sharing ideas with you weekly.


I bought mine from Walmart about ten years ago. I used heavy duty Velcro to attach mine to the side of a filing cabinet.
I used it as a math number of the day center. The students loved it!
A. Golembiowski
Great suggestions – thanks for sharing what you used!
A little hiccup for me was that the oil pans I found had embossed lettering on half of it. Does not make for a smooth surface. Might have to shop around a little. I think I got mine from Walmart.
Oh – good point Lori to find a flat one! I’ll be sure to add that to my hints in the post. Thanks for mentioning it.
– Leslie
Do you have the labels you used for this project posted somewhere?
Hi Andrea,
I added then to this post for you!
Such a great idea! How did you make the name magnets?
Thanks Hadley! I measured the magnets that I purchased. I made round name labels to match the size. I printed and laminated them and adhered them on with rubber cement or double sided sticky tape.
– Leslie
This is awesome! Where did you buy the tape from???
Hmmmm… I believe I got it from Big Lots and Meijer… maybe Walmart?
– Leslie
Wow! great idea. I will be asking my hubby to search for an oil pan ASAP!
Awesome! Please share a pic on facebook – I’d love to see it in action.
– Leslie
Love it! I bought my oil pan today! Thanks for sharing!
Awesome! Please share a pic on facebook – I’d love to see it!
– Leslie
This is great! I am going to try this! Thank you! How did you get it to mount to your bulletin board?
Hi Erin,
I used some really strong double sided stick tape. Best wishes if you try it!
– Leslie
Love this idea. Maybe solid colored contact paper would work instead of the paper. Magnets would stick wonderfully. I think I will try..
I had thought of laminating it, but I didn’t want the sheen – so contact paper sounds like a great solution! Thanks for sharing your idea!
Looks great! 🙂 You are so creative—and though the oil pan isn’t technically ‘trash’, you definitely made a treasure out of it! 🙂
Liesl
wildworldofkindergarten.blogspot.com
Thanks Liesl! I thank Pinterest for the creativity! 😉
So cool and functional!!
Thanks Kristen!
Looks awesome! Can I ask how you attached it to your bulletin board??
Where would the world be without duct tape? :o)
~ Julie
Thanks Julie! I have a humongous role of double sided sticky tape that I used… (it’s at least 12 inches wide) But I think screwing it in would’ve worked too.
Very cute! Love the bright colors!
Jennifer
First Grade Blue SKies