How to Organize Kindergarten Math Teaching Materials When You’re Not Using Them
Organize your math materials when they’re not being used so it’s easy to get what you need when you need it.
Any organization system should make it easy to get stuff from and put stuff away – making it easy to maintain all year long. Here’s how you can easily create a system of containers and labels to make finding what you need pretty quickly.
I’ll show my system, and how it’s all organized in one cupboard in my classroom.
Now, because we all run our classrooms differently I want to be sure you know these things about my classroom:
- I teach guided math – which means I teach math in small groups. This also means that I’m not following anyone’s curriculum. (In fact, I pretty much just hid all of that under my classroom sink.)
- I keep my everyday math materials in another location. This means that I have the tools I use almost every day right within arm’s length.
- I have 6-8 sets of everything that I use in my small groups because that’s how many students I could have in a group.
Consider how much stuff you have
Now, let’s be honest for a minute. Sometimes, the sheer volume of “stuff” it takes to teach kindergarten can feel overwhelming.
And sometimes that means we end up storing a lot of stuff. I get it. I’ve been there.
I also think that every two years it’s a necessary thing to clear out the excess and only keep what you’re really using.
I’m not telling you to throw out old games and manipulatives… but chances are if you haven’t used them regularly in at least a year, you probably won’t again next year.
So, consider how much stuff you really have to store and pare it down to what you use every year.
Pick a smart place for storage
For some of us, storage is something our classrooms lack and for others, we have an abundance.
Whatever your situation is, I think you can dedicate a space to storing your math materials.
For me, I picked a cupboard that was at eye level and easy to get to.
When I need to grab materials for a lesson, or the week or I am digging for a spur of the moment material – I need to find it fast and have it convenient.
If I have to go a few extra steps or do extra digging – forget about it. I keep putting it off and I hate feeling unproductive. There. *Lazy* teacher admission.
So pick a smart place that you can access easily that you won’t mind getting into each week or as needed.
Use containers
Now that you have a storage space, it’s time to make getting to everything in that space relatively simple.
The easiest solution for this is to use containers. We’re not talking anything fancy – but functional.
Pick containers that allow you to:
- grab them off the shelf
- reach in to get what you need
- place them back on the shelf with ease
- organize by time or type-of-use
You want containers that will fit in your storage space, that are deep enough to hold things upright and not too huge so that things get lost.
You may need multiple sizes of containers. I did – let me show you what that looked like.
My cupboard has two shelves. I used locker-style bins from the Dollar Tree on the top shelf.
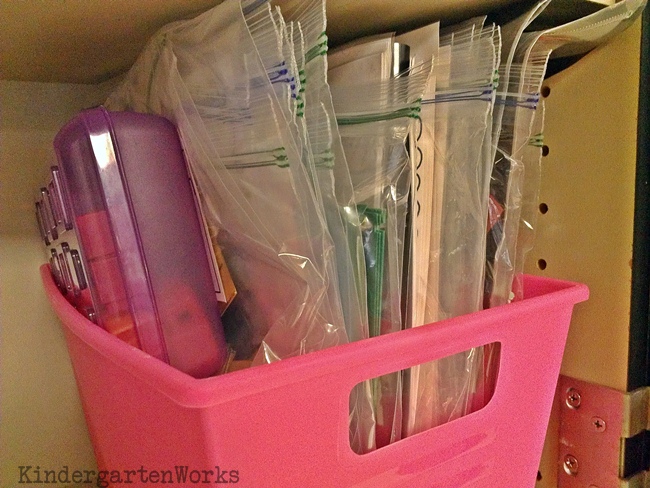
These are deep enough to hold things upright (so things aren’t falling over) and wide enough for each one to hold plenty of things.
The handles make it easy to grab and return from the shelf.
I use one of these for each quarter (so I have four of them total) to store the games and activities center materials. This allows me to organize by time.
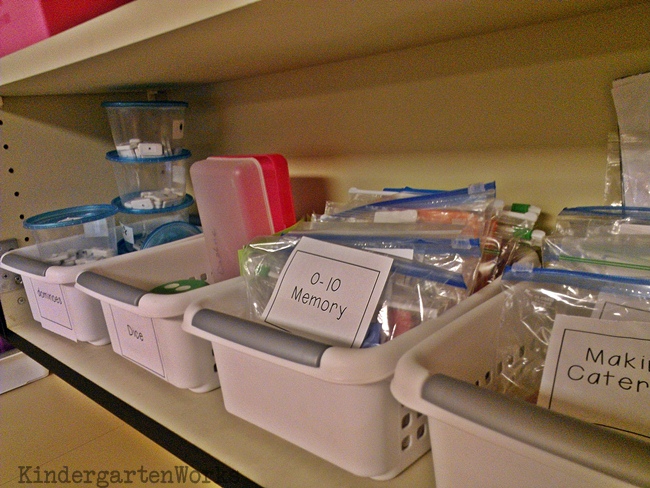
On the lower shelf, I have a set of plastic baskets that I can carry to my teacher space as needed or pull materials from. These are the materials I will use during my group lessons.
These Sterilite bins are not as tall but the materials are easy to access. These allow me to organize by type-of-use.
Use Ziplocs and smaller containers
When it comes to organizing games or materials you have sets of, frugally, then Ziploc baggies will be your friend.
The gallon-size hold regular size paper and are perfect for printed games and a few manipulatives. The quart-size are great for holding card sets.
Sometimes the containers end up being stuffed, but when I’m changing out games or flipping through the Ziploc bags, it is easy to find what I need quickly and they aren’t falling all over the place when they are stored in a tall-enough container.
You can also use pencil boxes to hold manipulative sets (like pattern blocks, base ten blocks, linking cubes) or use dollar store tupperware to store bulky sets like dominoes.
Use labels
Once you have containers that fit your storage space and will help you get what you need quickly, then I recommend using labels to finish off your organization system.
When you add labels, you literally save yourself mental time and energy – albeit small – but with the sheer number of decisions we make in a single day of teaching – this matters.
Your brain simply reads the label and you don’t have to think hard about what you’re looking for or where it might be at. It works.
Label the containers

Remember the Dollar Tree locker bin on the top shelf? That holds games and activities for each quarter. So, each bin has a label – Q1 Games, Q2 Games, etc.

Let’s look at the bottom shelf. This one has some containers labeled and some not.
I do label the bin if all of the materials are the same, as the dominoes or dice baskets. But if the contents are all different, then I label the bags inside as you can see in the far right two baskets.
Let me dig into labeling materials and bags next.
Label Ziploc bags
Just like you want to be able to get a container out and put it away with ease, you want the same for the materials you use within the containers.
Need to find the 0-10 memory ten frame memory game? Look for the label. It’s easy to grab when you’re ready to teach, keep separate from the 0-20 game, and easy to clean-up when your baggies are clearly labeled.
Labels are my saving grace when I have differentiated sets of materials all stored together.
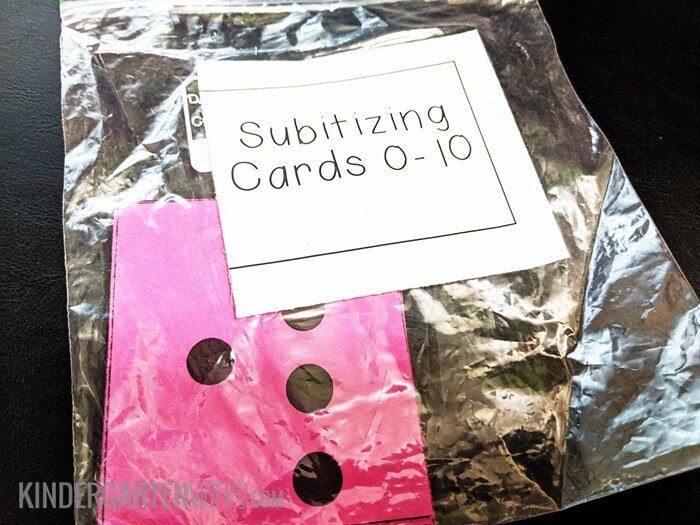
You can print labels pretty inexpensively on your computer or make your own with post-it notes and packaging tape.
I simply spent one day creating a list of the gazillion items I have, inserting those into my computer and making paper labels. {Yes, one for each baggie or bin} I had a huge supply of double-sided stick tape that I plastered onto the back so each one is essentially a giant sticker.
Let’s wrap it up
Keep in mind that you are mainly organizing for yourself. Not Pinterest or to make anyone else happy. It’s got to work for you and be worth the work you do on the front end to set it all up.
In general, I think it is – especially when it saves you time and mental energy prepping for math lessons.
Your main goal is to create a system of containers and labels that make it easy for you in the future, a resource person like a classroom aide or a classroom helper to get and return the materials – quickly.
You don’t want to just create extra work for the sake of organizing – so organize your materials in a way that makes sense to you, is easy to access and is easy to put stuff away.
If you like what I do here on KindergartenWorks, then be sure to subscribe today. I look forward to sharing ideas with you weekly.

I love your organizational system. I have been following your guided math system this year since it is our first year with all-day K. Love, love, love that I get to teach math the way it should be taught! I would love to have a list of your practice zone activities for each quarter. Another product idea!
Thanks for sharing Theresa. I loved reading how you feel like you’re now teaching math the way it was meant to be – so incredible! I’m excited right along with you!
Thanks for sharing your idea – I find a lot of free games available, but I’ll definitely consider it or put it in a post.
– Leslie