
Free, Easy-to-Navigate eLearning Template for Kindergarten
Create your own distance learning lesson plans with this free template. Make navigation easy and simple for your kindergarten students and their parents.

This free eLearning template is designed for kindergarten (though it could also work for other grades) and uses Google Slides. Let me show you how it works, how to use it, and customize it.
I hope it can save you tons of time and make a smooth eLearning experience for your students.
Plus, if you like it I’ve got more themes available (and more are currently being added).
How it works
Students will click through three pages of tasks – pages that you determine the content. The navigation between pages is all set up for you and makes getting to each thing easy.
Give this sample distance learning template a test drive so you can see for yourself.
Here’s a video to see how it works:
The home page has buttons that link to each slide and the navigation bar at the top helps students get back to the home page.
How to use this template
To use this template, decide how long this content will last for. Is this one day’s worth of learning or a week’s worth? You choose!
Set up 1-3 tasks on each page. You write text directions (and you can add audio directions – I’ll show you how below).
You link easy-to-use number buttons to help students navigate to content online, when applicable.
You can even delete tasks, so if you only want one or two tasks on a page – you can do that.
How to customize this template
So, how do you customize this template?
Click the free download button below to create a copy in your Google Drive to begin.
[You agree to these terms of use by copying this template.]
Start playing around with it or continue reading for a step-by-step tutorial.
1. Change learning page titles
Change the text on slide 1 to read, learn, bonus or whatever titles you want.
Some titles to consider:
- reading, math, writing
- learn, practice, do
- do each day, finish this week, for fun
- watch, try, complete

Now, make the titles on the following pages/slides match what you picked.
Pick titles that can work every time you want to use this template – consistency will make it easier for you to plan and for your students to know what to expect.
2. Create simple tasks with directions
For each slide, plan a set of three simple tasks.
Click the text next to each task number and write your own directions.
Be direct and short. Read it aloud to check if it’s enough direction for both your student and their parent to understand the task.
The tasks can be a continuation of one another or they can be three separate tasks.
Tip! If you don’t want a task – delete the # circle, the directions text box and the shaded background.
3. Create task links
If the task should link to a video, website, another google doc or activity (like this scavenger hunt) then click on the number button and paste the link.
Complete this step for every task that should have a link.
An alternative to making the task number the link is to make another icon clickable that leads students where you want them to go.
To do this: Add a little icon – like this link chain one. Download then drag it onto your task and link it.
4. Share it with students
When you’re done you will share this slide as a presentation with your students. This makes the links all work like buttons.
(If you simply share it as a Google slides document that they can edit, then you lose that navigation feature.)
To share:
- Click the yellow share button in the top right corner
- Click the drop-down arrow and choose “More…”
- Select “On – Anyone with the link”
- Click “Save”
- Click “Copy link”
If that doesn’t work for you then try:
- Click the yellow share button in the top right corner
- Click the small letters in the bottom right corner “Advanced”
- Select “Change…”
- Click “On – Anyone with the link”
- Change “Access: (Anyone no sign-in required) Can view”
- Click “Save”

Get ready to paste the link but before you share it – change the end of the link to /present instead of /edit.
Original link: https://docs.google.com/presentation/d/1234567890/edit?usp=sharing
Change to: https://docs.google.com/presentation/d/1234567890/present
Share that new, changed link however you connect with your students – Google Classroom*, Facebook, Seesaw, Classdojo, etc.
If you want to test out what yours looks like – open a new incognito window (using Google Chrome) and it’ll show you what your students might see.
There you have it – a set of easy-to-navigate plans for your kinders to use at home!
Note:
*Sharing in Google Classroom requires that you paste your link in the assignment’s (or material’s) instructions box. Unfortunately, if you just try to use the linking icon or paperclip icon to attach the slideshow, it will automatically revert to showing the editable slides.
More ideas to customize this template
Now, let’s talk about making this a super-smooth experience with a few ways you can customize this template even more (especially for distance learning purposes).
You don’t have to do any of these things, but they may be helpful to you and your families.
► Add the date
If you plan to reuse this same template every day or from week to week, then consider adding the date (using a text box) on the front page.
This will help families know when the work is assigned for at-a-glance.
If you plan to reuse any of these templates – then you want to make a new copy for each new set of plans.
To do this:
- Go to: File
- Click: Copy
- Select: Entire presentation
- Rename it with the date or another way you can tell them apart
- Choose the folder where you want to keep them organized and select the sharing settings (most likely you’ll want to share it with the same people)
- Click OK
- Your new template will open in a new window to work on
► Tips for videos
Link to a fullscreen video
If you want to link to a Youtube video, you can sometimes change the link to show the video fullscreen and not show the extra “distraction stuff” you normally see on Youtube’s website.
Check out how different this video is presented compared to this one.
Right?!? Big difference in what is shown to students.
To do this change your Youtube video URL:
Original link: https://www.youtube.com/watch?v=123456789
Change to: https://www.youtube.com/embed/123456789
Note that this can’t be done with every video, though, so you do have to test it out because some people turn off the ability to let their videos be embedded.
Create a separate video page
You can also embed a YouTube video into another Google slide. Choose Insert > Video.
Do this if you don’t want to send your students to YouTube’s website.
To do this:
Make a copy of this free video template page anytime you need it. Edit it and insert your video. Then link your task number button to this new page.
► Add audio directions for non-readers
In my sample, you can click on the audio speaker buttons and hear the directions read out loud. (*Google drive does have limits on how many times a file can be played so you currently may not be able to play my example audio files due to this post’s popularity)
I did this to make it easier for beginning reader kinders. This way a parent doesn’t necessarily have to help with every step. *hopefully*
Here’s how you can add audio directions.
1. Record your directions with your phone
The easiest way to record audio directions is to use your phone.
You’ll need a voice recording app that will let you share files to your google drive and be logged into your google drive on your phone.
The app I used on my android is called – Voice Recorder. I liked it because it let me make a bunch of recordings and upload them to my google drive folder all at once instead of having to upload each individual file.
Here’s how to record your own audio directions using the Voice Recorder app:
- Click the red circle record button and start talking
- Push the red square to stop recording
- Type in a title for the file name that will help you identify the direction. Click OK
- Repeat for each direction
I also found a comparable option called Rev that’s available on both google play and the app store (though it won’t let you upload a bunch of recordings at once).
Think smart! How can you create a general set of audio directions that you can use for multiple days worth of lessons?
2. Upload your recordings
Here’s how to upload your own audio directions using the Voice Recorder app to your Google Drive folder:
- Click the headphones to see all recordings
- Click the hamburger menu ☰ and select “Share multi-file”
- Select all of your direction files and click “Share”
- Save them to your Google drive destination (You should only have to select this once. It will remember this destination each time.)
Be sure to make the sharing settings of the Google Drive folder where you save all of your audio directions set to “Anyone with the link can view.”
3. Insert your direction recordings into your lesson plans
Google makes it easy to insert your audio directions. Really!
You go to Insert > Audio and select the audio direction file you want.
The little speaker icon will automatically appear, already attached to your audio file and you drag it to wherever you want it to appear on the slide.
► Add additional parent or technical help directions
Maybe you want to assign something that needs additional directions or login steps. What do you do?
Well, my recommendation is to keep your template as simple and as consistent as possible. Put that additional information on a separate Google Slide document or page.
Add a little help icon – like this one. Download then drag it onto your task and link it to the separate help document.
For example, if you need to explain how to login to a website then create a slide that has the information needed in step-by-step directions for parents.
Link the little help icon to that slide and parents can follow the directions using the information that opens in a new tab.
Here is an example of a parent tutorial page (used with permission from Bree at Kindergarten Whale Tales).
It gives parents the support they need without cluttering up what your students see on the lesson page.
To do this:
Make a copy of this free parent/technical help template page any time you need it. Update it with the step-by-step information (or screenshot photos) parents might need.
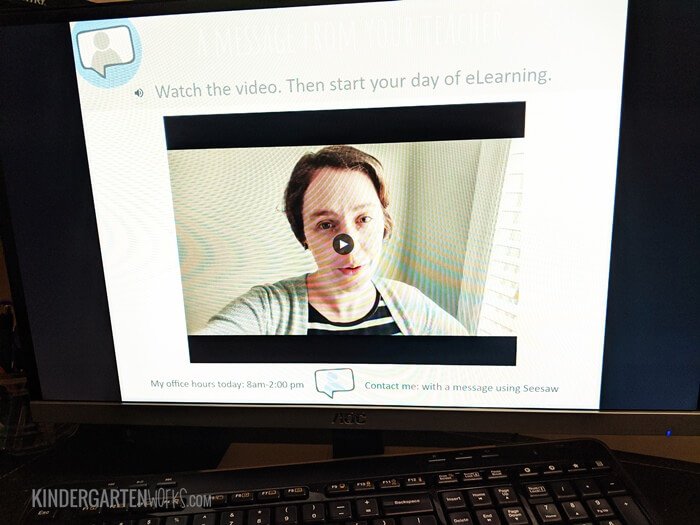
► Add a welcome or teacher contact page
You may want to create a welcome page or a teacher contact page to connect.
You can easily do this by inserting a little teacher talk bubble icon onto the home page.
Download then drag it onto your first slide and link it to a separate slide. You can even put a colored circle behind it to draw attention to it and make it appear as a button.
For example, if you want to record a video message, write a note or share your contact hours then create a slide that has the information needed.
Link the little teacher talk bubble icon to that new slide and it will be user-friendly information that opens in a new tab.
To do this:
Make a copy of this free teacher welcome/contact page any time you need it. Update it with your contact hours, a new video or written message to your students for the week.
► Introduce the template with a quick video tutorial
If you want to be sure that using this template goes off without a hitch for the first time, consider using a video tutorial to teach how to use it.
I’ve made two introduction videos to help you out!
One has the basic setup and one demonstrates all the features (how to use the speaker buttons, teacher bubble, and help buttons).
Or you can make your own tutorial. Use a tool like screencast-o-matic to record your computer screen and talk through how you want your students to use it.
Once they see it in action, they’ll be set to go.
► Add additional easy-to-navigate work
Okay – this is an advanced step – so use this only once you get a handle on how to use the main template above.
If you need students to do more than just three things per lesson page – then we have two options to consider.
Option 1: Create and link to a separate multi-page document
The first option is to create a multi-page separate Google doc or Google slide presentation. You might want to use this if you have multiple sight words or a multi-step project you want them to do.
Click to see a sight words example.
To do this:
Make your direction on your lesson page simple – like “work on our sight words.” Then link the number button to your separate multi-page document like the example above.
You can make a copy of this free multi-page template with icons that look like navigation buttons. Update it with your directions, content, etc. (and you can duplicate slides if you need more).
You can also do this on any slide you make by downloading these forward arrow, back arrow, all done checkmark icons and dragging them onto the pages. Then link them to the next page/previous page.
Remember – these will only work like clickable buttons when you share this as a presentation with your students.
Option 2: Use a template with more task buttons
The second option is to create an extended template that has more tasks.
It looks and feels just like the original sample you saw above, but has six tasks per homepage button instead of three. [See a sample]
We accomplish this by 1) duplicating the slides and 2) adding icons that act as navigation buttons. For example, this means students can easily get from the first page of reading tasks to the second page of reading tasks.
If you think this is more of what you need, you can download this extended template here. You can always delete extra tasks if you don’t need all six or delete an entire slide if you don’t need more than three tasks for a particular section.
Let’s wrap it up
There you have it – a free template to create your own distance learning lesson plans for kindergarten. I truly hope it can save you tons of time as you make plans and make this remote learning experience smooth for your students.
Plus, if you like it I’ve got more themes and layouts available.
Not sure what types of tasks to plug into your lesson plans? Or do you need help getting a jumpstart with lesson ideas?
Then check out these 40+ free distance-learning online games and activities for kindergarten:
Or find inspiration in this list of 19 things kinders can do independently for remote learning.
If you like what I do here on KindergartenWorks, then be sure to subscribe today. I look forward to sharing ideas with you weekly.


Are there different themes besides jungle?
Yes, indeed – here is where you can find them: https://www.teacherspayteachers.com/Store/Kindergartenworks/Category/Templates-eLearning-Distance-Learning-429387/Order:Alphabetical#seller_details_tabs.
– Leslie
Will you be bundling these anytime soon or shall I start buying! This is a GREAT resource!
Hi Megan,
These are set to go! Unfortunately, I’m not sure that these particular items can be bundled. So, I hope you can find all of the themes you could want ready to go. I’m so glad you like this resource.
Thanks,
Leslie
Hi!
First of all, thank you!! This is great!
My question is…are you able to put/link a google doc/pdf into one of the sections of the template so the kiddos can click on it, pull it up, and manipulate/write on it?
I see you can, but the question is how? I inserted a slide but when the link is clicked, it denies access.
Hi Barbara,
Instead of inserting the slide for students into this presentation, you want to link to a separate google slide file (or google doc). That way this template can still be clickable, and you keep the easy-to-use navigation, but the slide you want them to edit, can be edited.
That separate google doc/slide should have settings so that every student can edit it. You’ll also want to change the end of the link on that separate file to end in /copy so it creates a copy in their google drive (if your students have google classroom accounts).
Another option, if you’re using google classroom, is to assign the separate google slide and then link to that assignment instead.
Hi there. I am all new to this. 🙂 Is there something I need to do to the google slide before I link it to the template so every student can edit it? Also, can I add a pdf that students’ can edit or does it only work with google slide
Yes Barbara, you’re right. You can only have students edit a Google slide and not a PDF. To make a Google slide work for every student you need to 1) set the sharing settings so that your students can view and edit it 2) make the link to the google slide in your template end in /copy instead of /edit or /present. This will give every student their own copy in their google drive to edit. Does that help?
You are amazing!! I’m sure I’ve told you before, but I can’t tell you enough. I am so grateful. Would you mind sharing how I can create a button to match the orange buttons for steps? I teach a K/1 combination so I would like to change one to K. Thank you! Thanks You! for all your support =-)
Thanks Leanne for sharing your thoughts! You mean like changing a number button to a letter button? This job would have 2 parts.
1) Make a new google slide. Make an orange circle shape and put a text box with a large K on top. Then go to File > Download > PNG (image).
2) Click on the number button you want to change on your eLearning template. Select “replace image” and then upload your letter button you downloaded.
But, if I’m misunderstanding which button you want to replace – just let me know!
– Leslie
Sorry if someone already asked this, but how do you record your directions audio? I am trying and it’s not recognizing it as audio when I go to insert the audio. Thank you so much for the resource!
Hi Amber – here are the steps I used to record using my phone (https://www.kindergartenworks.com/teacher-tools/free-elearning-template-for-kindergarten/#audio). You’ll want to be sure it’s recorded as a .mp3 file with whatever app or program you record with. That way Google Slides will recognize it as an audio file. I hope that can help!
– Leslie
What did you use to record a video message? I am trying off my phone but when someone tries to view it says they don’t have access to it.
Hi Brooke, I just used my phone and then uploaded the video to my Google Drive.
But, you will have to change the settings for it in order for everyone to see it. That might be the small fix you need!
I’d recommend you create a folder that is set up with sharing settings for everything within that folder so that “anyone with the link can view” then I’d put everything in this same folder (like your video) so the sharing permissions are the same for everything new you add and you don’t have to remember to change those settings for everything you upload for eLearning purposes.
Does that help?
– Leslie
Do you have some of these lessons already made up that we can purchase? I just don’t have the time or technology sense to create them myself?
Hi Wendy, I’m sorry that I do not already have some available like that. Best wishes to you.
– Leslie
This is awesome and has made me feel a little better about the upcoming weeks. I have a question. I’m Trying to generate a weeks worth of lessons on both the lesson template and the sight word works. Can I create a link to share for each day? It takes me to the latest update on the templates without saving the old. It just replaces it? I hope that makes sense. I’m hoping to plan a few of these ahead of time.
Hi Terri – go to File > Make a copy. Then rename it with the date or something like that so you can keep multiple copies. Make a copy for each new day you want to plan. That way you can work ahead.
– Leslie
This is awesome! Thank you so much for sharing! I am excited for my kinder to use this.
One question…I am having trouble sharing this on google slides. My share button doesn’t have a drop down”more…”
Hi Jenn – click the small “advanced” text in the bottom right corner of the box that comes up when you click the yellow “share” button and see if that brings up extra options for you!
– Leslie
I can’t thank you enough. I know this is probably a whole other hour-long tutorial but how would you change the graphics?
Hi Lorena, you can change the background images to a plain color or another image of your choice. Click the “Background” button and either select a color or choose an image. You can also replace any image using the “replace image” button when you’ve clicked on a graphic.
– Leslie
Thank you so much Leslie!
Wow! This is amazing! It is so kind and generous of you to share this resource. It confirms what I’ve always known about teachers – teachers love collaborating and sharing ideas and resources with one another. Thanks for being a bright spot during this not so bright time in our lives … Thanks so much for sharing this and for giving such easy to follow directions!
This is fantastic and made my day! I am so excited to start using it. In the example version, you have a link that takes you to a scavenger hunt page… how did you make that page with the four parts??
Thank you!
Hi Chelsy, I added that scavenger hunt page as an additional bonus template just yesterday. Look in the speaker notes section for the download. I didn’t add it right in this post because I think the post was already super-long lol!
– Leslie
Fantastic… thank you so much for creating such a wonderful easy to use template during such a stressful time. This will save me so much stress and time! I have told everyone about this and LOVE it!
Thanks again!
I have has so much fun looking through this! Thanks so much for such an amazing resource! Could you guide me to the 4 square template (scavenger hunt) page.
Thanks!!
Hi Haley – you’re welcome! The scavenger hunt template is included in the free template (when you make a copy) – look below slide #1 in the speaker notes section where you see the copyright information. You’ll find it there as a bonus download!
– Leslie
You are amazing!
This is by far THE best kindergarten e-learning option I have seen…and boy have I been researching them lately. What you’ve created is truly wonderful. I cannot thank you enough for sharing this for FREE with your fellow teachers. THANK YOU! It has saved me hours of time!!
Thank you Dawn – I’m so glad this is helpful to you. The fact that it saves you hours is the best compliment I can get.
– Leslie
Leslie, this makes lesson planning so fun! 🙂 Thank you for sharing your hard work!!! ❤️
I’m so glad to hear this – thank you Lorena! Happy planning!
Hi, How do you add a video to the template page? Thanks for all of this. It is very helpful!!
Hi JoEllen, I’m so glad you’ve found this helpful. To add a video you go to:
1. Insert
2. Choose: Video
3. Paste the URL (web address) of the youtube video you want or do a youtube search for a video.
4. Click on the video you want and click: Select.
5. Then resize the video box to be bigger if you want.
You can currently only add youtube videos to a template page. If you want a video from schooltube or vimeo, you can just link the number button straight to the video.