
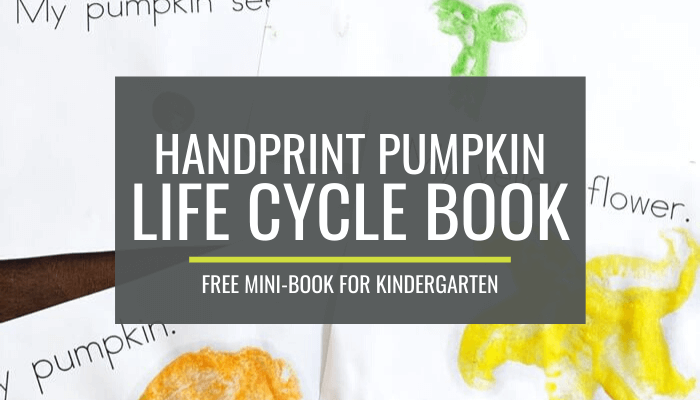
Simple Handprint Pumpkin Life Cycle Mini-Book
Make an emergent reader using handprints and fingerprints to recreate the life cycle of a pumpkin. Here is a free mini-book to print and use in kindergarten.
There is so much to cover when fall hits in the classroom. It’s a perfect time to cover favorite science topics like apples and pumpkins because, for many of us, it’s easy to bring this science topic right into the classroom or to take a field trip.
I created a mini-book that is simple to complete in the classroom so you can connect art and science when you cover how pumpkins grow. The art focus is on using prints.
Use this life cycle book after you have introduced the life cycle of a pumpkin, but before Halloween. The last page will be the hook that has them all excited to complete it. {wink}
Okay, now a small disclaimer: This may not be the perfect example of a “cycle” since we don’t actually go back to the seed at the end of the book. But it’s got all of the major steps a pumpkin goes through in its life so I figure it’s pretty darn close.
Students will use different portions of their non-dominant hand to recreate the life cycle steps of a pumpkin.
How to make it
First, download and print these free life cycle mini-book pages. You agree to these terms of use by doing so. [downloading help]
Grab a paintbrush, these colors of paint (use any kind of washable tempera paint or homemade flour fingerpaint as we did) and you’re set to go:
- brown (or gray or light yellow)
- yellow
- green
- orange
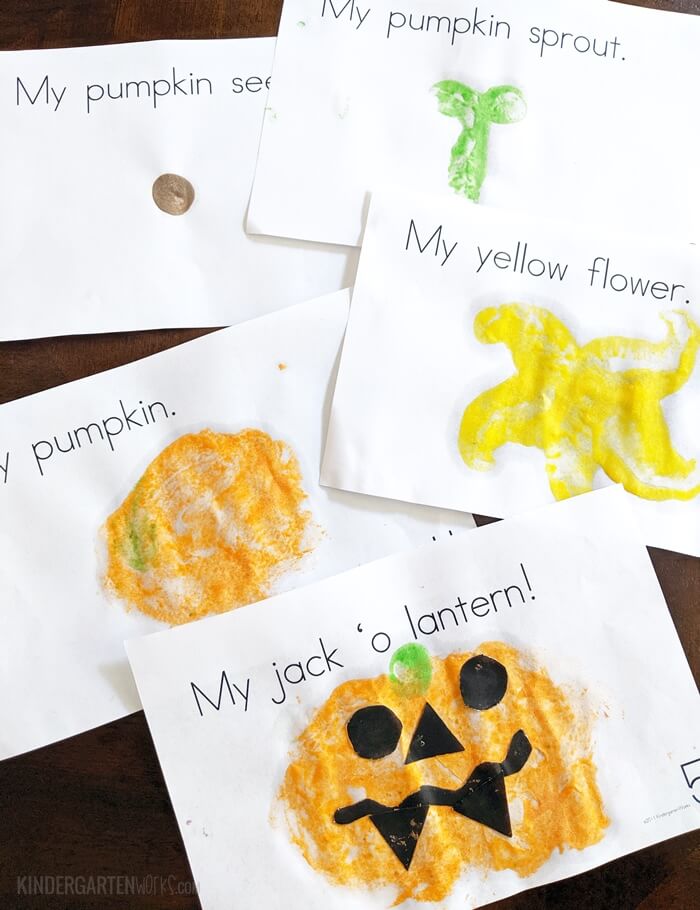
They paint their thumb for the seed.

And you can color or fingerpaint the background to look like dirt if you want.
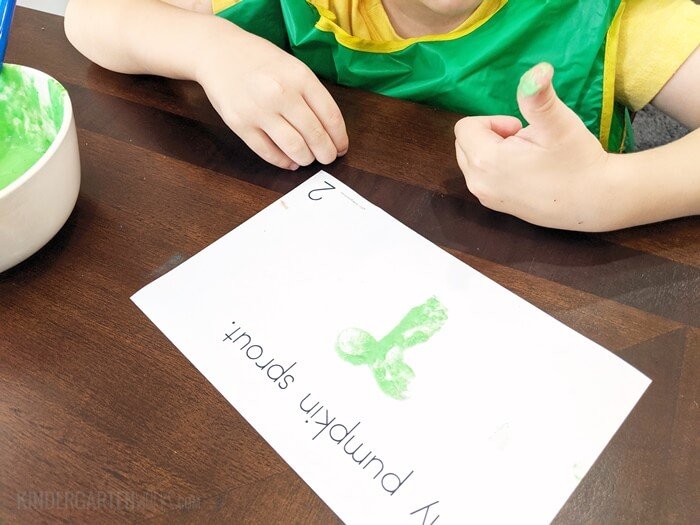
They paint their pinkie finger and thumbs for the pumpkin sprout with its first two leaves called the seed leaves.
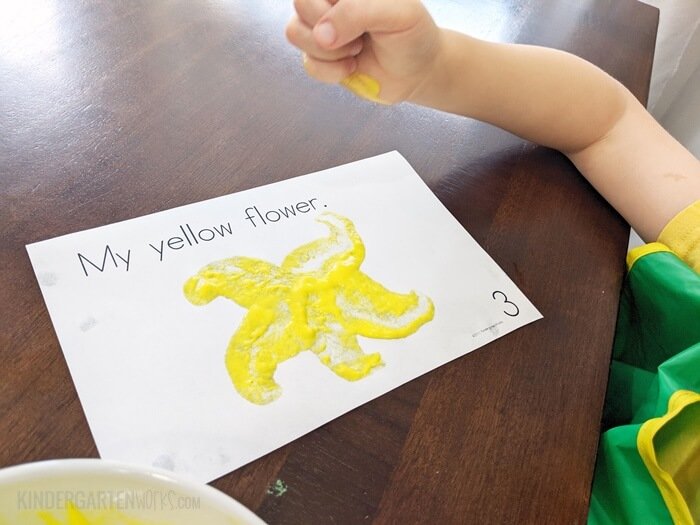
Then comes the pumpkin flower. For this step, kinders will paint and press the bottom of their fist five times in a circle.
Students then use their fist again to create a small pumpkin and then a second, larger pumpkin.
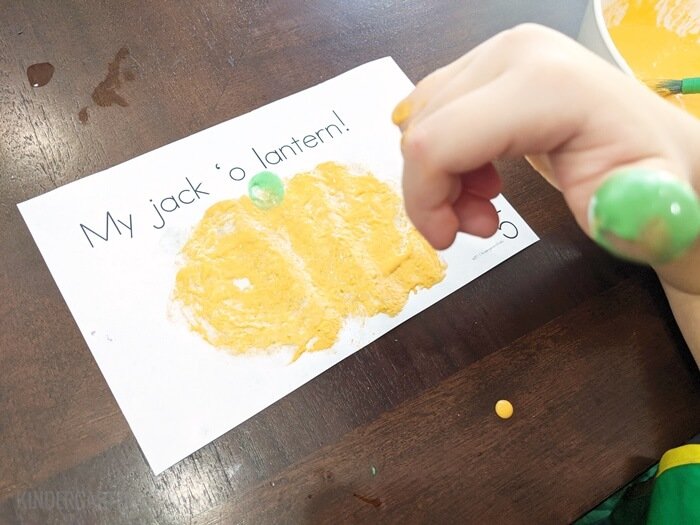
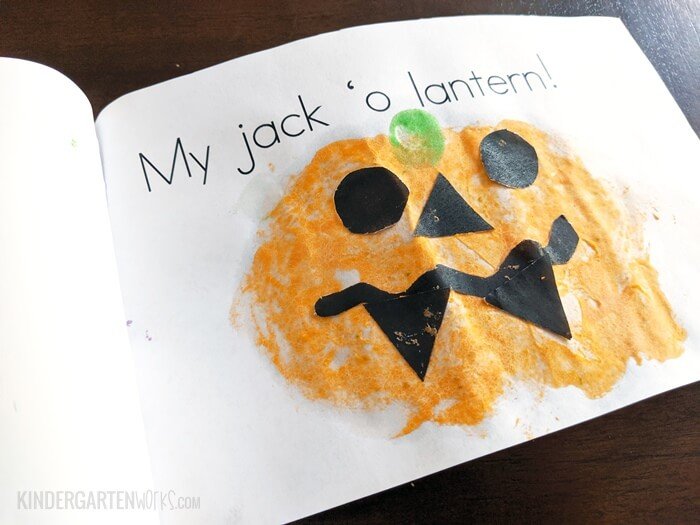
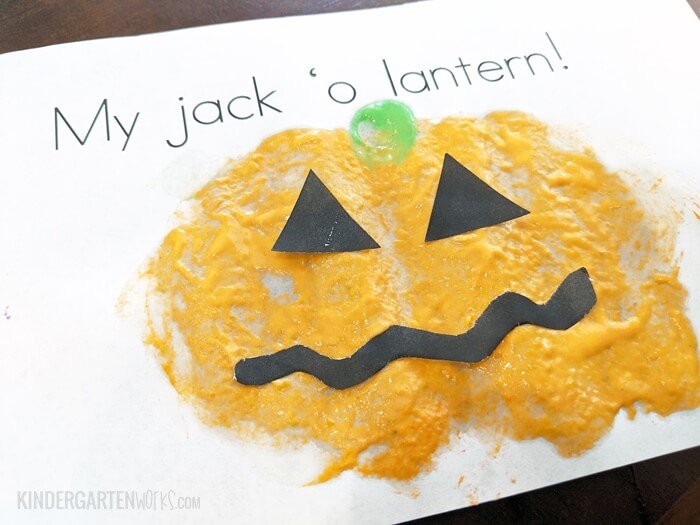
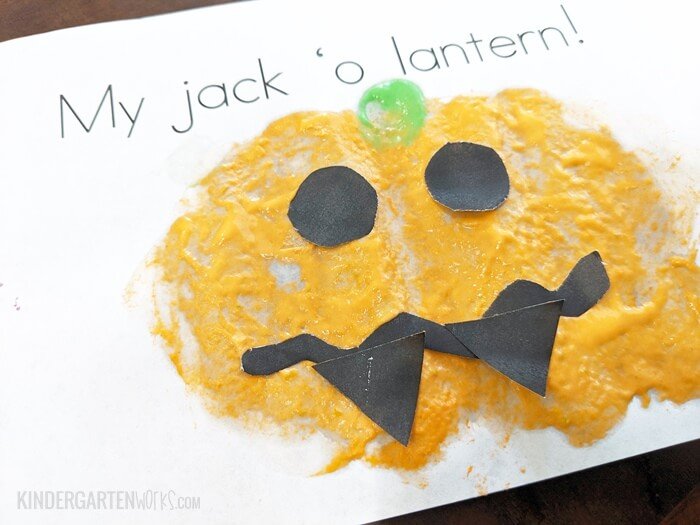
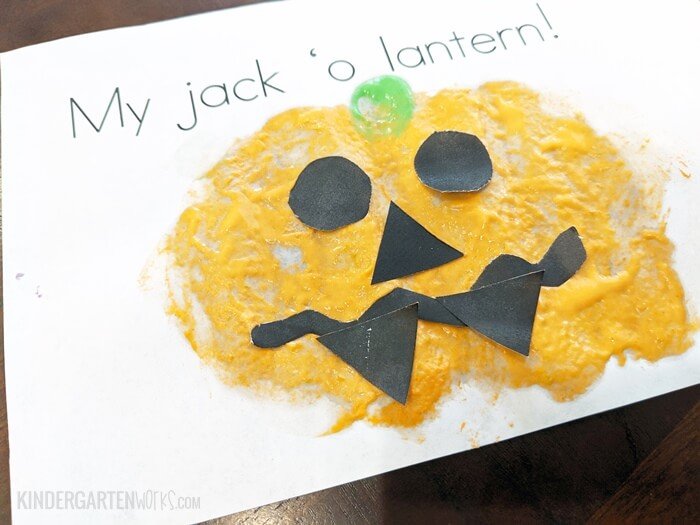
Then you finish it all off with cut-out pieces (or you could draw them on with black markers once dry) to make a jack o’ lantern.
When you staple all of the pages together, it creates a handmade emergent reader using “my” as the primary sight word. Super cute!
Each student can make a unique face for their jack o’ lantern since there are three shape options included for the eyes and nose and two different style mouths. But, if they want to get creative they can use additional pieces too (like turn triangle eyes into vampire-style teeth or a hair bow) to add more detail.
A few notes…
Painting alternatives
You could totally just use crayons, paper scraps (cut into simple shapes) or stamp pads for this activity too – but I wanted to explore using different parts of their hand to make prints and paint works so much better for that.
Planning for this activity
To plan for this activity, consider whether you’ll want to complete it all at once or perhaps do one page a day.
If you want to complete it all at once, have students to either put their name or initials on each page before they begin and don’t staple the pages together until they are dry. You’ll need a lot of counter space for the pages to dry.
How to maximize the activity
Don’t just send this book home once it’s dry. Make the most out of this activity by having them read it multiple times.
Have students read their completed books to one another or to read them with you during guided reading groups.
Encourage students to make their own pumpkin life cycle books during writer’s workshop. Let them add a sentence for each page of this book or create their own. There’s no reason they can’t use this project as inspiration – or cut out their illustrations to add to their own book with their own words and an illustrated background.
Let’s wrap it up
I hope this activity is a fun and simple one for you to use in your classroom. It’s a great way to connect some art (not a craft) with what we learn about pumpkins in kindergarten… and throw in a little reading practice too.
You may also like these ideas if you’re gearing up for Halloween this fall:
If you like what I do here on KindergartenWorks, then be sure to subscribe today. I look forward to sharing ideas with you weekly.
More Kindergarten Activities
- Year-Long Playdough Word Work Literacy Center
- Free Christmas Pokey Pinning Activity for Sight Words
- Valentine’s Day Card Collection Keepsake Book
- Hooray for 100! Cute Writing Activity for 100th Day of Kindergarten
What’s Next: Plug in a few free online pumpkin life cycle videos, games and read-alouds (all teacher pre-screened) into your computer lab lesson plans with one click!

Am I missing something? I’ve not read your post closely, but in looking at the photos, the paint seems “funny”…like you added something to it for added texture. Am I seeing something that’s not there? Is it just regular tempera paint?
Thanks!
Hi Dani,
Lol – it does kinda look funny! It’s very textured as it’s “flour” paint – a cheap way to create paint with flour, water, oil and food coloring. (Like this recipe: https://www.playdoughtoplato.com/homemade-flour-paint-recipe/ but ours was slightly different ) It’s not always the best for making prints – in fact I’d recommend a normal washable tempera paint you normally use in the classroom! But I needed paint quick and without having to restock the colors I needed from the store. I’ll be sure to add those details to the post. I hope this activity comes in handy for you!
– Leslie