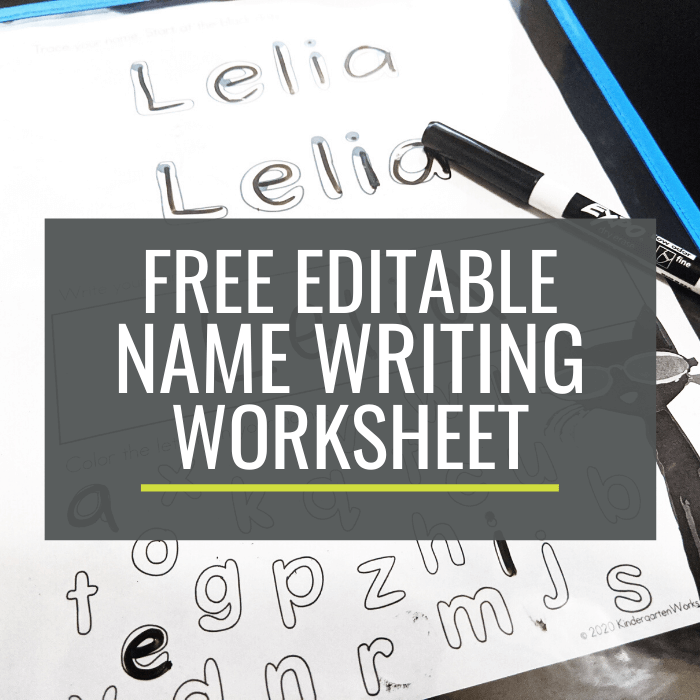
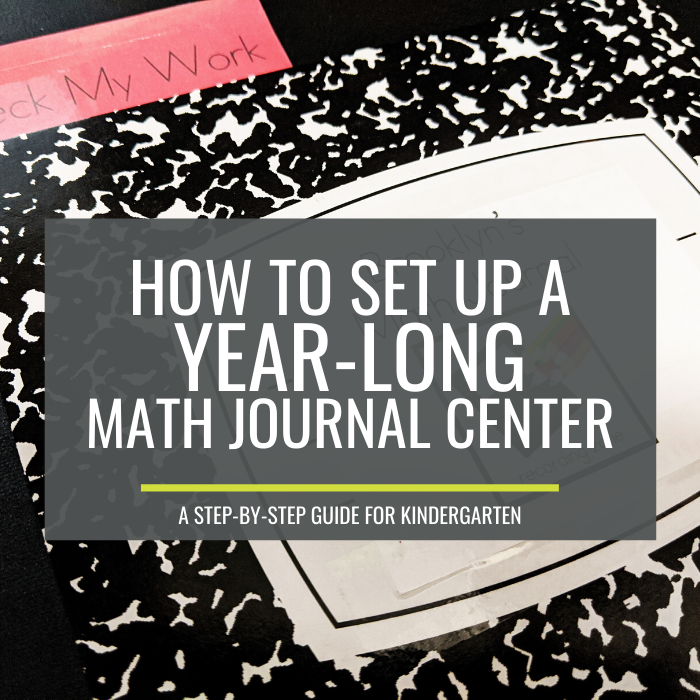
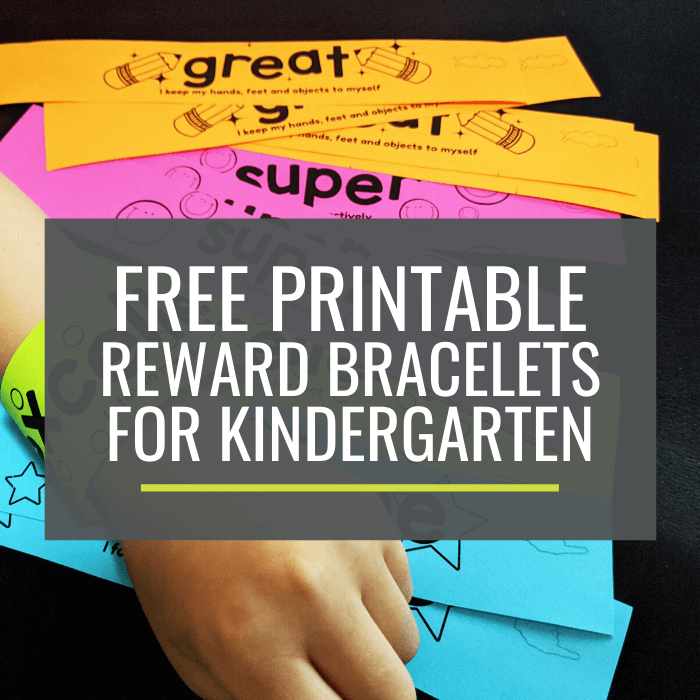
• Skip to primary navigation
  • Skip to main content
  • Skip to primary sidebar
KindergartenWorks logo
  • Reading
  • Math
  • Teacher
    Tools
  • Activities
    & Ideas
  • Classroom
    Management
  • Shop
menu icon
go to homepage
search icon
Homepage link
  • Reading
  • Math
  • Teacher Tools
  • Activities & Ideas
  • Classroom Management
  • Shop
×

Home

All Posts

Free Scaffolded Handwriting Worksheets for Kindergarten: Lowercase a-z

May 14, 2020 · 5 Comments

Free Scaffolded Handwriting Worksheets for kindergarten lowercase a-z

Teach how to form letters in kindergarten with scaffolded handwriting worksheets. Here are free worksheets to teach how to write lowercase letters from a to z.

Free Handwriting Worksheets for kindergarten lowercase a-z

There is an age-appropriate approach to teaching handwriting in kindergarten. It maybe a little different than you have learned. It's all about teaching how to form the letters - and learning how to form a maximum amount of letters with a few basic strokes.

Related: How to teach handwriting in kindergarten >>

So here are some letter writing practice sheets that are designed specifically to be age-appropriate for kindergarten. You can download them to use in your classroom.

A note about worksheets

Now, I have a confession. I loathe worksheets. Seriously.

But I also know that there are students who require additional practice with specific letters. That's why I made these - to support your students so they can learn to form any specific letter consistently.

So, pick the one or two letters that each student in your small group needs to work on print it for them.

Alternative ideas to using these just as worksheets would be to:

  • laminate and use with watercolor paints (wipe and dry when done)
  • slide it into a dry-erase sleeve and use with dry-erase markers
  • print it onto an overhead and use it with a vis-a-vis marker (rinse and dry when done)
  • print it onto an overhead (trim the corners) and use it on a large Magna Doodle
Create reusable handwriting worksheets
slide it into a dry-erase sleeve and use with dry-erase markers

Let's look at the design

These worksheets were designed to scaffold and guide students to forming these letters on their own.

Name writing

At the top, students write their name in a defined space - a rectangle. Students can see where their name should go, not go (as in outside of the lines) and learn more quickly appropriate letter sizing simply because it's a "closed" shape.

Letter writing

The students see the letter in various fonts [as marked in yellow] which helps the brain to recognize the general shape of the letter and not focus on small variants.

There is sufficient practice of the focus letter - 12 times to be exact. The scaffolding goes from: a path to follow with a starting dot [green] -- to a path to follow without a starting dot [blue] -- to no path to follow and no starting dot [orange].

Scaffolded handwriting worksheets for kindergarten

And sandwiched right in between is a shift [marked in pink]. To keep the brain and hand from just going on auto-pilot, the student must shift to practicing other letters that are formed similarly.

This is key.

Before they try it with less support, they first have to apply what they've practiced in the first two rows to the letters in the third. Then they need to reset once again to what they practiced the most, this time with less and finally with no support.

Creative connection

Lastly, because I loathe the 'closed' nature of worksheets I wanted to throw in a creative aspect to connect to the way letters are formed.

Students use the lines of the letter to create something [as marked in purple] out of the letter's shape. They can turn letters into anything - a monster, an animal, a vehicle, an invention, a person, an object, etc. It does not have to start with the letter!

Allowing students to think outside the box lets them make a personal connection to how this letter looks visually.

The way the letter looks and is formed is much more likely to stick with them if they have a personal connection to it.

Get the worksheets

These worksheets are free for personal use in your classroom. Download and print what you need.

Download handwriting a-z worksheets

[terms of use] [downloading help]

These worksheets feature the best handwriting font for kindergarten, but I've added additional starting dots for the letters that have multiple strokes to show where to start.

Let's wrap it up

There you have it - free worksheets to teach how to write lowercase letters from a to z. I hope the scaffolded design helps your students learn to form their letters correctly quickly.

It's my hope to make an uppercase set in the near future to add to this post.

If your students don't really need to practice individual letters but need to work on their names, then you want these free name writing practice sheets instead.

You should also be sure to have these handwriting letter stroke posters in your teaching tool arsenal. They are extremely handy to teach what letters have strokes in common - and that allows you to teach smart handwriting.

Handwriting - Free Handwriting Strokes Posters

If you like what I do here on KindergartenWorks, then be sure to subscribe today. I look forward to sharing ideas with you weekly.

More Handwriting in Kindergarten

  • 5 Quick Tips for Teaching Handwriting in K
  • Tracking Handwriting Progress: The Simple System that Works
  • Rainbow Writing Letter Book - What I Use the First 26 Days of Kindergarten

Free Class Book to Learn Names at the Beginning of Kindergarten

May 8, 2020 · Leave a Comment

Free Printable Class Book to Learn Names at the Beginning of Kindergarten

Make a class book of student names inspired by Chicka Chicka Boom Boom. Here is a free printable book cover and book template to make a class book in kindergarten.

Use this class book at the beginning of kindergarten to help your students learn each other's names and connect to literacy.

Let me share why I made this class book, explain how to make it yourself and give you the free download.

Why I made it

I like to start off the kindergarten year by reading Chicka Chicka Boom Boom as one of my first focused read-alouds.

It's not the first story I ever read aloud, but it is the first focused one, which means I'll re-read it, again and again, each day for a week.

Here is a preview of the book:

(affiliate) Get the book >>

It is a relatively easy book to extend to get the most out of learning the alphabet.

We turn it into a retell literacy center activity, use it to introduce our pokey pinning center and we also make this class book.

(In fact, I enjoy this story so much that the bright colors and polka dots from the borders of this book became details of my classroom decor and I made a coconut tree for a reading nook.)

Now, since it is for the beginning of the year it covers these main things:

  • student names
  • the alphabet
How to make a class book to learn each others names in kindergarten

By using both the alphabet and student names, put to text that they are familiar with (because you've read Chicka Chicka Boom Boom aloud a few times) then this becomes a book they can "read" independently.

So be sure to put this book into your library center and start a "books by us" basket. Your kinders will want to read and re-read books they've helped make over and over again.

How to make it

Here's how you can make it and do this activity with your new class of kindergarteners.

Begin by taking a set of photos that you have of your students (like the ones you took on the first day of school). Print those off small - in either wallet or 4x6 size.

Now, download this free class book template. [terms of use] [downloading help]

Then you'll want to print your front cover. You can print in color or black and white.

Next, print off the number of pages you need to fit the number of students you have. You'll want one page per student.

If you don't have 26 students (and I hope you don't, but I have) then use one of the pre-made pages for the beginning or the end of the alphabet (or both) to help you adjust the number of pages in your book to fit your class size.

Student page of class book of names in kindergarten

Give each student one lowercase letter stamp (it does not have to match any of the letters in their name) and they stamp it in the empty box on their paper.

Then they write their name on the line, glue their picture into the open space and color the page.

Next - have the class help you order the pages so that you can bind it into a class book.

Use an alphabet chart or sing the ABC song to help identify which letter comes next in order and the matching student brings up their page to add to the book.

Take the pages and bind them together. Read the class book as a read aloud the following day and make it available for students to read on their own.

Alternative options

Here are a few alternative ideas just in case you don't have all of the items above to complete this activity.

If you don't have letter stamps, you could print small square letter cards (like flashcards) on colorful paper and students could glue those in. I've added some to the download because I've got your back.

If you don't have photos of your students, they could draw a self-portrait. However, this does make it harder for the students to read the book indepently at the beginning of the year since they won't be able to recall everyone's name or illustration as successfully as they would with a photograph.

Let's wrap it up

There you have it - a class book inspired Chicka Chicka Boom Boom that focuses on student names and the alphabet. Just right for the beginning of kindergarten.

Are you ready for more teaching ideas for the beginning of the year? You should read what I use the first 26 days of school.

Rainbow Writing Letter Book

If you like what I do here on KindergartenWorks, then be sure to subscribe today. I look forward to sharing ideas with you weekly.

More Beginning of the Year

  • 4 Free First Day of School Printables
  • Teach How to Cut: The Lowdown on Scissors
  • 3 Tips to Make the First Week of School Easier

Free Printable Last Day of Kindergarten Memory Banner

May 7, 2020 · Leave a Comment

End of the Year Kindergarten Memory Page

Make end of the year memories together on the last day of kindergarten. Here is a free printable memory banner that can be a photo prop, coloring page or a last day of school art project.

Free Printable End of the Year Kindergarten Memory Banner

The end of the year is a busy time for teachers. Then comes the last day and we are filled with mixed emotions.

I try to ensure that I still have lots planned since there usually is a last minute change in scheduling for us.

This is my go-to last day of school activity for my kindergartners since it can easily fill up any amount of time. I also really love it since if it doesn't get done... then it is no big deal.

Let me show you how to make it as well as give you a few alternative ideas on how to use this memory banner in your classroom.

How to make a kindergarten memory banner

First, you'll want to download the free memory banner. [terms of use] [downloading help]

Next, you'll want to print the banners for your students. You can also print it onto 11x17 papers which makes this a very nice-sized project.

Students write their names at the bottom or on the back of their banner.

Then they trace the circles hard with crayons. (You could easily edit out this step if you need the project to move faster or are short on time.)

Kindergarten last day coloring page

Students use watercolors to paint each circle a different color.

I'll note that normally we don't finish painting the entire thing since I made lots of circles. But that was part of my plan. For real.

This project is pretty straight-forward. Now, let me explain the real beauty of this project.

Why I love this last day project

I love saving this for the last day of school.

Really.

After they are done painting, they get out our classroom stash of Clorox wipes and clean up everything!

It leaves the classroom really clean and in good shape for starting the summer off without my classroom looking like a bomb went off.

Later in the school day, after their paintings are done drying, I take a picture and email them home on the last day!

end of the year kindergarten memory banner {printable}

This project is also really flexible. Here are my thoughts:

If they don't finish painting - it's no big deal. It's an easy time filler that allows them to have one last chance to be creative in the classroom.

The end of the day is extremely hard to plan for time-wise - there's just so much that can change last minute. To have an extra activity that is very flexible, like this one, is ideal.

You could easily just have your students color this page too.

Or you could print it off on bright, colored paper and use it as a photo prop to take last day pictures. Add the year or date with a Sharpie marker and you're set to go. {wink}

And lastly, if you wanted students to all sign the back of each other's pages like a yearbook page - this page can totally work for that too.

If this project doesn't fit your idea of a last day of school project... how about  a cute handprint poem?

Kindergarten End of the Year Hand Print handprint poem

If you like what I do here on KindergartenWorks, then be sure to subscribe today. I look forward to sharing ideas with you weekly.

More End of the Year

  • End of the Year Quick Photo Ideas
  • End of the Year Printable Photo Props
  • How to Do End of the Year Class Sorts

Free End of the Year Kindergarten Handprint Poem

May 6, 2020 · Leave a Comment

Kindergarten End of the Year Hand Print handprint poem

The end of the school year brings lots of work and pulling a year's worth of learning together. Learning about each other, life, academics, problem solving and more.

How can a kindergarten teacher use activities to help pull it together?

Here is one idea where the finished product is more for the parents but is a great discussion starter and lead-in activity.

Kindergarten End of the Year Handprint Poem

Let me share what inspired this poem, how to do the activity, and how it can kick off all our your end of the year wrap-up activities.

This handprint poem was inspired by Little Miss Kindergarten's end of the year Kindergarten Handprint Poem which I used for years and loved.

But since we don't "graduate" from kindergarten in our building and honestly, some kindergarten students will be ours again next year in kindergarten. So, I wrote a similar poem that just says "completed" kindergarten.

How to do the activity

First, download the free printable handprint poem. [terms of use] [downloading help]

end of the year kindergarten handprint poem

You can blow the poem up onto 11x17 paper or print it as is - one copy for each student.

Students write their name on the paper and then rub a tiny amount of soap all over their hands without any water (like hand sanitizer). Think of this as a primer to help wash off the paint later.

Next, let your students chose from three colors of paint and paint their hands - one at a time and then push their handprints onto the paper at the bottom.

I think that they turned out very beautiful just as they are on white paper, so we didn't add anything, although you could definitely let them paint a frame or add a construction paper background.

What we do after the activity

This cute end of the year handprint poems activity kicks off our wrap up activities - with the right note of celebration (without the craziness), excitement for next year, and appreciation for kindergarten.

Here's what we do after making these handprint poems in the days following.

We focus on how far we've come and we read (affiliate) First Day Jitters. They can finally understand the twist ending by the end of kindergarten. {wink}

We tour first grade classrooms (while they're away at a special) and head back to our classroom to write a letter to our new teacher - even if we don't know who it is yet.

I attach their letter to the back of their student profile sheet so when we do our class sorts, the teacher can be familiar with their writing, work and get a warm note from their new student.

Plus, we usually enjoy a few end of the year celebrations.

End of the Year Celebration Ideas for Kindergarten and graduation alternatives

If you like what I do here on KindergartenWorks, then be sure to subscribe today. I look forward to sharing ideas with you weekly.

More End of the Year

  • 6 End of the Year Celebration Ideas for Kindergarten
  • I'm Done! Free Kindergarten Banner
  • End of the Year Quick Photo Ideas

Free Editable Goodbye Letter for the End of the Year

Apr 29, 2020 · 10 Comments

It can be hard to say goodbye to a class of students at the end of the year. It can be even harder when the year has been full of ups and downs, challenges and overcomings, good moments, and rough ones.

Here is a free goodbye letter to give to your students this is editable. I hope that this letter template can help make it a little easier to say goodbye whether your year was smooth or tough.

Because, after all, these kids are forever "your kids." Just because they change grade levels doesn't mean they stop being "yours."

You can use the poem as is, or change it to fit your year and what you want to say to each child. I'll even show you how to send it digitally in case your school is closed.

What does the letter say?

This goodbye letter from the teacher says,

"I’m so glad I was your teacher I’ve come to love you so. I can’t believe the end is here. I hate to see you go. You’re such a star And I love you so dearly. You light up my life, I mean that sincerely. Remember all the fun we had In all the things we did, But most of all remember…You’re a very special kid!"

This poem is originally from Learning with Mrs. Leeby (thank you for sharing) and I think it is so sweet.

How to make yours

The beauty in this goodbye letter is that if it doesn't quite fit what you want to say at the end of the year, you can change it.

This editable teacher letter is available in Google Slides so you can edit the text.

Let's go over how you can make your own using this free template.

Step 1 - Make a copy

Okay, so you'll need to decide do you just want to the poem, or do you want to put a picture along with the poem?

Click here to make a copy of the goodbye letter template so you can get started. [terms of use] [downloading help]

If you want to add a photo (either of you and your class or you and that student) then click here to make a copy of this goodbye letter template. [terms of use] [downloading help]

Step 2 - Make it yours

Make any changes to the text or letter you want to appear on every student's page. For example: type in your name at the bottom of the letter and make any changes to the poem.

You can delete the kindergarten date tag at the bottom if you teach another grade level or you can add a text box to write in something different altogether. (But I'll update that date every year so you can come back and download an updated version for next year)

Now, duplicate the page for as many students as you have.

Step 3 - Customize for each student

Now, type in a student's name on each page and you're ready to print or share.

If you are using the template that includes the pictures, then click on the picture on each page and select "Replace image." Then choose a picture to upload in its place. You can use the "crop" function to edit your photo a bit.

Step 4 - Share your letter

When your letters are finished, it's time to either print or share them digitally.

You can easily send all of your pages to print - on white or colored paper. Both look great.

Or click on each slide and go to File > Download > JPEG image (.jpg, current slide). This will save every slide page as an image that you can share through email, Seesaw, or however you like to share individual photos with your students.

Let's wrap it up

This free goodbye letter from the teacher hopefully makes saying goodbye, which is tough at the end of the school year, a little bit easier since it's already put into words for you.

Are you preparing for the last day of kindergarten? You might want to make this handprint poem with your class too.

Kindergarten End of the Year Hand Print handprint poem

If you like what I do here on KindergartenWorks, then be sure to subscribe today. I look forward to sharing ideas with you weekly.

More End of the Year

  • Sorting your class at the end of the year
  • End of the year quick photo ideas
  • 6 End of the year celebration ideas for kindergarten

How to Make Monster Munch for a Halloween Classroom Snack

Apr 21, 2020 · Leave a Comment

Monster Munch is a super easy snack to make for a classroom snack on Halloween. Here's how to create this easy snack for your Halloween party.

This monster munch recipe is a snack mix that's both easy and very popular with kindergarteners. Let me show you how to make it and give you a freebie so your class can make it in a center or in pre-made baggies.

This idea came originally from Kathy, an awesome KindergartenWorks teacher-peep. {{Thanks Kathy!}} I've added my own tips and freebies to make it a cinch for you to use in your classroom too.

What is monster munch?

Monster munch is a snack mix. Really, it can include whatever works for you and your classroom (considering allergies).

Think of a basic snack mix or trail mix recipe and add in a Halloween flavor like candy corns.

Just remember to balance the sweet and salty factor so it's tasty. It's popular with kids because they can help make it and often has lots of favorite things included.

I like a larger amount of cereal, popcorn, and pretzel-type items since those are less expensive to buy in large quantities. And then I sprinkle in some of the other, sweeter ingredients.

We make a similar snack mix again in February for Valentine's Day but make it "cupcake crunch" and they love it then too!

How to make it

To make monster munch, pick 5 items from this list to make your monster munch snack:

  • Cereal (Cheerios, Rice Chex, Kix, Apple Jacks, Froot Loops)
  • Plain or salted popcorn
  • M&M's, Reeses Pieces or Chocolate chips
  • Pretzels
  • Candy Corn
  • Mini-marshmallows
  • Raisins

Then pick a scooper to match the quantity of each ingredient you want in your mix.

Tablespoons, ¼ cups, handfuls and plastic spoons all work nicely in kindergarten.

You, the teacher, create your own "recipe" by scooping set amounts into a baggie or container until you like the ratio.

Now - you can either prepare this as a center or station or pre-make baggies for students (or have a parent volunteer make it).

How to make snack mix as a center

If you want to put out the ingredients and scoopers so students can make this on their own as a center or station activity, then here's what you do.

First, download these editable recipe cards. You agree to these terms of use by doing so. [downloading help] You'll need to open them in Powerpoint or upload them to Google Slides.

Then, copy and paste the clipart (the numbers and food ingredients) onto the page(s) you like the best. Duplicate any slides you like or need more of.

There are:

  • large table cards if you want to put one ingredient with one card like a buffet line.
  • a recipe card with a white background (as pictured above)
  • recipe card with gray lines for steps

You could also call this Monster Mash, Scarecrow Crunch or Halloween Haunt Mix for fun. There are recipe cards with these alternative titles included.

Last, print the recipe cards and students will count or scoop (based on your instructions) the items into a Ziploc bag, small plastic cup or onto a napkin, plate and shake, stir or mix it up before eating.

Easy activity and snack all in one!

How to premake the snack

This snack mix is best when it is made fresh or the night before. That way things like pretzels and cereal don't have time to absorb moisture from any of the other ingredients and get stale.

If you're including marshmallows - wait until the last possible minute to add those since they can get rock hard when mixed with other ingredients.

Simply use the ratio of ingredients you created for your "recipe" into individual snack-size or sandwich-size Ziploc bags.

Print these cute printable monster munch toppers for Ziploc bags to make these ready to go.

If you want to call it Monster Mash, Scarecrow Crunch or Halloween Haunt Mix then there are these alternative topper titles included.

After you print them, cut the toppers out and fold them over the top of the sealed baggie. Then staple in the middle to secure the topper on.

You can easily send this home since it's already all contained.

Let's wrap it up

There you have it. An easy snack mix that's easy and just right for fall when you add candy corns. I hope that directions for how to make it and the freebie make it a cinch to use as your Halloween classroom snack.

Looking for more activities for Halloween? Then check out these easy Halloween activities for kindergarten.

If you like what I do here on KindergartenWorks, then be sure to subscribe today. I look forward to sharing ideas with you weekly.

More Kindergarten Teaching Ideas

  • 16 Quick Phonics Videos for Kindergarten
  • Easy and Fun Thanksgiving Activities for Kindergarten
  • Simple Handprint Pumpkin Life Cycle Book

12 Kindergarten Videos for Earth Day – Read, Move and Learn!

Apr 17, 2020 · Leave a Comment

Want to find kindergarten-friendly videos that hit the mark in April? Here is a list of teacher-recommended videos for Earth Day.

It can be fun to change up our normal routine in the classroom (or via distance learning) for Earth Day and add a video or two into our lesson plans.

For example, you just might need a learning video to supplement what you're teaching or a brain break video that can help get the wiggles out.

Whatever you need - here are Earth day-themed books read aloud, brain break videos and some learning videos that can help you teach.

Earth Day-themed stories

These stories are good read-alouds for Earth Day. They are fun and nod to Earth Day while sticking to what is age-appropriate for kindergarten.

Earth Day: An Alphabet Book

Explore the creatures and things of the Earth while expressing being thankful for them all in this sweet ABC book. From acorns, coconuts and beagles to yaks, yams and zebras - this book covers a bunch in just under 3 minutes.

I Am Earth

Find out how the Earth is a perfect planet and how it works (in simple terms) to have the things we count on: seasons, gravity, day and night.

Earth Day Every Day

A little girl finds ways to plant trees, conserve energy and reuse items families don't need anymore. This book is told from the perspective of a little girl in school and is wonderfully relatable for young students.

Miss Fox's Class Goes Green

Help students understand the meaning of "going green," a phrase that students hear a bunch in regards to Earth Day. They will also recognize some small things people do to contribute to keeping Earth well-taken care of.

Brain breaks

Brain breaks give students the opportunity to break from focusing by moving to music in order to recharge.

If I Were a Tree

This repetitive song encourages kids to jump when the song says "trunk," stick out their arms for branches, whooosh their hands for "leaves, reach for apples and then repeat each action as the song lists more and more tree parts.

It's created for a Jewish holiday (the mention of Happy Tu B'shevat the last 3 seconds of the video), but I think it could work in the classroom too.

If You're a Kid... [Earth Day Remix]

What's a kindergarten video list without a Harry Kindergarten video? To get kids moving - create a dance movement to match each thing kids can do to conserve energy.

Learning videos

These videos are meant to help you teach mini-concepts in the classroom. They focus on how plants grow, the planet Earth and knowing the continents on the planet.

This way students are encouraged to know more about the planet which can empower them to come up with their own meaningful ideas on how to care for our Earth.

How Do Seeds Become Plants?

Students learn how seeds grow into plants by covering important basics quickly (all in under 4 mins) like seed coats, germination, roots and shoots.

The perfect video before you plant seeds as a class!

Watch a Seed Grow Into a Plant

Now that the previous video covered the basics - watch them happen fast!

I think this video of a seed time-lapsed as it's growing over 25 days is beautiful. It's a great way to see the roots, sprout and minute changes that happen when a seed grows into a plant.

Peep Plants a Seed

Peep learns just how much work can go into tending for growing a seed into a sunflower.

This quick video shows how sunlight and water are required and great encouragement while waiting for those seeds you planted in your sprout houses to sprout.

The Planet Earth Song

This funky-town sounding song explains what our Earth is composed of, how it rotates and how it's "just right" for life. I like that the words are shown on the screen and that it's just over 2 minutes long.

This is Our World - a Song for Earth Day

This song would be perfect to sing for a class performance for Earth Day. It repeats, "This is our Earth, this is our home, this is our time, this the place we belong."

Seven Continents Song

I think that learning the names of the continents is a great way to expand their understanding of the Earth. I think learning the 5 oceans is a great idea too.

Plus, it's not even a 2-minute video which means you can show it again. You know they will want to watch it again. Don't they pretty much say that for every video? {wink}

Kinder-friendly version

Do you want to make this list available to your students in a kinder-friendly way?

Use this Earth Day videos page on CoolKindergarten that links to most of these videos and five bonus Earth Day-themed free games online.

Conclusion

There you have it - videos that teachers are using for Earth Day in their kindergarten classrooms.

I hope that these books read aloud, exercise videos and learning videos are helpful as you teach.

Thanks to all of the kindergarten teachers who chimed in to share their favorites on the KindergartenWorks facebook page!

What videos did I miss that you love to share with your class for Earth Day? Tell us in the comments.

More Kindergarten Ideas and Activities

  • 16 Quick Phonics Videos for Kindergarten
  • Free End of the Year Kindergarten Certificates and Diplomas
  • Studying Butterflies for Kids

How to Take Virtual Attendance in Kindergarten

Apr 3, 2020 · 15 Comments

Are you looking for an easy solution to take virtual attendance for distance learning? This simple attendance solution is free and easy to use - even in kindergarten.

You can take attendance using a Google form. It is completely free and it's pretty straight forward for students - even kinders.

Let me show you how it can be used in kindergarten to make taking virtual attendance (daily, weekly, whatever) a breeze.

I've even made you a template to copy and save you loads of time. You'll just need to type in your class list and you're pretty much set to go.

Or, you can just jump to see what other teachers are doing to take attendance.

Taking attendance during a distance learning situation may or may not be required by your school - but if it is - check out this solution that will take you minutes to set up and last as long as you need it to.

If you're looking for a way to compile lessons that is easy for kindergarten students to navigate, then check out my free distance learning template that'll teach you how.

Use a kinder-friendly Google form

You can make a kinder-friendly gorm using Google Forms. Really!

You make a form. They click their name and submit. Instant virtual check-in.

Here's my example:

Every student has their own animal icon to help them quickly find their name on the class list.

After they click their name (or the icon) they can write a note to the teacher, which is optional, or they can simply click "submit."

That's how easy it is!

Want to try it out for yourself - here - pretend you're a student and click your name from my pretend sign-in sheet and click submit.

Ta-daaah! See, that took you only a few seconds.

And on the backend (the part only the teacher sees) I can see who and when they checked in, all in a spreadsheet.

After you create the form, you share a link to it either daily, weekly or add it to your eLearning lesson plan template and ask students to check-in.

Want to use this for your classroom? Let's do it.

How to make it

Okay, if you don't already have a Google account set up, click here do that. Now let's set up your form and I'll make it super quick by sharing my template with you.

animal images designed by freepik

Set up the form

To make this form for yourself, here are the steps:

  1. Click here to make a copy of the form I created (with animal icons for up to 29 students) or find another theme
  2. Change any text (like the title or description) to make it your own. You can keep or delete the "Optional: Send a note to the teacher" section.
  3. Change the names in the list to your students' names. You can delete or rearrange the list anyway you'd like (or pick and choose which icons you like best).
  4. Click the little "preview" eye icon in the top right-hand corner to see what your form will look like to your students.

Set up your spreadsheet

Now that your form is made, you'll want to get everything into a nice spreadsheet when students submit their attendance.

Here's how to do that:

  1. Click the "Responses" tab above your form
  2. Click the green "create spreadsheet" icon in the top right-hand corner
  3. Choose "Create a new spreadsheet" and you can name it in the underlined area. Name it something like "Attendance 2020"
  4. Click "Create"
  5. A new window opens up with your spreadsheet. You'll see a timestamp (the date and time) and the student's name. Save this webpage in your bookmarks, as a shortcut on your desktop or someplace you can find it again easily.

Optional: Go back to your form and select the three dots menu (next to the green spreadsheet icon). Click "Get email notification for new responses."

Your form is done and functioning. You're ready to take attendance!

[Jump to: How to share the form to take attendance]

Customize the form

Here are a few options that you can do to customize your form - making it completely yours. But you don't have to do any of these things!

Use the little "preview" eye icon in the top right-hand corner anytime you customize something to see what your form will look like to your students.

Change the confirmation message

You can change the message that students see after they click submit.

I currently have a message that says, "Thanks for checking in today. Have a wonderful rest of your day!" but you can edit that.

To do this:

Click the "settings gear" in the top right-hand corner of your window. Click on the "Presentation" tab and change the confirmation message text.

Change the picture icons

I added picture icons because it makes it beginning-reader friendly. You don't have to use the same images as in my example. There are more options!

Do you have student photos you can use? Upload those.

Do you use ClassDojo? Download your class' avatars and then upload those.

Download your ClssDojo icons to put into your attendance form

I've made three more themed-versions for you. You can copy these forms and customize them to fit your needs.

monster images from freepik

How cute are these monsters? Click here to get this attendance form with monster icons for up to 29 students.

classroom supplies clipart from Teacher Karma

Or maybe you want to go bold and bright? Click here to get this attendance form with school supplies icons for up to 29 students.

images from freepik

Or perhaps we can go a bit whimsical. Click here to get this attendance form with childlike-drawn illustrations for up to 24 students.

Changing the picture icons may take a little bit of time upfront - if you decide to upload your own - but you only have to set it up once.

Students simply fill out the same form every day. *Magic*

Change the header

If you want to change the header image or delete it altogether - go for it!

You can download any of these sample headers to use for your classroom.

  • Who is here? [included in most templates above]
  • Who is here? with no icon
  • Attendance
  • Great job learning!
  • Who is here? pastel colors [included in child-like illustrations template]

To use one: Click the paint palette icon in the top right-hand corner and upload your new header image.

Share the form

Once your form setup is complete, you need to share it with your students.

You can do this as often as needed! Just use whatever platform you're already using to communicate with families - Google Classroom, ClassDojo, Seesaw, etc.

Get the URL link

To get a link to share:

  1. Click the purple "Send" button
  2. Click the link icon next to "Send via"
  3. Click "Shorten URL"
  4. Click "Copy"

Now paste that link for your students.

Boom! Done.

Add a link in your eLearning template

If you're using my easy-to-navigate eLearning templates, then here is how you can link to the attendance form in the template.

If you're using a weekly template, then change the checkmark link at the bottom of each daily task list to link to your attendance form.

That way when they've completed the list of tasks, they click the checkmark and it takes them to the attendance form.

If you're using any template, you'll want to simply make a clickable link somewhere for students to use.

Insert a raised hand "I'm here!" icon - like this one - onto your template. Download then drag it onto any slide and link it to your attendance form.

Here are some examples of where you can put it.

Put it at the top of your template along with a text box that reminds students to check-in or add it to the bottom of the first slide (the homepage) for students to do before they start their work.

If creating a form isn't for you, then maybe you'll like some of these other ideas shared by teachers.

How are other teachers taking attendance?

Here is what other teachers and families shared about how they are checking in or how they take attendance during this extended remote-learning situation.

You'll see there is a pretty big range of answers.

"My son’s teacher poses a question they need to answer. Ex. Who said just said, “Just keep swimming”! or a math equation." - A. A.

"I have to check in with all my families every day. I use remind. I am able to send info and receive pictures of my students and I am able to share lots of things with them as well." - K. A.

"Participation - parent/student has to check-in in some way with me once a week." - J. R.

"No attendance required for us. We have done daily virtual morning meetings, which they LOVE! I have only had a few miss those, and will check in with families if I don’t have contact for more than a few days." - B. M.

"Yes. Every day, I pick one activity and they have to send me a picture of them doing it." - N. G.

"Not attendance per say, but we need to keep track of the assignments they complete to count for attendance." - B.W.

"One of my girls has to email her attendance daily, the other just comments on the morning message in Google Classroom from her teacher that she's starting her work for the day, and that's how they're keeping track." - L. D.

"My district set up a way [to take attendance] on the school website, a list is sent out to teachers of who didn’t sign in and we check that against who is doing work within our platforms - responding with who is turning in work. My kids (jr high age) fill in a google form each day." - H. K.

"We have a google form that parents select and submit their child’s name from each morning. I share the link each day at 9am." - K. K.

"Yes! Families have to take a picture of their work packet (I sent home, one for each day with a worksheet for phonics and math) and send to me via email or on the Remind app. Then I have to submit to my administration." - H. M-D.

"We are keeping a log of parent and student contact. I am so fortunate that my district’s priority is supporting families. We are providing activities, but the goal is to maintain current development, wherever that might be." - S. C.

There are a lot of options out there - pick what is sustainable for you and what makes it easiest for both you and your students.

Let's wrap it up

No matter what your school has decided about distance learning, remember that this too shall pass.

While this distance learning situation is going to last undoubtedly longer than any of us could want - we can do our best to make it easier for our families and students.

It's my hope that this attendance form and the list of ideas from other teachers can help you find a simple and easy way to take attendance (if you're required to) so that you can make it easier on your kinders.

More on distance learning

  • How to share online lesson plans with Google Classroom, Seesaw or ClassDojo
  • 19 things kindergartners can do *by themselves* for distance learning
  • Free, easy-to-navigate eLearning template for kindergarten

19 Things Kindergartners Can Do For Distance Learning

Mar 25, 2020 · 6 Comments

As kindergarten teachers, we do our best to plan lessons, activities, and tasks that help our students learn.

While doing this over the internet definitely looks different for distance learning or remote learning - the nature of what we are doing is really still the same.

So here is a list of things kindergartners can do almost independently online.

I hope this list can save you time lesson planning or give you inspiration when you feel like you've hit a wall.

General activities kinders can do

Here is a list of things students can do from afar:

  • Count, read or show their work to someone in their household
  • Take photos of their work (works for both paper and non-paper stuff)
  • Record a video project, response or answer
  • Complete a google slide activity
  • Play a single online game or activity
  • Complete a Seesaw activity
  • Work for a set amount of time on a web-based curriculum like freckle.com
  • Watch a teacher-made video
  • Watch an educational video
  • Do a familiar chart or chant (alphabet, sight words, etc.)
  • Read along with a story online
  • Teach flashcards to a family member, stuffed animal or toy (letter sounds, sight words, etc.)
  • Create a collection of things/objects
  • Do a guided drawing
  • Find things in their environment (I-spy, scavenger hunt, etc.)
  • Write a simple story with illustrations
  • Rainbow write sight words
  • Add a sentence to their work
  • Do a drawing challenge
  • Move, dance or sing along with an educational video

Now, I'm sure that I missed something from this list - so be sure to share your ideas in the comments too.

Tips for planning distance learning lessons

Let's look at a couple of ideas that can help you plan your long-term distance lessons.

Parents will need some tech support upfront

In the beginning, as everyone is getting used to learning online - for a snow day or for extended remote learning circumstances - parents will most likely need some technical support.

So, start simple. Don't jump right into a full day of lessons - simply focus on a tutorial or two - or even a "how-to" video to help everyone settle into the new routine.

Teach parents and kinders how to login to any external websites or apps you may be using (Freckle.com, Seesaw, etc.). Keep those tutorials handy so that you can share them again as needed.

Build a routine

Whatever tasks you choose for your distance learning - it might be wise and helpful if you try to build a simple routine.

It will make lesson planning easier - you can just plug in what makes sense for your students to do next. And if you have a routine it will also help students and parents know what to expect.

Remember, this is a huge undertaking for parents. I mean - so huge.

Pick a themed day

Even if you set a routine, you can easily pump in a little fun sporadically or even once a week. Simply pick one day of the week that you change up what you do.

Here are a few, fun ideas. Pick one of these from this list to get started.

- Take a day off from eLearning day

This is exactly what it is. Assign no work and give everyone the much-needed pressure release of filling the gap while away from school.

- Guided drawing day

Choose an online video or PDF tutorial to teach students how to draw something. Then students write to a prompt in connection with their picture.

- Pick-a-theme day

Go for a theme! Choose online games, videos, and stories all around a theme. We do this naturally in the classroom, so why not extend it into a set of eLearning lesson plans too?

- Memories day

Ask students to share a special memory they have of school. What is something they really enjoyed this year? Share in the memories and reconnect even though everyone is far apart.

- Yoga/PE day

You can add a specials class for fun each week! Find an online yoga class for kids - like a Cosmic Kids lesson. Or give your students a quick workout like this 5-minute move lesson.

- Practical life day

Assign your students to help with a chore around the house and document it.

- Teach us Tuesday

Our students all have unique interests and being at home is a perfect time for them to dig deep into those interests. Have students share something they've been doing, learning about, or reading about - that they think others might like too.

Maybe they've helped cook this week, made a playdough sculpture, learned about dinosaurs, watched a Bug Wars video and learned about the raspy-bulldog cricket's mandibles, or helped do a family puzzle.

Embrace the unique nature of what learning at home can be and reinforce that they are learning all the time.

Create your own videos

Your students want to see you! So, host a Google Hangout Meet or Zoom conference time so everyone can check in via video chat every once in a while.

But don't forget that you can create your own videos and share them with your class if you can't quite find the right content online.

Here are some video ideas you can record:

  • read aloud
  • word work lesson on a whiteboard or with manipulative letters
  • class alphabet or sight word chart
  • daily calendar time (modified)
  • guided drawing
  • writing mini-lesson
  • writing prompt question + hook

Use your phone, sit near a window for natural light and hit the record button. Use Google Drive to upload your videos and share them with students.

Let's wrap it up

When you combine this list of things kindergartners can do online with a routine and one fun day each week - you can hopefully save time lesson planning - or find the inspiration to keep going.

Are you looking for specific games and activities online?

Start with this list of my 40+ favorite sites and free, online games for kindergarten.

And if you need a kindergarten-friendly way to share lesson plans, then check out my free, easy-to-navigate eLearning template for kindergarten.

If you like what I do here on KindergartenWorks, then be sure to subscribe today. I look forward to sharing ideas with you weekly.

Free, Easy-to-Navigate eLearning Template for Kindergarten

Mar 25, 2020 · 37 Comments

Create your own distance learning lesson plans with this free template. Make navigation easy and simple for your kindergarten students and their parents.

This free eLearning template is designed for kindergarten (though it could also work for other grades) and uses Google Slides. Let me show you how it works, how to use it and customize it.

I hope it can save you tons of time and make a smooth eLearning experience for your students.

Plus, if you like it I've got more themes available (and more are currently being added).

[feast_advanced_jump_to]

How it works

Students will click through three pages of tasks - pages that you determine the content. The navigation between pages is all set up for you and makes getting to each thing easy.

Give this sample distance learning template a test drive so you can see for yourself.

See sample eLearning template

Here's a video to see how it works:

The home page has buttons that link to each slide and the navigation bar at the top helps students get back to the home page.

How to use this template

To use this template, decide how long this content will last for. Is this one day's worth of learning or a week's worth? You choose!

Set up 1-3 tasks on each page. You write text directions (and you can add audio directions - I'll show you how below).

You link easy-to-use number buttons to help students navigate to content online, when applicable.

You can even delete tasks, so if you only want one or two tasks on a page - you can do that.

How to customize this template

So, how do you customize this template?

Click the free download button below to create a copy in your Google Drive to begin.

Download free template

[You agree to these terms of use by copying this template.]

Start playing around with it or continue reading for a step-by-step tutorial.

1. Change learning page titles

Change the text on slide 1 to read, learn, bonus or whatever titles you want.

Some titles to consider:

  • reading, math, writing
  • learn, practice, do
  • do each day, finish this week, for fun
  • watch, try, complete

Now, make the titles on the following pages/slides match what you picked.

Pick titles that can work every time you want to use this template - consistency will make it easier for you to plan and for your students to know what to expect.

2. Create simple tasks with directions

For each slide, plan a set of three simple tasks.

Click the text next to each task number and write your own directions.

Be direct and short. Read it aloud to check if it's enough direction for both your student and their parent to understand the task.

The tasks can be a continuation of one another or they can be three separate tasks.

Tip! If you don't want a task - delete the # circle, the directions text box and the shaded background.

3. Create task links

If the task should link to a video, website, another google doc or activity (like this scavenger hunt) then click on the number button and paste the link.

Complete this step for every task that should have a link.

An alternative to making the task number the link is to make another icon clickable that leads students where you want them to go.

Make icon for distance learning template

To do this: Add a little icon - like this link chain one. Download then drag it onto your task and link it.

4. Share it with students

When you're done you will share this slide as a presentation with your students. This makes the links all work like buttons.

(If you simply share it as a Google slides document that they can edit, then you lose that navigation feature.)

To share:

  1. Click the yellow share button in the top right corner
  2. Click the drop-down arrow and choose "More..."
  3. Select "On - Anyone with the link"
  4. Click "Save"
  5. Click "Copy link"

If that doesn't work for you then try:

  1. Click the yellow share button in the top right corner
  2. Click the small letters in the bottom right corner "Advanced"
  3. Select "Change..."
  4. Click "On - Anyone with the link"
  5. Change "Access: (Anyone no sign-in required) Can view"
  6. Click "Save"

Get ready to paste the link but before you share it - change the end of the link to /present instead of /edit.

Original link: https://docs.google.com/presentation/d/1234567890/edit?usp=sharing
Change to: https://docs.google.com/presentation/d/1234567890/present

Share that new, changed link however you connect with your students - Google Classroom*, Facebook, Seesaw, Classdojo, etc.

If you want to test out what yours looks like - open a new incognito window (using Google Chrome) and it'll show you what your students might see.

There you have it - a set of easy-to-navigate plans for your kinders to use at home!

Note:

*How to share in Google Classroom

*Sharing in Google Classroom requires that you paste your link in the assignment's (or material's) instructions box. Unfortunately, if you just try to use the linking icon or paperclip icon to attach the slideshow, it will automatically revert to showing the editable slides.

More ideas to customize this template

Now, let's talk about making this a super-smooth experience with a few ways you can customize this template even more (especially for distance learning purposes).

You don't have to do any of these things, but they may be helpful to you and your families.

► Add the date

If you plan to reuse this same template every day or from week to week, then consider adding the date (using a text box) on the front page.

This will help families know when the work is assigned for at-a-glance.

If you plan to reuse any of these templates - then you want to make a new copy for each new set of plans.

To do this:

  1. Go to: File
  2. Click: Copy
  3. Select: Entire presentation
  4. Rename it with the date or another way you can tell them apart
  5. Choose the folder where you want to keep them organized and select the sharing settings (most likely you'll want to share it with the same people)
  6. Click OK
  7. Your new template will open in a new window to work on

► Tips for videos

Link to a fullscreen video

If you want to link to a Youtube video, you can sometimes change the link to show the video fullscreen and not show the extra "distraction stuff" you normally see on Youtube's website.

Check out how different this video is presented compared to this one.

Right?!? Big difference in what is shown to students.

To do this change your Youtube video URL:

Original link: https://www.youtube.com/watch?v=123456789
Change to: https://www.youtube.com/embed/123456789

Note that this can't be done with every video, though, so you do have to test it out because some people turn off the ability to let their videos be embedded.

Create a separate video page

You can also embed a YouTube video into another Google slide. Choose Insert > Video.

Do this if you don't want to send your students to YouTube's website.

To do this:

Make a copy of this free video template page anytime you need it. Edit it and insert your video. Then link your task number button to this new page.

► Add audio directions for non-readers

In my sample, you can click on the audio speaker buttons and hear the directions read out loud. (*Google drive does have limits on how many times a file can be played so you currently may not be able to play my example audio files due to this post's popularity)

I did this to make it easier for beginning reader kinders. This way a parent doesn't necessarily have to help with every step. *hopefully*

Here's how you can add audio directions.

1. Record your directions with your phone

The easiest way to record audio directions is to use your phone.

You'll need a voice recording app that will let you share files to your google drive and be logged into your google drive on your phone.

The app I used on my android is called - Voice Recorder. I liked it because it let me make a bunch of recordings and upload them to my google drive folder all at once instead of having to upload each individual file.

Here's how to record your own audio directions using the Voice Recorder app:

  1. Click the red circle record button and start talking
  2. Push the red square to stop recording
  3. Type in a title for the file name that will help you identify the direction. Click OK
  4. Repeat for each direction

I also found a comparable option called Rev that's available on both google play and the app store (though it won't let you upload a bunch of recordings at once).

Think smart! How can you create a general set of audio directions that you can use for multiple days worth of lessons?

2. Upload your recordings

Here's how to upload your own audio directions using the Voice Recorder app to your Google Drive folder:

  1. Click the headphones to see all recordings
  2. Click the hamburger menu ☰ and select "Share multi-file"
  3. Select all of your direction files and click "Share"
  4. Save them to your Google drive destination (You should only have to select this once. It will remember this destination each time.)

Be sure to make the sharing settings of the Google Drive folder where you save all of your audio directions set to "Anyone with the link can view."

3. Insert your direction recordings into your lesson plans

Google makes it easy to insert your audio directions. Really!

You go to Insert > Audio and select the audio direction file you want.

The little speaker icon will automatically appear, already attached to your audio file and you drag it to wherever you want it to appear on the slide.

► Add additional parent or technical help directions

Maybe you want to assign something that needs additional directions or login steps. What do you do?

Well, my recommendation is to keep your template as simple and as consistent as possible. Put that additional information on a separate Google Slide document or page.

Add a little help icon - like this one. Download then drag it onto your task and link it to the separate help document.

Add a help icon for parents

For example, if you need to explain how to login to a website then create a slide that has the information needed in step-by-step directions for parents.

Link the little help icon to that slide and parents can follow the directions using the information that opens in a new tab.

Here is an example of a parent tutorial page (used with permission from Bree at Kindergarten Whale Tales).

It gives parents the support they need without cluttering up what your students see on the lesson page.

To do this:

Make a copy of this free parent/technical help template page any time you need it. Update it with the step-by-step information (or screenshot photos) parents might need.

► Add a welcome or teacher contact page

You may want to create a welcome page or a teacher contact page to connect.

You can easily do this by inserting a little teacher talk bubble icon onto the home page.

Download then drag it onto your first slide and link it to a separate slide. You can even put a colored circle behind it to draw attention to it and make it appear as a button.

For example, if you want to record a video message, write a note or share your contact hours then create a slide that has the information needed.

Link the little teacher talk bubble icon to that new slide and it will be user-friendly information that opens in a new tab.

To do this:

Make a copy of this free teacher welcome/contact page any time you need it. Update it with your contact hours, a new video or written message to your students for the week.

► Introduce the template with a quick video tutorial

If you want to be sure that using this template goes off without a hitch for the first time, consider using a video tutorial to teach how to use it.

I've made two introduction videos to help you out!

One has the basic setup and one demonstrates all the features (how to use the speaker buttons, teacher bubble, and help buttons).

Or you can make your own tutorial. Use a tool like screencast-o-matic to record your computer screen and talk through how you want your students to use it.

Once they see it in action, they'll be set to go.

► Add additional easy-to-navigate work

Okay - this is an advanced step - so use this only once you get a handle on how to use the main template above.

If you need students to do more than just three things per lesson page - then we have two options to consider.

Option 1: Create and link to a separate multi-page document

The first option is to create a multi-page separate Google doc or Google slide presentation. You might want to use this if you have multiple sight words or a multi-step project you want them to do.

Click to see a sight words example.

To do this:

Make your direction on your lesson page simple - like "work on our sight words." Then link the number button to your separate multi-page document like the example above.

You can make a copy of this free multi-page template with icons that look like navigation buttons. Update it with your directions, content, etc. (and you can duplicate slides if you need more).

You can also do this on any slide you make by downloading these forward arrow, back arrow, all done checkmark icons and dragging them onto the pages. Then link them to the next page/previous page.

Remember - these will only work like clickable buttons when you share this as a presentation with your students.

Option 2: Use a template with more task buttons

The second option is to create an extended template that has more tasks.

It looks and feels just like the original sample you saw above, but has six tasks per homepage button instead of three. [See a sample]

We accomplish this by 1) duplicating the slides and 2) adding icons that act as navigation buttons. For example, this means students can easily get from the first page of reading tasks to the second page of reading tasks.

If you think this is more of what you need, you can download this extended template here. You can always delete extra tasks if you don't need all six or delete an entire slide if you don't need more than three tasks for a particular section.

Let's wrap it up

There you have it - a free template to create your own distance learning lesson plans for kindergarten. I truly hope it can save you tons of time as you make plans and make this remote learning experience smooth for your students.

Plus, if you like it I've got more themes and layouts available.

Not sure what types of tasks to plug into your lesson plans? Or do you need help getting a jumpstart with lesson ideas?

Then check out these 40+ free distance-learning online games and activities for kindergarten:

Or find inspiration in this list of 19 things kinders can do independently for remote learning.

If you like what I do here on KindergartenWorks, then be sure to subscribe today. I look forward to sharing ideas with you weekly.

40+ Free Distance-Learning Online Games and Activities for Kindergarten (and How to Use Them)

Mar 21, 2020 · 6 Comments

Let's skip the search and go straight for the most helpful free online games for kindergarten.

If you're in the midst of planning for distance learning or staring down a possible future of eLearning lesson plans, then use these free games and activities online to help you keep your lesson plans engaging for students.

Let's look at my favorite games and activities online for kindergarten and then talk about how to actually use them for eLearning with more ideas from other teachers about how to stay connected to your class and plan lessons when you can't be in the classroom.

[feast_advanced_jump_to]

Online sites for kindergarten

These sites I'm listing require no logins, no passwords and are free to use. And I've used them with kindergarten, so they are teacher-approved. Some sites may require minimal help with navigation or directions (if there is no audio-support) but the content is all right-on for kindergarten.

You're probably familiar with these already, but I'm also going to include some specific games below too.

  1. Coolkindergarten.com has both language arts and math games for kindergarten plus a small selection of read-alouds and math videos. All items match kindergarten standards.
  2. Starfall.com is a classic beginning learner website. Use both the alphabet and learn to read page for the maximum benefit and a couple of the kindergarten math activities are good too.
  3. Turtlediary.com has both reading and math games. You might find it helpful to explore their list of games.
  4. Brightly storytime is a quality set of read-alouds hosted on youtube.
  5. Storyline online has recently added some new videos and the quality of these videos is great.
  6. Freckle.com is a differentiation platform with built-in activities for ELA, math, social studies and science.

Now let's look at some specific games that are free to use.

Online games specific to kindergarten standards

Some of these specific games come from the websites above, but there are extra ones too.

I hope having them listed out by skill is helpful when you're making your lesson plans.

Reading games & activities

All of these reading games are my favorites on these reading sub-skills for the second semester.

Blending cvc words

  • Short a machine
  • Chicken blast
  • CVC blitz (expand to fullscreen)
  • Bird hop and panda pop (choose CVC)
  • CVC word scramble
  • Odd and Bob
  • Buried treasure
  • Dragon's den
  • Viking words

Short vowels

  • Short a song / Short a story
  • Short e song / Short e story
  • Short i song / Short i story
  • Short o song / Short o story
  • Short u song / Short u story
  • Phonics pop (set 1, 2, 3 or 4 have short vowels included)
  • Vowels save the day song

Sight words

  • Sight word memory
  • Spooky spellings (year 1, books 1 and/or 2)
  • Submarine spelling (pre-primer)
  • Bird hop and panda pop (choose sight words or sight words 2)
  • Tricky words
  • Guess word shapes
  • Snowball fight
  • Sight word smash
  • Sight word safari

Digraphs

  • Chunk that word song
  • Th digraph mini-lesson
  • Sh digraph mini-lesson
  • Ch digraph mini-lesson
  • Dinosaur eggs (select sh, th, ch and ee)
  • Shark sounds (select ch, sh, th and oo)
  • Bird hop and panda pop (choose wh, ch, sh, th)
  • Phonics pop

Long vowels

  • Silent e video
  • Long vowel memory
  • Long a word building / long a picture hunt / long a story
  • Long i word building / long i story
  • Long o word building / long o picture hunt / long o story
  • Long u word building / long u story
  • Lonely long vowels song
  • Magic e mix and match
  • Bird hop and panda pop (choose magic e)
  • Phonics pop

Math games & activities

All of these math games are my favorites on these math sub-skills for the second semester.

Making numbers

  • Subitizing ten frame race
  • Fuzzbugs (choose 5 or 10)

Composing and decomposing 11-19+

  • Candy machine
  • Base ten bingo (select tens)
  • Shark numbers (up to 29, 59 or 99)
  • Base ten snakes (choose count and write - either ones or tens)

Counting

  • Whack a mole (set a goal of 45)

2D and 3D shapes

  • Highlight 2D shapes
  • Shape invasion line-up
  • Superhero solve with shapes
  • Shapes shoot

Addition and subtraction

  • Subtraction balloon pop
  • First to 5
  • Monster memory

Science games & activities

  • turtle wax (simple machines: slides)
  • desert dive teeter-totter (simple machines: lever)

Clever online activities

Here is a list of new or temporary activities that have become available. These can help you round out your lesson plans.

Guided drawing

Keep your guided drawing activities alive with Mo Willems drawing lessons.

These lessons are taught by the author of the Pigeon books and you could ask your students to write a simple sentence to go with their completed picture. Use this "Don't Let the Pigeon" writing activity as an example.

At-home safari or scavenger hunts

Let your students take a daily home safari. Encourage them to draw a picture of their favorite thing they learned while watching or to draw what the featured animal eats.

Send your students on daily scavenger hunts. Post a picture each day with their list - get kids moving, away from their screens and get them outdoors.

Free curriculum

You can sign your class up for freckle.com, which is free. Ask students to work for 15-20 minutes a day.

You may also want to check out links or activity ideas in this kindergarten online free curriculum.

How to make online lesson plans

Okay, so now that we have these fantastic links, what do we do with them?

Well, it depends on what you have to work with.

For some teachers, this means that you are putting out work for your students using Seesaw, ClassDojo, Google Classroom or something your school already has in place for eLearning.

In general, you can pick the sites or specific games you want by copying the site (or game) URL and pasting it in your favorite method of sharing work.

Here are a few of the current favorite ways teachers are using these tools right now.

Google Classroom

I made a free eLearning template just for you to use in kindergarten! Check out how to make an easy-to-navigate eLearning lesson plan using a Google Slide presentation.

Seesaw

Heidi, a kindergarten teacher, said:

"You can post PDFS, links to websites, video or voice recordings of yourself. Kids can type, draw, write, voice or video record responses. They have many safety settings for keeping things private or public with in your classroom. There is a database of assignments teachers have shared that you can use as well. It was simple to learn and implement for teachers, students and now parents!! Today, since routines have finally settled - I am able to video personal messages to kids about their work."

Amber has these recommendations for teachers using Seesaw for the first time:

"Use the caption on the bottom of each Seesaw page to record your instructions and put your YouTube videos into Slides and link those instead of just linking a YouTube video. It will be easier for your kids to navigate. Make sure you make your Slides share setting to 'Anyone with link can view' or it’ll prompt them to sign in to Google."

Click here to set yourself up on Seesaw and invite your classroom families to use it.

For an eLearning situation, be sure to have parents download the class app too (in addition to the families app).

ClassDojo

Here is an example from a fellow kindergarten teacher Robin on how she is currently using ClassDojo for eLearning.

Robin, a kindergarten teacher, said:

"I am using ClassDojo. I read a story to my students each morning using the video feature. Then I upload videos from youTube, link some worksheets to do and then give them a daily challenge to do or a scavenger hunt. Anything that gets them moving!

Many parents say my students love hearing me read to them. The book I read relates to their challenge or activity.

For example, today I read, "Animal Strike at the Zoo... It's True." I challenged my students to find things that have strips, spots or were orange/yellow. I also asked to hear for rhyming words in the story and then in their activity, I then gave them words that they would have come up with the rhyme for. I also encouraged them to go to the Cincinnati Zoo today at 3 pm for a live Facebook field trip on an animal in the cat family (hence the look for strips, spots orange/yellow challenge).

Everything in my room is cross-curricula in someway... Why stop just because we aren't in school. Welcome to eLearning!"

When asked - how do you share worksheets and do put the videos in class story?

Robin shared:

"I share worksheets by having them as a PDF and linking them. Videos are from youtube that we have done in class and students are familiar with (no new content). I copy the link and share them on the class story.

Sharing on class story, you can see who has viewed it and such. It is a way to get it out to all your parents at once. Sending messages would allow for more individualized videos or activities for students."

Kathy also shared:

"Student accounts are needed for Portfolios, where students show their work. There are teacher instructions under Teacher Resources.

You can open a post on either your phone or laptop and a "Record" icon will be in the window. Click and start recording yourself.

You can suspend your phone over a paper for a mini-lesson, like a document camera. It works great. I used a rack from under my sink, but I’ve seen pics where teachers have placed their phone within a stack of full cans of food. "

Click here to set yourself up on ClassDojo and invite your classroom families to use it.

How to connect with students while out of the classroom

Are you looking for more ideas on what to assign to your students or ways to create eLearning lesson plans?

Here are some fantastic ideas from teachers who are actually in the midst of figuring this out themselves.

Use photo and video activities

Have students post photos or videos to share their completed assignments.

Elizabeth said, "I use ClassDojo. It's fun to see their video and photos. I posted assignments like find 17 objects and share them or count to 75. For photos, I asked them to post drawings about stories."

Create a routine

Develop a routine to make lesson planning easier. This will also greatly help families know what to expect and be able to execute the plans over the long haul.

Debra, a kindergarten teacher said, "My team and I created lesson plans for a week and release the activities for the day. We post a link to a story and tell them to draw or write what it was about, some math problems, a sight word activity, a CVC word activity, an activity to complete on Mobymax, etc."

Remember the familiar things

Your classroom experience is unique. Don't let your kiddos miss out on that with these little things they've become so used to.

Record yourself doing your sight word chant, alphabet chart or reading books aloud. Pick some things that are routine and familiar and do them just the way you would in class.

Take a picture of your alphabet chart or your digraphs charts - upload them and ask students to practice them aloud.

In conclusion

It may feel like a scramble to get started with distance learning, but - you've got this!

I wanted to thank the teachers featured here who've already jumped in head first to eLearning and shared their knowledge with the rest of us.

I hope this list can help you keep your lesson plans engaging for students and makes planning for distance learning easier.

Just like anything new, there is going to be a learning curve, but you can adjust and keep your students learning.

Just remember to be thoughtful about the workload for parents who have a new learning curve too.

More kindergarten online

  • 16 Quick phonics videos for kindergarten
  • 10 Color song videos for kindergarten
  • 19 Things kindergartners can do for distance learning

13 Kindergarten Videos for St. Patrick's Day – Read, Move and Learn!

Mar 6, 2020 · Leave a Comment

Want to find kindergarten-friendly videos that hit the mark in March? Here is a list of teacher-recommended videos for St. Patrick's Day.

It can be fun to change up our normal routine in the classroom on a holiday and add a video or two into our lesson plans.

For example, you just might need a learning video that can help bring the level of excitement down from a holiday party or a brain break video that can help get the wiggles out.

Whatever you need - here are St. Patrick's day-themed books read aloud, brain break videos and some learning videos that can help you teach.

St. Patrick's-themed stories

These stories are good read-alouds for St. Patrick's Day. They are fun and keep the holiday light.

The Gingerbread Man and the Leprechaun Loose at School

This cartoon-style book features the famous Gingerbread that gets loose in the school. This sequel is a great rhyming story of a leprechaun who makes a mess and is caught by the class with the help of the Gingerbread Man.

This book is a little bit longer, so choose this one if you have 10 minutes to spare.

How to Catch a Leprechaun

If you like to decorate your classroom for St. Patrick's Day - or make traps - your students will like this story. Follow a leprechaun through his mischief as he challenged kids to make a better trap next year.

This story is a short one - pick this if you have less than 5 minutes to spare.

Pete the Cat: The Great Leprechaun Chase

We all love Pete the Cat. Here is his St. Patrick's Day story version. He meets Clover, the leprechaun only to find out he is already a lucky cat.

This is a good lesson-learned story to talk about how the choices we make can create our own good luck. Read this is you have at least 7 minutes.

The Night Before St. Patrick's Day

In this story, a brother and sister set up to catch a leprechaun and have his gold only to be tricked. This is a simple rhyming story that takes students on a St. Patrick's Day adventure.

Pick this story if you only 5 minutes.

Ten Lucky Leprechauns

Keep adding one more leprechaun in this quick rhyming story - all the way to ten. They find the gold and that the true treasure is having friends.

This story is just right if you have less than 5 minutes.

There Was An Old Lady Who Swallowed a Clover

There Was an Old Lady books are pretty much a classic in the world of kindergarten. This St. Patrick's Day-themed version features a clover, daisy, butterfly, bird, fiddle, pot of gold and she giggles out a rainbow.

This book is quick - just under 5 minutes.

So, after looking at this list, it seems like every book out there for St. Patrick's day is pretty much a rhyming book. Good thing you got a lot of practice reading rhymes during Read Across America week {wink}

Brain breaks

Brain breaks give students the opportunity to break from focusing by moving to music in order to recharge.

I Said a-Boom-Chicka-Boom

Students get up to move to this watch-repeat-style video. Students try to catch a leprechaun, pick a four-leaf clover, dance an Irish jig, draw a shamrock, play with green slime and find a pot of gold.

The end gets a bit silly but it'll help get the wiggles out in just under 5 minutes.

Hula Hoopy St. Patrick's Day

This video features dancers dressed in green doing moves with hula hoops.

While it's not your typical repeat-after-me brain break - I think kids would enjoy watching this first, then trying out some of their own moves with your school's recess stash of hula hoops for an extended brain-break outdoors.

Play the video again once you're outside (no watching - just listening) and see what they come up with inspired by the music.

Learning videos

These videos are meant to help you teach mini-concepts in the classroom.

The Month of March

Learn about the month of March with Jack Hartmann - how many days there are in March, when St. Patrick's Day is and that it ushers in spring.

St. Patrick's Day Counting

What would a video series be without a Harry Kindergarten video? {wink}

Help a lucky leprechaun count his gold to 20 by ones, to 30 by twos, to 100 by fives, and to 100 by tens.

I'm a Little Leprechaun

Need a poem or song to teach shared reading? Try this little leprechaun song to the tune of "I'm a Little Teapot."

Here are the words to print out for your shared reading:

I'm a little leprechaun, dressed in green. The tiniest man that you have seen. If you ever catch me, so it's told, I'll give you my big pot of gold.

I'm a little leprechaun, imagine that with my little green boots and my big green hat. At the end of the rainbow, so it's told, you will find my pot of gold.

Or get this printout of a slightly different song version.

Green Color Song

Since St. Patrick's day is all about the green, use this classic Frog Street Press song to help your students learn to spell green independently.

Find more: Ten color songs to teach how to spell color words >>

G-R-E-E-N St. Patrick's Day Song

This is an alternative version of learning how to spell green using a St. Patrick's day-theme. It repeats just like the song BINGO and kids clap on the missing letters.

Kinder-friendly version

Do you want to make this list available to your students in a kinder-friendly way?

Use this St. Patrick's Day videos page on CoolKindergarten that links to most of these videos and three bonus St. Patrick-themed free games online.

Let's wrap it up

There you have it - videos that teachers are using for St. Patrick's in their kindergarten classrooms.

I hope that these books read aloud, exercise videos and learning videos are helpful as you teach.

Thanks to all of the kindergarten teachers who chimed in to share their favorites on the KindergartenWorks facebook page!

Are you ready to explore kindergarten freebies for St. Patrick's Day?

More Kindergarten Ideas and Activities

  • 14 St. Patrick's Day Freebies for Kindergarten
  • 16 Quick Phonics Videos for Kindergarten
  • Free End of the Year Kindergarten Certificates and Diplomas
  • Studying Butterflies for Kids

Lucky Spinner CVC Game for Kindergarten - A St. Patrick's Day Freebie

Mar 5, 2020 · Leave a Comment

Play a St. Patrick's Day-themed word work game with your beginning readers. This free spinner game is perfect for guided reading groups.

This is one of fourteen freebies I recommend for St. Patrick's Day in kindergarten.

It's important for kindergarten students to be able to substitute individual sounds of simple one-syllable words. This activity will help your students practice that.

Let me show you how to play it and list what you need to pull it together.

How to play

Students pick a golden coin word card and write the word on their leprechaun pot.

Then they spin the lucky spinner and erases one letter of the word - the first letter, the vowel or the last letter - depending upon where the spinner landed.

Then the student writes an appropriate letter from the alphabet to substitute.

They sound out the new word.

How to do points

Students could just keep track of their new words they make using the included "words I made today" card or give themself a "point" in the ten frame after they've read each new word aloud correctly. That part is up to you.

However, to make it more of a game I suggest using the ten frame at the top or the "words I made today" card as a way to track points for real and nonsense words.

Draw a dot for each point.

Students earn one point for making a new word that is nonsense (wid, bur, pol, etc.) but they earn two points for making a real word!

See how excited they get when they start to realize they can pick smart alphabet letters to make real words and earn more points.

Each student then adds up their points when time is up.

What you need

In order to play this game, you'll need a few supplies. You probably already have them on hand.

You'll need:

  • copier paper or construction paper
  • brads
  • paperclips
  • dry-erase markers
  • laminate or plastic sheet protector sleeves

How to prep this game

Print the writing piece (leprechaun pot outline) and either laminate or slip it into a plastic sheet protector sleeve.

Push a brad through a paperclip and through the center of the spinner card (there are both small and spinner cards available). Close the brad and adjust so the spinner spins smoothly when you flick it.

Print a set of the word cards on thick paper (like construction paper) so you don't need to laminate them.

If you plan to use this game for a small group, I think it's easiest to make colored sets.

KindergartenWorks :: 4 Easy to Use 'Spin and Change' Phonics Games
Make colored sets for easy clean up

To make a set you print off a writing piece (leprechaun pot outline) and set of word cards for each student on one color construction paper. That way everything for student A is on one color and everything for student B is on another (and so on).

It makes clean-up and tracking game pieces super simple.

How to store this game

Use a gallon-size Ziploc bag to put all of your game pieces into. Easy peasy.

Or, if you make colored sets, slide each set's pieces into the plastic protector sleeve and store all sets together in a gallon Ziploc bag.

I liked to store my guided reading activities, like this one, in my filing cabinets.

Free download

This free St. Patrick's day game is based on Kathy's Pot o' Words game that I used in my own classroom and loved. I used it with students who were reading level ¾ (C/D) books in guided reading groups.

This version I made has been tweaked to support kindergarten students with more visuals.

This free download includes a writing page, full-page spinner, quarter-size spinner, 20 golden coin word cards, 12 blank word cards and a "Today I made these words" card for students to take home.

Download Lucky Spinner CVC Game

Let's wrap it up

Since it is important for kindergarten students to be able to substitute individual sounds in CVC words, this activity will help yours work on that.

If you're interested in more fun St. Patrick's Day things for kindergarten, then I suggest you check out 14 St. Patrick’s Day Freebies for Kindergarten next.

But you don't have to save this game for St. Patrick's Day! This free spinner game will work anytime your reading groups are ready for it.

Read more: >> 4 Easy-to-use 'spin and change' games >>

If you like what I do here on KindergartenWorks, then be sure to subscribe today. I look forward to sharing ideas with you weekly.

How to Set Up Your Space to Teach Math in Small Groups

Mar 5, 2020 · 9 Comments

Create a space to teach math in small groups that is organized, efficient and easy to use all year long.

Here's what a teacher center is and how I recommend setting up your teaching area if you teach using a guided math format.

What is a teacher center?

The teacher center is a place to gather students in small numbers to work on math skills at their level and work on building their math strengths.

It usually is a location of the classroom that has a teacher chair, some math materials nearby and room to spread out a bit with math manipulatives.

In some classrooms - it's a kidney-shaped teacher table, a rectangular kindergarten table or in other classrooms - it's the floor.

A teacher center can take on any shape that will work for you and your classroom.

If you want to differentiate your math teaching, you most likely will need a system in place to keep all of your other students engaged and learning while you meet with a small portion of your class.

In that case, you'll want to fully explore what guided math could look like in your classroom using this ultimate guide: How to start guided math in kindergarten.

Let's take a closer look at how to set up a teacher center area in your classroom that:

  • is organized
  • has what you need at your fingertips
  • is easy to maintain all year long

Set up an inviting area

The goal of creating a teacher center space isn't to have a Pinterest-perfect one. And the goal isn't to have every math material available you could possibly ever need to teach any math concept.

The goal is to have what you need within arms reach when you need it and to have a place to work with students.

And for most of us, this means that there won't be too much stuff in this space. There needs to be a clear work surface and space for students to sit and work.

To set up an inviting area you'll need:

  • seating for the teacher
  • seating for the number of students in your largest group
  • space for students to work using manipulatives
  • functional storage nearby

Here's an example of the space we used one year in our classroom. I put a kidney-shaped instructional table low to the ground.

guided math - small group space guided setup

I had a memory foam pillow for me to sit or kneel on and colorful bathroom throw rugs to define student seating areas.

Now, I know that sitting on the floor isn't for some of you, but it was awesome for us. When we were not doing math, this table was used all day long by my students since they had alternative seating options.

The table was placed in front of a bookshelf so I could see out to watch over the rest of the class and utilize the shelf space so everything would be within arm's length.

The following year, I didn't use any rugs and the filing cabinet pictured was moved and yet, the space was still inviting and easy to use.

Organize your materials

You generally need three types of storage at a teacher center.

1) First, plan what materials you need most often for the most lessons and find permanent places for those materials. If you're going to use it almost every day at the teacher center, you want it within your arm's reach.

2) Then create a place for you to put materials that are just for the particular day's lessons (if there are any materials you need that aren't normally stored at this center).

3) Lastly, create a place to keep any materials specific to each of your math groups. This way you can keep flashcards, unfinished work or differentiated materials specific to a group.

I'll show you what I had in each type of storage in my classroom.

Everyday materials

I stored the materials I used most often in a 3-drawer Sterilite unit and in pencil caddies on the shelf behind my teacher table.

Let me show you the contents of each drawer.

guided math - small group space guided setup

I used little Dollar Tree organization baskets and sometimes a pencil box inside to keep smaller items organized and easy to grab.

guided math - small group space guided setup

In the 3-drawer unit I kept:

  • pattern blocks + attribute blocks
  • ten frames (drawn on craft foam) + counting chips
  • foam dominoes
  • die
  • number lines
  • counting rods (pipe cleaners with beads)
  • math mats
guided math - small group space guided setup

Now, I also used pencil caddies next to these drawers. These also held materials we would use regularly, if not daily.

The pencil caddies held:

  • pencils
  • dry erase markers and baby sock erasers
  • bingo daubers (dot makers)
  • glue sticks
  • linking cubes
  • crayons
  • markers
  • red, yellow and green craft foam (to play flashcard flash)
guided math - small group space guided setup

Pencil caddies were easy to place onto the table and clean up into.

I used pencil boxes in the largest section of the caddy to hold an assortment of crayons, pencils, and markers and one pencil case contained linking cubes.

Temporary materials

Next, I kept a medium-sized, Sterilite sturdy white basket with the materials needed for our wrap-ups, warm-ups or general lesson materials. It was a great place to card sets, a game or special manipulatives.

This basket holds things only temporarily. Once a lesson or the week is over, this basket's materials get returned to their proper place.

This basket was also big enough that I usually placed my guided math lesson plan binder in it too. That way our table stayed clear and could be used for other things during the day.

Related: How to organize math materials when not in use >>

Group-specific materials

Last, I had four purple baskets on the bottom shelf behind my teacher table to hold materials specific for each group.

These are the locker-style bins that the Dollar Tree normally carries.

Most often we kept flashcards (because my students created their own sets) or unfinished work in these baskets. Sometimes they were empty.

The baskets have a group label so that students can easily find his or her own work without digging through an entire class set or have to rely on the teacher to get for them.

Let's wrap it up

There you have it - what a teacher center is and how I recommend setting up your teaching area if you teach using a guided math format.

Remember to make your teacher zone inviting, but keep the focus on having enough seating and work area and to make it functional.

When you have a place to keep materials you'll use all year long at your fingertips, a place to rotate in temporary materials and a place to keep small group materials, you'll be set up with a system that's easy to maintain.

Read Next: How to create a guided math binder >>

If you like what I do here on KindergartenWorks, then be sure to subscribe today. I look forward to sharing ideas with you weekly.

14 St. Patrick's Day Freebies for Kindergarten

Mar 4, 2020 · Leave a Comment

Let's plan fun St. Patrick's day activities for the kindergarten classroom. Here are free mini-projects, reading resources, sight word activities, and math mats - all with a St. Paddy's Day theme.

Don't feel like just because there are a lot of fun St. Patrick's Day ideas for the classroom out there that you have to do a lot.

It's my style to keep it simple - like just pick one or two things from this list and incorporate them into your normal daily routine.

You may also want to read: How to celebrate any minor holiday in kindergarten

So, let's start with some mini-projects since these may be "extra" activities and then jump into the resources and activities that would fit into your normal day.

These freebies are from various teachers so you'll need to follow the links in order to download them.

Mini-projects

Swap out your writing time or carve out a few extra minutes from your daily routine to insert one of these mini-projects for St. Patrick's Day.

Directed leprechaun drawing

source: firstgradeblueskies.com

This directed drawing for a leprechaun turns out really cute. Students can make any kind of background, but I think the rainbow is just perfect. And I loved that this student chose to make theirs a grumpy-faced leprechaun.

Rainbow loot necklace

source: eighteen25.blogspot.com

Make this fun, edible rainbow necklace as a fun counting activity that also is good for fine motor work. You'll need a nice, giant box of Froot Loops and some string.

Sometimes the rainbow, and not the gold at the end can be the reward {wink}

Tip! Tape one end of their string onto the table so their hard work doesn't slip off while they're working.

Or if you want to make treats ahead of time instead of as a class, here are three free St. Patrick's Day printable treat tags.

Leprechaun hat craft

Make a trace-and-cut Leprechaun hat to celebrate with a little themed cuteness. This free pattern comes with all of the pieces to make the hat except that you'll need to make the headband to wrap around.

For this mini-project you'll need:

  • green pipe cleaners
  • green, black and yellow construction paper
  • scissors
  • glue

Pot of gold writing craft

source: krogerskindergarten.blogspot.com

Have your students write and draw what's really in the pot of gold with this "What's in the Leprechaun's Pot?" craftivity.

Those are fun activities to squeeze into the day or week of St. Patrick's Day. Now, let's dig into some reading and math activities that can easily fit into the normal daily routine of kindergarten life.

Reading resources

What can you do during your guided reading groups or during your phonics mini-lessons? Try one of these free reading resources.

CVC sounds

Snag some gold coins from the Dollar Tree and this Elkonin box printout. But - you could also use pennies, counters, or yellow circle die-cuts.

Kinders put coins on the pot, then they slide a coin into each box as they say each sound in the spoken word. This will work for both CVC or CVCC words.

Emergent reader

Take this free St. Patrick's Day emergent reader and use it in your guided reading groups. There are two versions so you can pick what's right for your groups.

Leprechaun poem

Use this cute little "I'm a Little Leprechaun" poem on March 17th. It's to the tune of “I’m a Little Teapot." Circle the rhyming word pairs, highlight the sight words and all of the little bits your students know.

For example, your students probably know bits like:

  • ck
  • sh
  • ch
  • ing
  • oo
  • sneaky e
  • am (hiding in shamrock)

Each student will end up with his or her own colored poem based on what they know.

But they'll be amazed at how much of the poem they can "read" based on how much of the text is colored!

More on: Teaching little bits in guided reading groups >>

Five lucky clovers poem

Five Lucky Clovers via Jeffco Public Schools

Or do this Five Lucky Clovers poem aloud with your class as a shared reading activity.

Things you could do:

  • Make a second copy of the poem and match the word cards on top of each other. Leave some cards out and clap on the missing words.
  • Use highlighting tape (or cut up translucent dividers) to find the bits you know, like the leprechaun poem above, as a class.
  • Circle or underline the rhyming word pairs with Wikki Sticks and then jump on the rhyming word pairs as you re-read the poem.

Lucky spinner CVC game

Play this Spin-and-change game with your level ¾ (C/D) readers in guided reading groups. Kinders have to substitute sounds in all three positions of CVC words and figure out if the words are real or nonsense.

Sight word activities

We often cover sight words in our daily life in kindergarten. Here are three different activities you could use on St. Patricks day.

Shamrock jelly sight words

I call this shamrock jelly - simply use green-dyed hair gel in sealed Ziploc baggies. Here's the tutorial on how to make these DIY squishy bags.

Have students use it as a tactile place to do their sight words, word work or spelling words during your guided reading groups. No need to erase – just smoosh and start again!

Sight word card game

Students pass around a black Leprechaun pot (like the one you find at the Dollar Tree) or a small container and take turns reading sight word cards. This free St. Patty's Day Hooray game is an easy game for groups.

Roll-and-read sight words

Put these Rainbow roll-and-write-a-sight-word sheets into plastic sleeve protectors with a die and a dry-erase marker. You've got a free sight word activity that focuses on repeated practice.

Can they guess which color column will fill up first? Maybe they get to eat a matching color skittle for each color column they fill up!

Now, let's look at some math mats you can use either whole-group or during guided math.

Math mats

Here are some mats to either laminate or place into plastic protector sleeves so you can get a lot of use out of them. Use any math manipulatives you have on hand to make them work.

Composing teen numbers

Make a set of number cards 11-19. Students pull a card and make the teen number in the rainbow ten frames. Use yellow cereal as golden coins or even yellow linking cubes for manipulatives.

More on: Why do teen numbers have a 1?

Decomposing teen numbers

Write numbers 11-19 (or higher if you've got more advanced students) onto gold Dollar Tree St. Patrick's day coins.

Students grab a coin and use base ten blocks to break down (decompose) the number into groups of tens and ones on these rainbow teen numbers sheets.

I added the "tens" and "ones" labels at the bottom of my math mats before slipping them into our dry-erase plastic sleeve to make them more kinder-friendly.

Addition game

free Lucky rainbow addition bump game for kindergarten with 3 dice

Let your students practice addition with one, two or three dice. This free lucky addition rainbow game is just right for March and it's already differentiated for you.

Students use the rules of bump games to try and be the first to have all of their playing pieces on the game mat.

Let's wrap it up

There you have it - mini-projects, reading resources, math mats, and sight word activities - all free and just right for St. Patrick's Day.

Just because there are a lot of fun ideas, you don't have to do them all. Your students will have a wonderful day even if you keep it simple. So pick what you love and skip the rest.

If you're ready for more, then check out these St. Patrick's Day videos for kindergarten.

If you like what I do here on KindergartenWorks, then be sure to subscribe today. I look forward to sharing ideas with you weekly.

How to Set Up a Year-Long Math Games and Activities Center

Feb 26, 2020 · 9 Comments

Set up a math games and activities center in your classroom that is easy to maintain all year long.

I think that math games are the perfect fit in a kindergarten classroom. They can help your students practice math skills and learn without you physically being there.

How to Create a Math-Games Center That is Easy to Keep Up With

Students can work independently which frees the teacher up to teach math in small groups - or in other words - do guided math. It's what I did in my classroom and it worked out great.

Related: How to start guided math in kindergarten >>

Here's how I set up a center during our guided math time that made it simple for me to maintain all year long.

[feast_advanced_jump_to]

What is a math games center?

This center is a space where you put standards-based math games and activities for your students to play either independently or with a partner.

In our classroom, we call it "the practice zone" simply because they are practicing math.

The math games and activities are put in one location, organized for easy clean-up, differentiated and changed throughout the year.

You offer choice to students during this center - they get to pick and choose which things to work on. The choice of what to play is key to kids staying on task and engaged for the full length of your center time.

How to organize materials

You don't have to spend a lot of money to get this center up and running. I think with a couple of drawers and some Ziploc bags, you're set to go.

You don't actually need a dedicated table or play space dedicated to just this center. Let students spread out and use available tables, shelves, and the floor.

You will want to pick out a classroom space where you can set up access to 6-9 games or activities.

Make sure that where you put it won't impede the classroom flow of students working at the same time and put it close enough that students can take games or activities to a nearby floor or table space to play.

I like using these (amazon affiliate) Sterilite 3-drawer units because they are deep enough to hold regular sized paper but wide enough and tall enough to hold manipulatives too.

I like these also because:

  • Students can remove the drawers to take the activity anywhere in the classroom. This makes clean up a breeze.
  • You can actually stack more than three tall if your storage space allows. Just remove the lid and snap together the number of drawers you want.

But if drawers aren't your thing - you can use whatever you have or whatever system you've come to learn works well for your classroom.

Be sure to label your organization system with both words and pictures so that your young readers and non-readers can find what they need.

the practice zone {math games and activities} - KindergartenWorks

I mark my drawer labels as an individual activity or partner work or multiple partners using the silhouette icons.

To keep things organized, you need an easy system to get things put away.

But what about those random math pieces that are found on the floor?

If someone finds a random game or math piece and the materials are still in a drawer, they put it away in the center. Easy and done.

If I've already put away a set of materials, and the students can't go into the closet to return it, they put it into our "lost math materials" basket. Then when I have time, I put it away. Until then it stays contained and isn't visual clutter.

Just think long term - what can you put materials into and rotate materials out of that will be easy enough to change throughout the year - without hassle.

Related: How to store math materials when not you're not using them >>

How to keep it simple

If you want students to be able to use this center all year long without lots of instruction, then you want to work smart.

First, consider what activities and materials you've already taught in small groups that can go into the math games and activities center when you're done with them?

This is a smart way to reinforce the lessons you've taught.

Keeping Math Games Zone Simple - Repeat Games from the Teacher Zone
Use games from small groups so students already know what to do

Think of it this way - it's just like the approach we use in reading.

We need to give them ample opportunity to PRACTICE and this is a structured way for them to do it independently.

If you place materials that they used in a small group setting with you they will know exactly how to use those materials.

What to include

There are enough good games and activities are available online for free or inexpensively that you can have enough stuff to last you all year. Let's talk a little about what to put into this center.

Think about this: what if your students already know how to use the materials in this center... then that means they just have to learn how to use them to practice new content.

From quarter to quarter I try to keep similar activities where the materials stay the same but the content changes.

This way I don't have to teach and model a new set of expectations, I can simply review how to use the materials and focus on content.

That meant I had games and activities like:

  • a dry erase sheet set*
  • vis-a-vis marker transparency set*
  • magna-doodle transparency sheets*
  • a marker based activity (usually a roll/graph, roll/add, stamping activity)
  • a little book activity (started whole-group and they finish independently)
  • spinner game
  • board game
  • bump game
  • memory game
  • dot maker (bingo daubers) activity
  • making activity (building numbers, building with tens and ones)
  • playdough activity
  • an I-Spy activity
Keeping Math Games Zone Simple - Adding 1 Cupcake
Bump and dice games are easy to incorporate and change out regularly

For example, we always had a bump game drawer. All year long. I simply changed out the game mat a couple of times a year to match the growing levels of my students or change it to match a holiday.

Now, I loathe worksheets... so those aren't what I want in this center.

However, if you have a worksheet that is valid practice, you can make it more interactive and fun by turning it into a dry-erase mat or transparency for students to use and re-use.

Here is an example of the beginning of the year. I wanted my students to practice forming numbers. I copied pages from my Monster Numbers mini-books onto overheads. This made fun handwriting practice.

Keeping Math Games Zone Simple - Transparency Worksheets

Now skip forward to after Christmas and my students are still using vis-a-vis markers... but the transparencies have changed. In this case, a student is ordering numbers to 100 using a dot-to-dot.

Keeping Math Games Zone Simple - Using Transparencies for Worksheets

Keep this in mind - you don't have to find all of the games today or tomorrow - build your stash as you find items throughout the year.

Here are more example items I've made that my students used:

  • Number puzzles / Dot maker activities, Playdough number mats
  • Subtraction memory
  • Picture directions (for games found online)
  • Magna Doodle cards
  • Teddy Bear Addition Number Line Game
  • Hide-a-2D-shape game
  • Sorting mats
  • I-Spy decomposing numbers
  • One more bump game
  • Roll and trace a shape

How to keep it fresh

Teach them how to use the materials once and then simply change up what they use to materials for.

The beauty in keeping the materials as similar as possible means you won't have to re-teach everything every week or even every two weeks.

It's my belief (after doing this for a few years) that you really only need to rotate items that you have put out for your math centers every 6-9 weeks.

And you don't have to rotate them all out or rotate them all in at the same time.

Simply add games in as time allows and take your cue from how students are doing in groups for when it's time to retire or refresh an activity.

Keeping Math Games Zone Simple - Marker Activity Decomposing Numbers
Keep content the focus - line it up with your standards

Keep the games low-key and focus on content. You want them to be able to play and do the work successfully by themselves.

If something ends up being super-high interest for your kiddos, repeat the same kind of activity next quarter with an amped-up level of content that matches your new standards.

Related: When to teach math standards in kindergarten >>

Teaching these games and activities into your day when it best fits you. For me, if it wasn't introduced during a small group lesson, I'd introduce it as a mini-lesson before we began guided math for the day.

In my classroom, I used the second day of our rotation (the day the journal prompt is being completed by the second half of the class) to teach a new activity whole group.

Since I'm only reviewing how to complete the math prompt and edifying students math journal examples from the previous day, I have more time to devote to introducing a new game.

This is also the same chunk of time I use to teach new computer center math games.

How to differentiate

You can differentiate work in a math games center.

If you differentiate items for students, there are two ways to go about it:

  1. Label baggies with group levels and place their items in a bag. A single drawer (like your memory game drawer) can have multiple levels of memory in it to accommodate all of your groups.
  2. Give a whole drawer to a particular group's activity.
Keeping Math Games Zone Simple - Differentiated Activities Within a Drawer
Label differentiated materials with group levels or star labels

If you don't have drawers... you can still use this idea. I like to use stars to differentiate levels of math materials.

Simply label the entire drawer instead of a baggie with the stars, level or group name.

To differentiate items within a drawer, which is what I did, I use preprinted star labels (little return address labels with webding font stars) and stick them onto our Ziploc baggies or whatever your activity is stored in.

the practice zone {math games and activities} - KindergartenWorks

For my classroom, I set up one-star, two-stars and three-stars as our group levels. More stars equals more support needed.

the practice zone {math games and activities} - KindergartenWorks

Let's wrap it up

Students can work independently at your math games and activities center to learn and practice skills and standards.

Remember to set up your center so that it is organized, simple to maintain all year long and easy to differentiate.

If you like what I do here on KindergartenWorks, then be sure to subscribe today. I look forward to sharing ideas with you weekly.

More math games you may like

  • Making 5 fluency games
  • Simple & free measurement activity for kindergarten
  • Coconut roll and color - free beginning number recognition game
  • What's the difference - free kindergarten math subtraction game

12 Free Dr. Seuss Activities for Kindergarten

Feb 24, 2020 · 1 Comment

Enjoy some reading fun with these activities to go along with Dr. Seuss books. Whether you're doing an author study, celebrating Read Across America or Dr. Seuss' birthday these ideas are classroom-tested and teacher-approved.

Let's look at some Dr. Seuss free printables for kindergarten, hands-on science activities and a couple of art projects to round out this collection of ideas.

Free Seuss printables

These printables are from various teachers so you'll need to follow the links in order to download them.

Free There's a Wocket in My Pocket Dr. Seuss-Inspired Class Book

Create a fun class book that rhymes! Use this “There’s a Wocket in My Pocket” Seuss-inspired class book template to get started. Take photos of your students in silly locations around the classroom to make it complete.

Use a We Love You Dr. Seuss mini-reader to send home with students after you've read a bunch of Seuss books. It features a page for each of five books.

It's not a leveled emergent reader, but it can still work for beginning readers. Have them highlight the sight words on each page.

Class Book for Kindergarten Tasting of Green Eggs and Ham

Do you have your kinders taste green eggs and ham? Use this printable book and class chart idea to extend the book Do You Like Green Eggs and Ham?

source: joyfullearninginkc.blogspot.com

Make some word family reference charts after all the books you read from Dr. Seuss. I love that this teacher includes printables to make the anchor charts.

And if you're in need of some color-the-rhyme worksheets, this teacher has you covered.

If you read this site at all, then you know I loathe worksheets - but it'll work in a pinch for a substitute teacher.

Hands-on science activities

Now let's look at some fun, hands-on science activities that connect with Dr. Seuss books.

source: littlebinsforlittlehands.com

Create a hat-stacking challenge for your kinders to see how can they stack the cups which makes a red and white pattern like the Cat in the Hat's hat. Don't give away the solution too fast!

After reading The Butter Battle Book, shake up your own butter. Learn how a liquid can become solid by shaking up heavy cream in a jar.

Here is a great full tutorial for making butter with an entire class and use these step-by-step pictures (using marbles) so you know what to expect.

Tip! ¼ cup of cream will make about 1 Tbsp of butter

Art projects

It's time to bust out the art supplies. Here are some easy Seuss-inspired art activities for kindergarten.

I love the idea of using straws to make a Thing 1 or 2 blow-paint activity. Simply drop some watered-down washable paint on the paper near the hairline and blow through a straw towards the outer edges of the paper.

No special tools are needed - just paper, paint, water and straws. If you like my little starter-character pictured above, you can download it here.

Tip! Teach students to dip their straw in the paint then cover the top of the straw with their finger to create suction (which holds the paint in the straw, like a pipette) and then remove their finger once they are ready to drop their paint onto their paper.

Use red, blue, and white paint or bingo daubers to paint-by-shape. This is a good following directions activity. If you choose to paint, you can use a foam stencil brush (from the dollar tree) or a regular fat paintbrush stamped gently.

source: theimaginationnook.blogspot.com

Every student will want to make a Thing 1 or Thing 2 headband. Grab the free button and use red and blue construction paper to finish it off. Students roll their blue construction paper tightly around a pencil to help create the crazy hair.

source: foreverin1st.blogspot.com

Teach how to draw Cat in the Hat, one of Dr. Seuss' most famous characters with this guided drawing tutorial. Here are some ideas on what to add to make a writing piece to go along with it to make a bulletin board display.

Let's wrap it up

Here are two more bonus things that are fun ideas for Dr. Seuss week.

Dress up to go along with your theme, sporting one of these affordable, cute teacher tees.

Make a list of your favorite Seuss books and then do a matching activity each day. Try out these 5 fun ideas for each day of Dr. Seuss week.

I hope this list of free Dr. Seuss kindergarten activities is helpful as you enjoy reading Seuss' books with your class.

If you like what I do here on KindergartenWorks, then be sure to subscribe today. I look forward to sharing ideas with you weekly.

green eggs and ham class book activity

What to read next: Green Eggs and Ham Class Book Activity

How To Create Guided Math Lessons in Kindergarten

Feb 18, 2020 · Leave a Comment

Guided math lessons in kindergarten can be easier if you set up a lesson plan format to follow. Let's learn how to set up an easy-to-use format so you can create guided math lessons successfully.

In kindergarten, guided math means that I'm teaching math lessons to small groups of students while the rest of the class is learning independently.

This may mean that I have a lesson plan per small group to create.

But before we throw up our hands and claim that it's "too much work" to create more lesson plans in order to reach multiple levels of students - let me share a lesson plan format with you that makes planning for multiple groups easier and not necessarily more work.

If you're new to guided math, you may want to read How to start guided math first.

Break down your instructional time into 3 parts

Let's break down the time you have to teach your small group of students into three parts.

We'll start with a warm-up activity, have a main lesson and finish off with a wrap-up task or activity.

These are meant to give you flexibility as the teacher to get in more content and allow you to teach all that you need to.

The three parts of your time with a small group do not all have to be on the same standard. They can be, but it's not needed.

If you can plug in a lesson idea, activity or exploration task into each part of the time you have with a group, you're set to go! It makes lesson planning so much easier.

Long Term Planning Sheet
Plug activities into each part of your plans.

Let's look at each part and see what you can plug into these times to make your time with each group successful.

Warm-up

Think of the warm-up as an activity or task that the students can do to get started learning - almost without you.

When you're teaching math in small groups, often you may need to finish directing another child, tie someone's shoe or handle a distraction before you can settle in to actually start teaching the small group of students in front of you.

The way around just making them sit and wait for you is to create a warm-up activity.

Set up an activity that they can start doing independently and you can slide in and join them just shortly thereafter.

You can change the activity, after a while, to something new but always pick something basic that they can start without you.

Keeping Math Games Zone Simple - Use Group Work to Help Determine Course
Students can start working without the teacher

Here are some ideas:

  • Write their numbers in order on the table using dry-erase markers and baby socks for erasers to see how high they can get before you call "Time!" but also get interrupted by counting aloud for you to 30 one-on-one (so you can assess them) while the others are still working
  • Start counting to 100, touching each number on their individual counting chart workmat. Then go through a page or two of math workmats as a group (once the teacher joins) in to build up fluency for naming 3D shapes, counting to 100 or tracing numbers 11-20 when called out.
  • Play flashcard flash with a partner - using their own set of flashcards

This is also a great time to cover "fluffy" standards that don't need as much time or focus to master. (I'm thinking of you 2D shapes)

A warm-up could be 5-10 minutes long. You can pretty much just call time and move right into your main lesson.

How to differentiate

These warm-ups are relatively easy to adapt to different group levels.

In most cases, you don't have to plan an entirely different activity or task for each group. Adjust the number range, amount of support materials or expectation to differentiate your warm-up activity.

Higher students could have to start writing at a number you have left on the table... say 57. Or they have to count backwards from 100 using the counting chart... or count to 100 first and then count by tens starting at 3. Their flashcards could be a higher range of numbers than your other groups are using.

Lower students could have access to a number line, or ten frames to help them build numbers and then write them. They could use a dry erase marker to color in how high they counted before needing to start over and try again to get closer to 100. Their flashcards could be a lower range of numbers than your other groups are using.

Keep lesson materials that are specific to each group (like flashcard sets) in a basket nearby with their group name(s) so they can get materials without you.

Leave materials out on the table that are not specific to each group (like your dry erase markers, baby sock erasers, and workmats) so they can get started without you.

Main lesson

The biggest chunk of time you set will be for your main lesson.

This is where you want to dig deep and spend time.

You'll be:

  • talking a little
  • asking questions often
  • listening a lot
  • and watching even more

Teach the standards that make the biggest impact on creating mathematical thinkers.

For us this meant we were usually focused on:

  • Composing and decomposing numbers 11-19 (and beyond) using tens and ones
  • Making 5 and 10
  • Subitizing numbers 1-9 (especially 1-5)

Sometimes this part of your lesson time will be a game, an exploration or a task.

Example: use a math game to develop subtraction strategies >>

Example: use exploration to find out why teen numbers start with a 1 >>

Example: Create ten frame flashcards to make teen numbers as a task. Use them later in subsequent lessons.

Composing and decomposing numbers in kindergarten - why teaching this actually matters

Whatever you choose, focus on mastering the standards or going above and beyond the standards with advanced students.

How to differentiate

To differentiate what you do with your groups, you'll want to think about the amount of support you give, the number range students are working with and the expectations.

You may need to alter or completely change those for each group.

You have the flexibility to do that to meet their needs.

Wrap-up

Think of the wrap-up as an activity or task that closes out your time together that capitalizes on the small audience you have in front of you.

Here are some ideas:

  • learn a new activity that will be in the games and activities center (the practice zone)
  • explain the new warm-up activity (for the next time they come to the teacher zone)
  • play a quick game to review a previously learned concept

Before you transition to see another group or end math for the day, use this time to quickly hit something that extends their time with you.

And if you don't use the wrap-up every day - that's okay. It's your classroom. Sometimes we ran out of time and I didn't get to what I had planned for it.

Conclusion

When it comes to planning guided math lessons it can be easier if you set up a lesson plan format to follow. Hopefully, you can use this three-part plan as your easy-to-use format so you can create guided math lessons successfully.

Remember what we're going for:

  1. Have a good chunk of time to dig deep in the main lesson, explore, make mistakes and talk through what we're learning
  2. Have a little time to cover more basic "fluffy" stuff or have time to teach a new related game or activity students will use independently

Want to see a sample guided math group with all three parts?

Continue reading: Composing and decomposing numbers: a guided math lesson plan flow >>

When to Teach Math Standards in Kindergarten

Feb 17, 2020 · 3 Comments

When to teach math standards in kindergarten

Let’s talk about when you should teach each of the math standards in kindergarten. Your curriculum guide may have it all laid out for you, but if it doesn’t or if you teach using a guided math format you may need to decide this for yourself.

To help make this easier – let’s first cover which standards are most important (and which ones aren’t) so we aren’t wasting precious instructional time.

I’m also going to share every math standard listed by quarters and a printable version of this list – so you can see how math standards can progress across an entire year of kindergarten.

Math standards that are a big deal in kindergarten

Not every standard is created equal. As teachers, we have to decide where to focus our instructional time so we get the most bang for our buck.

Here are the standards that I think make the biggest overall impact on a kindergarten student’s ability to develop a strong mathematical foundation in school.

  • Counting objects one-to-one
  • Composing and decomposing numbers 11-19 using tens and ones
  • Counting orally
  • Making 5 and 10
  • Subitizing numbers 1-9 (especially 1-5)

You can disagree with my list if you want. But after years of teaching students in small groups – working on these skills is what I’ve seen develop the best math thinkers.

Now please understand – these are just the core version of the standards. There is a lot that goes into each one. But if I have to choose where to spend my time teaching, I’ll pick these every time.

Subitizing numbers – seeing the groupings of objects and number of objects without counting

You should know that “subitizing numbers” isn’t spelled out as a standard. But it is crucial for young students to learn to do addition, subtraction and a lot more successfully.

Check out this set of free subitizing activities. It is one of my favorite resources that I use to plan many of my small group math lessons – especially at the beginning of the year.

Standards that are not as important

When it comes right down to it, some kindergarten standards aren’t nearly as important. The reason is is that they are more limited in scope. They aren’t as jam-packed and can’t go as “deep.”

In my opinion, this includes:

  • 2D and 3D shapes
  • measuring and comparing

I’m not saying that I skip these standards. In fact, I’ve got lots of ideas on how to teach 2D and 3D shapes.

But I am saying that these standards a “fluffier” and are easier to cover whole-group in a mini-lesson, or in small amounts of time and don’t generally need entire lessons devoted to them. Seriously.

Standards for each quarter

Here are our kindergarten math standards as they were planned out into nine-week quarters, though some quarters had 10 weeks.

Some standards are repeated and others are broken down into sub-parts since mastery takes place over a longer period of time.

You can also think of this list as a math standards scope and sequence master list for kindergarten.

1st quarter standards

This set of math standards usually covered our school calendar from mid-August to mid-October.

Counting and Cardinality (Ordering)
K.CC.1.a.         Count orally by ones to at least 30.
K.CC.1.b.         Count orally by tens to 30.
K.CC.3.a.         Recognize numbers from 0-10.
K.CC.3.b.         Print numbers from 0-9 when prompted. (Number formation)
K.CC.4.a.         Count objects by touching them singularly while saying the number name.
K.CC.4.b-1.      Recognize that the last number named tells the number of objects counted.
K.CC.4.c.         Recognize that each successive number name refers to a quantity that is one larger.
Numbers and Operations Base Ten
K.NBT.1.a.        Compose numbers from 11-19 from a group of ten ones and additional ones using objects.            
Measurement and Data
K.MD.3.a         Classify objects into given categories such as size, shape, color, thickness.
K.MD.3.b         Count the number of objects (10 or less) in each category.
Geometry
K.G.1.a           Identify and name the following shapes: squares, circles, triangles, rectangles, hexagons.
K.G.1.b           Describe objects in the environment using names of shapes (two dimensional).
K.G.1.c           Describe the relative position of objects using appropriate vocabulary, including above, below, beside, in front of, behind, next to.
K.G.2             Name shapes regardless of their orientation to overall size.
K.G.4.a           Describe two-dimensional shapes to identify their various attributes, including vertices, sides, corners, and length of sides.
K.G.5.a           Draw shapes to represent objects in the world.

2nd quarter standards

This set of math standards usually covered our school calendar from mid-October to Christmas break.

Counting and Cardinality (Ordering)
K.CC.1.a.     Count orally by ones to at least 60.
K.CC.1.b.     Count orally by tens to 60.
K.CC.2.        Count forward beginning from a given number (not 1) within the known sequence (known sequence includes counting by ones and tens).
K.CC.3.c.     Print numbers from 0-20 when prompted (number formation).
K.CC.3.d.     Recognize numbers from 11-20 out of sequence.
K.CC.4.b-2. Explain orally the number of objects is the same regardless of their arrangement.
K.CC.4.c.     Recognize that each successive number name refers to a quantity that is one larger.
K.CC.5.a.     Count up to 20 objects that are in an order by answering the question “how many”.
K.CC.5.b.     Count up to 10 objects in a scattered configuration by answering the question “how many”.
K.CC.5.c.     Given a number from 1-20, count out that many objects.
K.CC.6.a.     Explain the meaning of “greater than”.
K.CC.6.b.     Compare two groups of objects and identify and state which group is greater.
K.CC.6.c.     Explain the meaning of “equal to”.
K.CC.6 d.     Compare two groups of objects and identify and state if they are equal.
K.CC.6.e.     Explain the meaning of “less than”.
K.CC.6.f.      Compare two groups of objects and identify and state which group has less.
Operations and Algebraic Thinking
K.OA.1.a      Represent addition with objects, fingers, and sounds to identify the meaning of addition as putting together and adding to.
K.OA.1.b      Represent subtraction with objects, fingers, and sounds to identify the meaning of subtraction as taking apart and taking from.
K.OA.1.c      Explain orally addition as putting together and adding to.
K.OA.1.d      Explain orally subtraction as taking apart or taking from.
K.OA.2.a      Solve addition word problems orally up to 10 when reading aloud using objects or drawings.
K.OA.2.b      Solve subtraction word problems orally up to 10 when read aloud using objects or drawings.
K.OA.4.a      State the number that makes 5 when added to any given number 1-4 with objects.
Numbers and Operations Base Ten
K.NBT.1.a     Compose numbers from 11-19 from a group of ten ones and additional ones using objects.
K.NBT.1.b     Decompose numbers from 11-19 into a group of 10 ones and additional ones using object.
K.NBT.1.c     Record the composition of numbers 11-19 through drawing of a group of ten ones and additional ones
Measurement and Data
K.MD.1.a      Distinguish between measurable and non-measurable attributes of objects.  Note: Measurable means quantifiable, such as length, weight, height, distance around.
K.MD.1.b      Name the measurable attributes of a given object.
K.MD.2        Compare the measurable attributes of two objects using appropriate vocabulary including taller/shorter, heavier/lighter, longer/shorter.
Geometry
K.G.1.c        Describe the relative position of objects using appropriate vocabulary, including above, below, beside, in front of, behind, next to.
K.G.4.a        Describe two-dimensional shapes to identify their various attributes, including vertices, sides, corners, and length of sides.
K.G.5.a        Draw shapes to represent objects in the world.

3rd quarter standards

This set of math standards usually covered our school calendar from returning from Christmas break to mid-March.

Counting and Cardinality (Ordering)
K.CC.1.e.    Count orally to 100 by ones.
K.CC.1.f.     Count orally by tens to one hundred.
K.CC.2.       Count forward beginning from a given number (not 1) within the known sequence (known sequence includes counting by ones and tens).
K.CC.3.e.    Write the number that represents how many objects are in a set, up to 20.
K.CC.6.b.    Compare two groups of objects and identify and state which group is greater.
K.CC.6.d.    Compare two groups of objects and identify and state if they are equal.
K.CC.6.f.     Compare two groups of objects and identify and state which group has less.
K.CC.7.       Compare two written numbers between 1 and 10, and state which is more or less.
Operations and Algebraic Thinking
K.OA.1.e.    Represent addition and subtraction by acting out situations and drawings.
K.OA.2.a.    Solve addition word problems orally up to 10 when read aloud using objects or drawings.
K.OA.2.b.    Solve subtraction word problems orally up to 10 when read aloud using objects or drawings.
K.OA.3.a.    Orally decompose (break apart) numbers less than or equal to 5 into parts in more than one way. Note: Goal of up to 10.
K.OA.3.b.    Represent the result of decomposition of numbers less than or equal to 5 through drawing or an equation.
K.OA.4.b.    State the number that makes 10 when added to any given number 1-9 with objects.
K.OA.4.c.    Represent the number that makes 5 when added to any given number 1-4 with a drawing.
K.OA.4.d.    Represent the number that makes 10 when added to any given number, 1-9, with a drawing.
K.OA.5.a.    Add fluently, orally or in writing, within 5.
K.OA.5.b.    Subtract fluently, orally or in writing, within 5.
Numbers and Operations Base Ten
K.NBT.1.c.   Record the composition of numbers 11-19 through drawings of a group of ten ones and additional ones.
K.NBT.1.d.   Record the decomposition of numbers 11-19 through a drawing of a group of ten ones and additional ones.
Measurement and Data
K.MD.1.b.    Name the measurable attributes of a given object.
K.MD.2.      Compare the measurable attributes of two objects using appropriate vocabulary including taller/shorter, heavier/lighter, longer/shorter.
K.MD.3.c.    Sort categories by count.
Geometry
K.G.1.c.      Describe the relative position of objects using appropriate vocabulary, including above, below, beside, in front of, behind, next to.  
K.G.1.d.      Identify and name the following shapes: cubes, cones, cylinders, and spheres
K.G.1.e.      Describe objects in the environment using the names of shapes (two-dimensional and three-dimensional).
K.G.2.         Name shapes regardless of their orientation or overall size. Use actual objects, not just pictures.
K.G.3.a.      Identify shapes as two-dimensional and flat.
K.G.3.b.      Identify shapes as three-dimensional and solid. Note: Use objects, not pictures.
K.G.3.c.      Sort objects into flat or solid categories.
K.G.4.b.      Describe three-dimensional shapes to identify their various attributes including faces and edges.
K.G.5.a.      Draw shapes to represent objects in the world.
K.G.5.b.      Model shapes in the world by building shapes from components.

4th quarter standards

This set of math standards usually covered our school calendar from mid-March to mid- to late-May.

Counting and Cardinality (Ordering)
K.CC.3.e.         Write the number that represents how many objects are in a set, up to 20.
K.CC.7.           Compare two written numbers between 1 and 10, and state which is more or less. (5 is more than 2.)
Operations and Algebraic Thinking
K.OA.1.f.         Represent addition and subtraction with verbal explanations and mental images.
K.OA.1.g.         Represent addition and subtraction with expressions and equations
K.OA.3.c.        Decompose (break apart) numbers less than or equal to 10 into pairs in more than one way.
K.OA.3.d.        Represent the result of decomposition of numbers less than or equal to 10 through drawing or equation.
K.OA.4.b.        State the number that makes 10 when added to any given number 1-9 with objects.
K.OA.4.e.        Represent the number that makes 5 when added to any given number 1-4 with an equation. *Mastery not required.
K.OA.4.f.        Represent the number that makes 10 when added to any given number 1-9 with an equation. *Mastery not required.
K.OA.5.a.        Add fluently, orally or in writing, within 5.
K.OA.5.b.        Subtract fluently, orally or in writing, within 5.
Numbers and Operations Base Ten
K.NBT.1.e.        Record the composition of numbers 11-19 through an equation of a group of ten ones and additional ones.
K.NBT.1.f.        Record the decomposition of numbers 11-19 through an equation of a group of ten ones and additional ones.
Measurement and Data
K.MD.1.b.         Name the measurable attributes of a given object.
K.MD.2.          Compare the measurable attributes of two objects using appropriate vocabulary including taller/shorter, heavier/lighter, longer/shorter.
Geometry
K.G.1.c.          Describe the relative position of objects using appropriate vocabulary, including above, below, beside, in front of, behind, next to.
K.G.4.b.          Describe three-dimensional shapes to identify their various attributes including faces and edges.
K.G.4.c.          State the differences of two- and three-dimensional shapes in different sizes and orientations.
K.G.4.d.          State the similarities and two- and three-dimensional shapes in different sizes and orientations.
K.G.5.a.          Draw shapes to represent objects in the world.
K.G.6.            Create a new shape from at least two other shapes using tangible materials. Simple shapes include squares, circles, triangles, rectangles, hexagons.

We didn't limit ourselves to only teach these standards in these quarters. When students were ready to move on, we did!

Printable version

Here is a printable version of these standards. Print them out and lay them side by side to really get a good understanding of how each standard grows in difficulty or abstraction over the year.

Download standards list

If you want help planning what standards to focus on then try this with your printed version:

Highlight a handful of standards from each quarter you think are the most important. These will become the main focus of your small group math instruction for those nine weeks of instruction.

Then find creative ways to hit the other standards you didn't highlight, but with less time and effort dedicated for mastery. Think about using games, warm-up activities or mini-lessons.

Tuck your highlighted standards list into your lesson plan binder so it's always at your fingertips and use it to plan your math lessons.

Let’s wrap it up

I hope that, if you need to know when to teach specific math standards, this list can help.

Remember to cover the standards that go the deepest to strengthen your kinders' math thinking to get the most out of your math lessons.

Want to know more about teaching math standards like these in small groups? I've got your back with this ultimate guide on how to start guided math in kindergarten.

How to Set Up a Year-Long Math Journal Center

Feb 10, 2020 · 2 Comments

Learn how to create a year-long math journal center in kindergarten.

Math journals are an excellent way to work on math standards without using worksheets, allow students to show their thinking and learn how to organize written math work.

Here's why and how I created a math journal center that lasted all year long in our classroom. This center fits right into how I teach math in small groups in kindergarten.

[feast_advanced_jump_to]

Why I created a math journal center

Since I teach math in small groups, I need the rest of my class to learn independently. Setting up a math journal center is one way I have students learn independently.

I knew that I'd need a math center where students would record their thinking in written form using pictures, numbers and sometimes words... because they have to learn to write during math. But I wasn't about to use worksheets.

I loathe worksheets.

So, to replace worksheets in my classroom (and I literally just hid them away in my cupboards until the end of the year when I recycled them) I purchased a set of composition notebooks for my class.

With these notebooks, we had the makings of a math journal center, or recording zone, as I like to call it. Of course, you can call it a station, zone, center or whatever you like.

Continue reading: Two reasons why I love using math journals in kindergarten

How it works

This center is pretty straightforward, but here's how it works:

  1. Students watch me model a math prompt.
  2. They learn how to "read" the directions using picture clues.
  3. They write the date and glue in the math prompt in their composition notebook.
  4. They work through the prompt choosing appropriate materials when it is their turn to visit this center.
  5. They record their thinking using pictures, color, numbers and eventually words.
  6. They often share their work with the class and/or it is reviewed by the teacher before it gets returned to them.

They can learn to write, draw and organize their thinking using plain notebook paper. It won't all happen during the first three weeks of kindergarten, but they will grow by leaps and bounds over the year.

What you need

To set up a math journal center, here are the basic things you'll need:

  • glue (sticks or bottles)
  • a composition notebook for each student
  • math prompts
  • two-ended bookmarks
  • student pencil boxes or a caddy of writing utensils
  • manipulatives
  • paper to print math prompts
  • Ziploc bags to store manipulatives in sets
  • basket to hold group notebooks

You don't have to have a specific area where kids sit to work - they can simply do their journaling wherever it's convenient.

If you have a little shelf space to keep student notebooks in baskets by groups and a three-drawer Sterilite organizer - that is all the setup space you need.

You don't need much space to set up a math journal center

Just label your baskets in a way that is easy to change, because the names of the students in each group should/will change as the year goes on.

How to make it last all year

In order to make math journals something they could do all year long, I needed it to bet set up as a regular routine thing. So they will know what to do with a little modeling, instruction, and praise.

You'll need to decide how often your students will visit this math center and that will help you determine how many prompts you need each week.

My students had two journal prompts each week.

To make a math center year-long, I think you need:

  • math prompts that look the same from week to week
  • materials available in the same location
  • a grading "rubric" (and I loosely use this term)
  • a plan to have students finish or redo work
  • a way to share student work with parents

Let's talk about each of those components so that it doesn't feel overwhelming.

1. Create kinder-friendly math prompts

Math prompts are what students will work from each week when they come to this center.

Math prompts in kindergarten should:

  • be open-ended whenever possible
  • have picture direction clues
  • be standards-based
  • usually require the use of manipulatives
  • be differentiated relatively easily

You want students to keep working at this center and completely avoid the potential problem of having "fast finishers" altogether. Make your prompts open-ended so students keep working at this center until time is done.

Try to make journal prompts open-ended

Use picture clues so that students can follow along visually when you're introducing and modeling the prompt. Then they can use those clues to help them recall the directions, steps and prompt when working independently.

Only pick prompts that are working towards what you're working towards - and that is mastering standards. Choose a variety of standards to hit over time, but don't feel like every standard is worthy of turning into a journal prompt.

'Cuz they're not.

Kindergarten students are such concrete learners that they should have access to and use manipulatives while they are working. They should attempt to draw their manipulatives in their notebooks to show their work. It's age-appropriate.

Format your math prompt tasks so that if you need to differentiate the difficulty for different groups of students, that it's easy on you.

I've already made a whole year's worth of prompts that fit the bill for kindergarten. You can buy them in my guided math pack.

I stored the current math prompts in the top drawer of a medium-sized Sterilite three-drawer unit. Students would take one and glue it onto the next available page in their math journal and show their work on that page(s).

2. Make manipulatives available

You'll want to have some basic manipulatives on hand to help students learn.

Here are some ideas:

  • linking cubes
  • pattern blocks or foam shapes
  • a camera (or iPad) to take photos
  • stamps
  • teddy bear counters
  • dice
  • dominoes
  • 2D/3D objects
  • number lines 0-10, 0-20
  • ten frames
  • high-interest objects (assorted buttons, beads, keys, shape macaroni, legos or counters)
  • number cards

And I've found that the key is to already have these manipulatives in sets.

I would put out a set of manipulatives students needed to complete the prompt into a Ziploc bag or if it was a set of pattern blocks or base ten blocks, those were kept in pencil boxes. If my largest group size was 7 students, I would have 7 sets of those materials pre-made.

Student materials are kept in baggies to make sets.

We stored these in the next two drawers of the Sterilite organizer.

That way they could carry it to their workspace from where we kept all of our math journal materials, clean up and return them easily for the next group.

Bonus tip! Here are two ways to keep "sets" separated if needed:

If you have a set of materials like dominoes that need to be kept as a set, create quick, picture labels to keep pieces together. Print a symbol multiple times (using the Wingdings or Webdings font) onto a label or a few labels. Cut the symbols apart and stick them onto the back of each domino in the set. Label the bag or container with the symbol so all pieces get returned to the right one.

Use color to separate sets of printed materials like cards. Students have an easier time cleaning up when they can visually see that all of their purple cards have been picked up right next to their partner who was using yellow cards.

3. Check student work

When it comes to grading in kindergarten - I don't. Checking these math journals is the closest thing I came to grading.

We used a rubric and a bookmark to make things easy.

Glue a rubric onto the inside front cover of the math journal.

Use a super simple rubric

A simple emoji face rubric was an easy way to check and document work.

Students could earn:

  • a smiley face - if all parts were completed and accurate
  • a straight face - if only some parts were completed or had incorrect work
  • a sad face - if the student didn't try their best or follow the directions

You can add words too, like to note how hard a student tried, if they are showing growth, used good organization or if they didn't stay on task. Consider it documentation for you and for their parents.

Use a two-ended bookmark

We used a two-ended bookmark to help make journaling go smoother.

The bookmark helped us find current work quickly without having to flip through a gazillion notebook pages.

Students tucked them in with the red end sticking out if it was ready to be checked (at the end of their center).

Then, after checking their work, I'd flip it to the green end so they knew it was ready to be put away.

What to do when student work isn't done, good enough or is completely wrong

Let's be real - it's kindergarten. And we're working with all kinds of kids. I won't pretend every journal entry was completed beautifully.

That's not my goal. Our goal is to use these to learn to organize their work and show work in ways that is meaningful to them. They don't exactly know how to do that in the beginning.

Now there are times when students goof off and don't complete their work. When it's chalked up to behavior or being off-task, that's an easy sad face documentation mark.

I set those math journals aside and students redo the prompt the next morning after they've completed their morning routine.

If a student gets the work wrong but did make good attempts, then I have some great information I can use and plan small group lessons around that need.

I also set those math journals aside and have the student redo the prompt the next morning if I can give them one-on-one assistance to get them back on track. Or if our morning is hectic, I hang onto it for math time and try to have them sit near me so I can help them through a couple of steps so not all is lost.

Plan to share work with parents

Parents like to see what's going on in the classroom. You can share student math journals with parents to facilitate good communication.

Since my students were no longer taking home worksheets daily, I needed a way to have students share their math journal work.

I didn't want them taking journals home each week since that would increase the likelihood some would not return - but I did compromise and send them home once each month or twice a quarter.

Send journals home every now and then for parents to see

I sent them home in a Ziploc bag with a note stapled to the inside so parents knew how to talk through their child's work with them and to return them back to school.

You could also take photos of student journal entries (or teach them to do it) and upload them to their SeeSaw portfolios (or some other digital sharing platform like Classdojo or Bloomz).

Parents were able to use the directions on the prompts, the work, and my emoji faces to get a good feel for their child's work in math.

How to keep it simple

Okay - let's look at this from the perspective that you want to work smart and keep it simple.

You want your students to work independently, you want them to grow in their math skills and you don't want a crazy amount of work each week to keep this center running.

Well here are three ways I think you do that.

1. Differentiate doesn't mean extra work

Differentiate only when you need to, and not for every prompt.

With most math prompts, you probably won't need to make any changes. But if you do, change the number range students are working with to better fit their independent skill range.

Use symbols so students know which prompt copy is for them.

I use star symbols to show which math prompts are for specific groups

Remember, differentiating doesn't mean just giving extra work to higher students - give them work that goes deeper and is more challenging.

2. Focus on content

Pick math prompts that help you teach! Go for math prompts that require learning to write and use numbers for a purpose and eventually use words to help add clarity to their work.

Skip the traditional math prompts: "I bought 3 pumpkins. My dad bought 2 more. How many pumpkins were there in all?"

I'm not saying story problems are bad - they just fit better during calendar binder time or as part of a teacher-led small group lesson instead.

3. Introduce, review, praise

When you introduce a math prompt - be very specific about what you want students to do... but don't always show them exactly how to do it or at least the whole thing.

Begin modeling what you want to see, but leave room for students to find ways to show their thinking.

For example, if you wanted students to show how they figured out multiple ways to make 5, perhaps they could organize their work by drawing a circle around each way. Or maybe they will draw a line in between each way. Or maybe they will do each way in a different color.

If your students don't all do the prompt on the same day (I only had two out of four groups doing a prompt on any given day) then be sure to review the prompt for your students on the second day.

I planned for my highest groups to do the prompt on the first day or rotating through centers so that my students who needed more support would see the prompt twice. The would see the introduction and review.

Use student examples from the previous day to help students see ways of showing their thinking, organizing their work, being neat and find specific things to praise that you want to see others try too. Just pick one thing from each example you pick to edify.

Use the system you have in place to your advantage so your students can work independently, grow in their math skills and you aren't doing a crazy amount of work each week to keep this center running.

Conclusion

There you have why and how I created a math journal center that lasted all year long in our classroom. Plus, we covered how the benefits of sharing work with parents and keeping it simple can make the work you do to set up this center easy to maintain each week.

If you're interested in grabbing my 74 math journal prompts - I'll include everything you need to help you get this center set up! This guided math pack includes the journal bookmarks, name labels, rubric, parent note and more.

Click here to buy the guided math pack journal prompts

17 Kindergarten Videos for January – Read, Move and Learn!

Jan 12, 2020 · Leave a Comment

Find kindergarten-friendly videos that hit the mark in January. Here is a list of teacher-recommended videos for January.

Let's face it. For many of us - especially in the Midwest - it's essential to have a handful of favorite learning videos during January. January usually means endless days of indoor recess and built up excess energy in our kinders.

A learning video can help break up the normal routine or a brain break video can help get the wiggles out.

So here are snow-themed books read aloud, brain break videos and some learning videos that can help you teach through the winter.

Snow themed stories

Now, most of these videos came directly from the teacher's list of recommended books to read to kindergarten in January.

Here are the youtube versions we found to be most appealing and are classroom-ready.

The Most Perfect Snowman

The Most Perfect Snowman is a sweet story that embraces kindness.

The Snowman

This video is almost a half-hour but is just beautiful with music and no words.

Sneezy the Snowman

Sneezy the Snowman is a relatively new book around the classroom block, but it's a fun rhyming book with a pattern, making it easy to love.

The Snowy Day

This quick read-aloud version animates the classic kindergarten winter book The Snowy Day.

The Jacket I Wear in the Snow

Another classic winter story read aloud. This reader's voice is pleasant and this version would be great to add hand motions to as students listen.

The Mitten

Do you read any Jan Brett books in the winter or do an author study? Then The Mitten should be on your list!

Brain breaks

When indoor recess hits, or simply the wiggles - it's time to fit in a brain break.

These Youtube videos aren't strictly for use in January, but they are handy.

Jack Hartmann penguin dance

The penguin dance is a quick repeating video that builds up motion. It will remind you of tooty-ta but with penguin flair.

Trolls GoNoodle

Sometimes students just need to go full out and dance their wiggles out. This dance video can help with that done to an upbeat song.

And if you need to exercise but in a more calm fashion then these yoga-for-kids videos might fit the bill.

Reader Michelle shared these three as her class' favorites:

Cosmic Kids Frozen

Retell the story of Anna and Elsa in this Frozen yoga kids video while using yoga poses.

Betsy the Banana cosmic kids

Students follow along with yoga poses to tell this imagination story as a banana at a birthday party.

Squish the Fish cosmic kids

Take an ocean adventure together with yoga poses to tell what's happening in the story.

Learning videos

Here are some videos to support or extend what you might be learning in the classroom in January.

Martin Luther King Jr.

Martin Luther King Jr. Day is in January. This read-aloud is kinder-friendly.

And here is a song to the tune of Bingo to gently introduce MLK and what he stood for.

Rhythm lesson - winter wonderland

I think this music lesson video is a great compliment to what students learn in music class. Have your students tap on their laps to match the drum.

*Note: Limit this video to just the first 3 minutes.

Patterns

Reinforce learning about patterns with this fun dancing patterns video. Make patterns using motions and get them learning.

Count to 100 with Spiderman

Just because Spiderman is in this video makes counting and doing 100 exercise moves more fun.

This video is great counting preparation for the 100th day of school.

Fixed fairy tales

If you've read any fairy tales (or fractured fairy tales) as a class, then compare one of these fixed fairy tales that are "how the story should have ended" versions:

I think students will find the storylines refreshing, but only if they know the originals well.

Conclusion

There you have it - videos that teachers are using in January in their kindergarten classrooms.

I hope that these winter books read aloud, exercise videos and learning videos are helpful as you teach through the winter.

Thanks to all of the kindergarten teachers who chimed in to share their favorites on the KindergartenWorks facebook page!

What videos did I miss that you love to show in your classroom in January? Share in the comments.

If you have snow on the brain, you may want to check out these 5 Clever Sneezy the Snowman Kindergarten Activities.

5 Clever Sneezy the Snowman Activities for kindergarten

Or add a few fun, winter-themed kindergarten activities to your lesson plans.

If you like what I do here on KindergartenWorks, then be sure to subscribe today. I look forward to sharing ideas with you weekly.

More Kindergarten Ideas and Activities

  • 13 Free Ideas for the 100th Day of Kindergarten
  • 18 Kindergarten Books for January - Teacher Favorites
  • Frozen-Themed Composing Numbers Game for Kindergarten
  • 7 Winter Gear Tips That Will Save Your Teacher Sanity

18 Kindergarten Books for January - Teacher Favorites

Jan 8, 2020 · Leave a Comment

Let's look at favorite kindergarten teacher books for the month of January. Here is a list of January books for kindergarten that teachers love to read aloud to their classes.

When it comes to planning January read alouds, many teachers choose books with snow, winter, hibernation and winter animals types of themes. So you'll see these represented amongst this book list for January.

These read aloud books are all recommended by real kindergarten teachers!

Here is a list of the January books for kindergarten:

  • Gingerbread Man
  • The Mitten
  • Squirrel's New Year Resolution
  • There Was An Old Lady
  • Tacky the Penguin
  • Snowy Day
  • The Gruffalo
  • Sneezy the Snowman
  • The Biggest Snowman Ever
  • Snowmen at Night
  • Pete the Cat Snow Daze
  • The Snowman
  • Snow Day!
  • Froggy Gets Dressed
  • The Most Perfect Snowman
  • The Hat
  • Bear Snores On
  • Trouble With Trolls

I’ll be sharing affiliate links and more information about each book so you can check things out for yourself.

Gingerbread Man

The Gingerbread Man is a classic pattern story that grows. It recalls the characters in order as the gingerbread cookie escapes many would-be dessert-eaters.

While I love this story so much as to plan the entire last two weeks leading up to Christmas break around it in our Gingerbread Adventures, it could easily be read in January.

If you read it, be sure to snag a few different versions for comparison purposes. Here are my favorite Gingerbread Man books.

The Mitten

The Mitten is a simple but fanciful tale of winter creatures climbing into a newly-knitted mitten to stay warm. It is an easy read aloud and very popular in kindergarten.

Carrie, a kindergarten teacher, recommends reading three different versions:

  • The Mitten by Jim Aylesworth
  • The Mitten by Jan Brett
  • The Mitten by Alvin Tresselt

Squirrel's New Year Resolution

If you want to hit on resolutions, then picking up Squirrel's New Year Resolution is an easy choice. This book is all about learning what a resolution is by leaning into your strengths.

Or if you did random acts of kindness in December or want to in January, this story would be a great segway.

The Old Lady Who Swallowed... Books

January is a great time to read and compare books with lots of versions. There Was an Old Lady Who... has so many kinds available. The main character traditionally swallows items that either grow in size or center around a theme until the story reaches a sudden climax and swift ending.

Start with an original There Was an Old Lady Who Swallowed a Fly and move onto these additional best versions to read.

Tacky the Penguin

One of my favorite winter characters is Tacky the Penguin. This penguin isn't quite like the others, and while it looks like he creates mayhem, his uniqueness always turns out to be the reason the day is saved.

There are multiple books in the Tacky the Penguin book series and I think you'll fall in love with Tacky too after reading one or two to your class. (The Tacky and the Winter Games book is great to read in a year when there is winter Olympics.)

The Snowy Day

The Snowy Day is by far, the most chosen read-aloud book for kindergarten in January by kindergarten teachers.

The story follows a young boy through deep, deep snow in all of the innocent and exploratory ways kids innately play in the snow.

The Gruffalo

The Gruffalo is a soft-hearted tale of a clever mouse who avoids being eaten using his imagination and wit.

There is also a nice video version on Netflix and a companion follow up book called The Gruffalo's Child.

Sneezy the Snowman

Sneezy the Snowman is a perfect read-aloud book for January. Kinders will love how everyone tries to keep the snowman from melting and yet warm at the same time.

This rhyming book has lots of free lesson plan ideas that I've found for you to get the most from reading it aloud (like retelling activities).

The Biggest Snowman Ever

While a longer book, The Biggest Snowman Ever is a story about building something greater together than we can do independently.

This is a nice one-time read-aloud book for kindergarten.

Snowmen At Night

Snowmen at Night will peak children's imaginations as they imagine what snowmen must do during the night in order to be so disheveled (or melty) in the morning.

This rhyming story features lots of childhood-related activities like sledding, baseball and drinking hot chocolate.

Pete the Cat Snow Daze

Pete enjoys so many snow days that he begins to miss school and takes matters into his own hands.

Pete the Cat Snow Daze is one of those "I Can Read" books so the text is a little on the boring, but it is still a fun book and makes for a quick read-aloud.

If you love Pete the Cat, you'll also want to check out these free Pete the Cat lesson plans.

The Snowman

The Snowman is a beautiful, wordless picture book. It is a classic story by Raymond Briggs.

Or take this book another direction after reading it and show the matching video. It's just beautiful music and the animated version of this book.

Snow Day!

When it comes to wanting a snow day, no one really wants one quite like the teacher. Snow Day! by Lester Laminack dives into what life on a snow day can be like which is perfect if you live a location that doesn't get any snow.

Froggy Gets Dressed

Getting dressed for winter weather at recess can make any teacher a little crazy.

Froggy Gets Dressed is a funny read-aloud that pokes at alllllllll of the stuff we have to put on before we go out to play in the snow.

The Most Perfect Snowman

The Most Perfect Snowman is a sweet story of an unfinished snowman named Drift who is treated differently until three children come along and gift him their winter gear. The snowman, in turn, gives them away to someone in need realizing what's most important.

Give this book a try - you'll love it.

The Hat

The Hat is a simple story about a hedgehog who finds and accidentally ends up wearing a sock. Hedgie plays it off as a hat to all of the farm animal on-lookers only to feel as if they are laughing at him... Little does he know what all of the animals are really thinking about wearing something warm.

Bear Snores On

If you want to touch on hibernation, Bear Snores On is a sweet book to read in kindergarten. This rhyming pattern book will make your students fall in love with all of the forest creatures from the bear books series.

Plus there are more Bear books worth reading in January like: Bear Says Thanks, Bear’s Loose Tooth, Bear Wants More or Bear's New Friend.

Trouble With Trolls

Trouble With Trolls takes place in a wintery setting and features a clever girl who must figure out a way to avoid losing her dog and winter gear to a bunch of troublesome trolls.

Students will enjoy the gentle tension and cleverness this story so beautifully winds together.

Let's wrap it up

There you have it - stories ready to read aloud to your class in January. Check your library or Youtube if you need to snag a book fast. I hope this list of kindergarten books is helpful.

Thanks to all of the kindergarten teachers who chimed in to share their favorites on the KindergartenWorks facebook page!

If you have snow on the brain, you may want to check out these 5 Clever Sneezy the Snowman Kindergarten Activities.

5 Clever Sneezy the Snowman Activities for kindergarten

Or you might want to show a few of these January videos for kindergarten.

More Kindergarten Ideas and Activities

  • 13 Free Ideas for the 100th Day of Kindergarten
  • 22 Fun, Winter Themed Activities for the Kindergarten Classroom
  • Frozen-Themed Composing Numbers Game for Kindergarten
  • 7 Winter Gear Tips That Will Save Your Teacher Sanity

If you like what I do here on KindergartenWorks, then be sure to subscribe today. I look forward to sharing ideas with you weekly.

Kindergarten Classroom Daily Schedule

Jan 4, 2020 · 16 Comments

Good morning. I wanted to invite you into a day in the life of... me, a kindergarten teacher... in my classroom.

This is also the skeleton of our daily routine and schedule since many of you have asked for it.

Please note that our schedule changes every year and I'm not afraid to even change it up mid-year just to see if I can improve on things.

But regardless of any changes, the bulk of what makes up our daily routine doesn't change. It's usually just the order of what we do when or the amount of time I can allot to certain things that does change.

Now, let's start with the morning before students arrive.

Morning prep time

A Day in the Life {of a teacher} ... in Photos :: KindergartenWorks

I turn on a computer or two in my classroom with my arms full of stuff and I keep the lights off while I begin my day. The daylight often gives me enough to work with and I enjoy the quiet stillness of the slightly-darkened room.

A Day in the Life {of a teacher} ... in Photos :: KindergartenWorks

I head over to my teacher space and either work on my lesson plans in my lesson plan binder, answer emails or organize materials for the day as needed.

I usually have a to-do list somewhere that helps me keep track of what was leftover from yesterday or I work ahead.

Or... I wheel around and use my large teacher table to plan out more of my guided reading plans or guided math plans.

A Day in the Life {of a teacher} ... in Photos :: KindergartenWorks

I don't plan super far ahead in general for guided math and guided reading since I use my notes and documentation from previous lessons to plan the next couple of lessons.

It feels like no time at all before I pick up my kinders, the lights come on and we are at full steam. Don't you love the enthusiasm they start every day with?

Students arrive

We follow our morning routine for putting items away and get started working.

A Day in the Life {of a teacher} ... in Photos :: KindergartenWorks

Students complete the calendar page from our calendar binders independently before coming together as a group. (We didn't do this until most students were successful at doing this independently.)

How to Organize and Use Classroom Reward Coupons in Kindergarten - sit in teacher's chair

Then they work on one of these three activities that I have selected for the day. I like to rotate:

  • buddy reading
  • read to self
  • author writing

During this time more daily things happen...

  • Announcements
  • Lunch count
  • Morning classroom jobs

Moving on.

Whole group calendar binder time

I use my computer to signal students to clean up with a good morning song and they all grab their calendar math binders and pencil boxes (which they left out from earlier on a table or shelf) and meet as a group on the floor.

We review the calendar page, date and then hit various Common Core math standards.

A Day in the Life {of a teacher} ... in Photos :: KindergartenWorks
Calendar Math in Action

Right now we are getting in a variety of skill practice like:

  • finding the missing addend to make 10
  • exploring rekenreks to 20
  • solving for an unknown
  • solving two-step story problems
  • subitizing
  • counting {right now by tens.... starting at numbers other than 10... like 4 or 7}.

But we don't hit all of those skills in one day. I select 1-3 skill pages to work on each day.

A Day in the Life {of a teacher} ... in Photos :: KindergartenWorks

But every day we do wrap-up with a weather graph activity and select our line leader for the day. We dissect their name to look for "little bits we know" in that person's name - like sight words, digraphs or common blends.

Then we head off to our first literacy center.

Literacy center #1 and guided reading

Students get busy at their literacy centers and I prep quickly for my first reading group - reminding myself of what the first lesson is gonna look like, set out our guided reading mats and grab my materials close by.

Currently, I have 5 reading groups, plus 2 completely independent workshop readers... so I have to rotate when I meet with each of them.

I see some groups 4-5 times a week, some groups only 2-3 times a week.

I call student names in a group to come meet me at my guided reading table.

Usually, we do a warm-up activity or two, a main activity and then we close it out.

A Day in the Life {of a teacher} ... in Photos :: KindergartenWorks

All the rest of my kinders are working at their first literacy center until they hear the cleanup song coming from the computer.

Their centers are open-ended so they can just keep on working until they are signaled to clean up.

This really helps me have the flexibility to work with groups and give them the attention needed on any given day.

Read-aloud

We pull together on the carpet and I let a few share their learning and thinking since not everyone gets to see what others are doing.

We begin a story discussion and read aloud.

A Day in the Life {of a teacher} ... in Photos :: KindergartenWorks

I'm big into using classics, different versions and well-loved authors to teach students how to think/engage when reading... so we talk and read and talk and read... I mention how they can practice the skill in their centers.

For example, as I write this post, we are enjoying comparing and contrasting different versions of Henny Penny this week. We also compare the story structure to other stories we've read and talk about the illustration style of Paul Galdone.

Last week we dissected The Little Red Hen and for two weeks prior to that, we dug into non-fiction books and magazines on penguins.

Literacy center #2 and guided reading

It's time for our second literacy center for the day and I pull another group of students. We work on the skills they need... sound familiar?

A Day in the Life {of a teacher} ... in Photos :: KindergartenWorks
Sweet CVC Roll, Say Keep

I'm not great at following a clock. {Really...}

But I am great at following a routine!

So, I use my strengths and use routine to help keep track of our day.

Students who aren't pulled by me continue working in their heterogeneous groups on their reading, writing and word work skills.

We have our specials scheduled at different times each day, so when my cell phone alarm reminds us to line up for a special, we figuratively just "push pause" on whatever we're doing and resume when we return.

A Day in the Life {of a teacher} ... in Photos :: KindergartenWorks
ABC Literacy Center

Sometimes I laugh at the amount of sheer "stuff" all over the place, but learning to read can take a lot of "stuff." And it all gets cleaned up in 20-30 minutes again anyways.

My kinders all grab their notebooks and their pencil boxes to bring to the floor.

We pull together again as a group.

Word work

A couple of students share what they did at centers or I edify things I want to see others do, how I want a few to challenge themselves, or I take a moment to re-teach something mechanical to keep centers running smoothly.

We use this whole group time for phonics and word work to practice reading skills.

Warm-up charts

We start with a warm-up.

Sometimes they get to be the teacher...

A Day in the Life {of a teacher} ... in Photos :: KindergartenWorks

But most often they are following along in their notebooks and I am doing my best to keep everyone engaged.

With students at all levels, giving them materials in front of them has been helpful to me in pulling them together.

We use an alphabet chart, name chant, bits chart, two sight word charts, and a vowel patterns chart as we grow through the year. Normally we are doing 1-2 charts each day. Those are the same charts they will see again in their guided reading groups too, depending upon their skills.

Poem of the week

We also use this word work time often to work through a nursery rhyme to build reading fluency and do more phonics or word work.

A Day in the Life {of a teacher} ... in Photos :: KindergartenWorks

You can see above we were talking about using repeated words, sight words and bits we know to help us improve our accuracy.

We dismiss from the whole group space with a reminder to try using such strategies at centers and head to our third literacy center.

Literacy center #3 and guided reading

I pull a group, the rest all continue working... see the pattern?

A Day in the Life {of a teacher} ... in Photos :: KindergartenWorks
Snapshot of Literacy Centers and Guided Reading Group
A Day in the Life {of a teacher} ... in Photos :: KindergartenWorks
Big Book and Detective Center in Action
A Day in the Life {of a teacher} ... in Photos :: KindergartenWorks
Non-fiction Literacy Center in Action

And a huge chunk of our day is complete!

Writing

We move into 'writing together' on most days, where we are doing shared writing, a mini-lesson or interactive writing (earlier on in the year)... and some days we just start writing in our own books.

We call it author writing.

They pick the content. They write and draw.

A Day in the Life {of a teacher} ... in Photos :: KindergartenWorks

I'm moving around the room talking with students about their books, helping them find ways to make their books match what's envisioned in their heads and looking for one-on-one opportunities to teach in the moment.

Lunch and recess

We break for lunch and recess. I take a few minutes to have an adult conversation with my favorite teacher down the hall.

After lunch

Most often, we work more on writing once we return from recess since I'm not great at sticking to a time schedule.

Sometimes we gather to let a couple of students share their stories. Some days, if we're behind, we simply clean up and move on.

Pack up and choice time

Now, in most years I'd save packing up until the end of the day. But this year we had to try something different. I'll explain more below.

We move onto getting our folders ready and backpacks packed up using our end of day procedures.

A Day in the Life {of a teacher} ... in Photos :: KindergartenWorks

If a student successfully follows through with the steps and the alarm for math hasn't gone off on my cell phone yet then they have a few precious moments to have choice time.

What is choice time? I stash a set of 4-5 choice activities behind the folder icon on our agenda that are like a surprise each day. They can choose from things like Legos, blocks, house, games, dress-up, and the rest of the goodies I have stashed away.

I like to use earning choice time as a whole-class-incentive to keep our transitions quick throughout the day (to earn more time to play) and to help students follow the multi-step end of day procedures efficiently.

Guided math

We move into guided math. This year my favorite teacher down the hall and I switch a handful of students to better differentiate our groups.

Students line up to switch classrooms for math with math journal and pencil boxes in hand.

Last year, I taught math in the morning and loved it. But this year, afternoons works out the best since we both have the same large, uninterrupted chunks of time here.

Guided math happens four days a week. On our off day, we do a guided drawing and writing project or a more-involved art project to connect to science or our read aloud.

Daily introduction

Students line up to switch or if they're staying they wait on the carpet. Sometimes I play a quick youtube math video to make the transition waiting time go more smoothly.

A Day in the Life {of a teacher} ... in Photos :: KindergartenWorks

I explain our math prompt, highlight great examples of work, go over a practice zone game or review a skill once our newly combined group is ready.

Math zone #1 and guided math

Students go to their first math zone and I meet with a group of students at the teacher zone.

A Day in the Life {of a teacher} ... in Photos :: KindergartenWorks

Math zone #2 and guided math

We turn on the cleanup song and switch (without meeting whole group which is different from our literacy centers) to our second zone.

A Day in the Life {of a teacher} ... in Photos :: KindergartenWorks

Wrap-up

Then we pull together during the last moments of our day to share a couple of work examples or student learning stories.

I will also often grade math journals during this time as I listen with one ear.

Students return to their rightful classroom (if they switched) and we grab our belongings that we had packed up ahead of time to go home.

Line up to go home

I wish students a good afternoon by reminding them that...

They are loved.

They are special.

And they are made for more.

You Are Loved Freebie Poster

The lights go off. I follow them out and after all students are picked up (we have no busses), I return to my classroom.

Prep and planning time

I often find that my lights stay off while I pick up large debris off the floor, stack items to-do on my teacher table and review my to-do list.

I add to it, cross things off, see what I did or didn't do during my prep period and what is a must before tomorrow comes.

I spend time printing, reflecting, emailing and looking to the day (and days) ahead ensuring that what we've got planned doesn't need a major adjustment.

A Day in the Life {of a teacher} ... in Photos :: KindergartenWorks

I try to make my teacher space as neat and as minimalistic as I can - just to make the next day start out on a calm note for myself.

Frequently asked questions

Wait a minute... Where is the science and social studies?

I use our reading discussions to hit select but solid-good, non-fiction themes throughout the year that help get it all in.

Where is the arts and crafts of it all {this is kindergarten Leslie!}?

Well, I'm not super big on crafts... but we incorporate guided drawing and/or art into a more involved project once a week. We do this on the day that we do not have guided math scheduled.

Can you give an example of integrated learning?

Sure. Let's use an example. Remember I mentioned we were learning about penguins...

Well, we:

  • made time to read about them during our read alouds
  • wrote about them during our whole group writing-introduction time as an interactive writing activity
  • checked on a zoo's live streaming cam to observe them during a transition time
  • made a kinder-gorgeous hallway display with our learning using both artwork and writing during our guided drawing project time

We just make it work by building it into our weekly routine.

How long is your ____ time?

Well, here is a look at our weekly schedule at a glance. This sample kindergarten daily schedule will help you see the routine and flow.

It may be in a bit different order than what you see listed in this post just because I would change things from year to year.

Let's wrap it up

Phew! That turned out to be crazy long with all of the photos. Thanks for sticking in there with me.

Perhaps we should grab a cup of tea and check out your day next?! Any takers? Maybe after a nap...

If you like what I do here on KindergartenWorks, then be sure to subscribe today. I look forward to sharing ideas with you weekly.

More Kindergarten

  • The Truth About Kindergarten Classroom Management
  • Learning Teen Numbers in Kindergarten
  • Classroom Jobs for Kindergarten
  • 5 Things You Won't Hate About Year-Long Literacy Centers

How to Make a Free 100th Day of Kindergarten Photo

Dec 20, 2019 · Leave a Comment

Celebrate the 100th day of school with a cute, free 100th day of school photo. Use this free photo overlay to make pictures of your students extra special on the 100th day of kindergarten.

While I like to plan a not-so-crazy 100th day of school (or really how I plan any non-major holiday), it can be fun to sprinkle in a few extra-special touches for special school days.

This overlay is a perfect extra-special touch.

Here's how you can make your own 100th day of school photos and get the free overlay too.

Don't know what an overlay is? No biggie - think of it like a sticker that goes on top of your photo - only you put it on top of the photo using your computer.

I've made overlays for mother's day, personalized ones for the end of the year, overlays for our 'S day' class photo, and ones for each month of the year.

Step 1 - Prep for the 100th day photos

The basic idea is that you take a photo of your students on the 100th day of school - off to one side of the camera's frame.

That way the empty space can later be filled up with these cute white and colorful sprinkle words that say, "Hooray for the 100th Day of School."

Think of it as a digital sticker that goes on top of the photo before you print.

Here are my tips for taking cute photos:

  • position on a neutral background with texture (bricks, fence, siding, etc.)
  • use natural light when possible (next to a window or school entrance or go outside)
  • position student off to one side of the viewfinder and leave lots of open space/background
  • get an up-close perspective (like the mid-chest and up)

Taking photos on the 100th day of school is the only part that you actually have to do on the 100th day. The rest of the work can be done later.

Step 2 - Add the 100th day overlay

It's time to add the overlay to your photos.

Start by downloading this 100th Day overlay onto your computer. [terms of use] [downloading help]

Now, get your photos from your phone onto your computer in any way that is easiest for you.

Now it's time to create your whole class' set of pictures at once.

While I’m all about making these cute photos, I don’t think I’d do it if it took me forever and a day to pull it off.

So here are three different ways that you can add the overlay on top of your photos:

I’ve included a helpful hints page in your download with a link to videos and more detailed directions on any of these three ways to help you get it done easily with the option of your choice!

Do it online

The first way – you can use a free photo editing website like befunky.com. You will:

  1. Upload a student photo
  2. Add the overlay on top
  3. Edit if you want to (make it brighter, crop it) and...
  4. Save it to print later

Do it with Google Slides or Powerpoint

You could also use a program like Google Slides or PowerPoint. This method is handy because you can keep the overlay in the exact same spot while just changing out the student photo background.

A little faster and this option I recommend most.

Here you essentially:

  1. Make a template page with student photo as your background and overlay on top
  2. Duplicate it to make as many pages as you have students
  3. Replace background student photo on each page with new student photo (right click > change picture)
  4. Save it to print later

Do it with a program you download

And the last option is one I’d choose for myself. It allows you to make all of your pictures at once but feels less straight-forward since it has lots of other options as you’re working that can be confusing at first glance.

But, for this option, you can use a free program called PhotoScape to get these pics done.

You will:

  1. Select all of the student photos and drag them into the list area
  2. You will select the overlay and place it
  3. Click to finish and it will create all of the photos with the overlay in the exact place you set it to print later

Right, now comes the final part!

Step 3 - Print or share the 100th day student photos

Print the student photos that you made on any printer you have available to you. Color prints look great of course but these would be sweet even printed in black and white.

Or skip the printing and share using your favorite method of connecting with parents (email, SeeSaw, etc.).

Let's wrap it up

You’ll be pretty quick at this after you do two or three and you’ll wonder why you haven’t been making photos with digital stickers like this all your life. {wink}

In that case – you’ll want to check out how to get cute student photos all year long with my monthly digital stickers that are awesome.

I hope these make you a happy teacher for such a quick and simple, unique photo moment for the 100th day of school.

If doing so much on the computer isn't your style - or if you'd rather just snap a photo and print them - then I've got your back. Take a photo of your kinders wearing their free 100th day of school necklaces, 100th day headbands or holding a 100th day certificate and you'll be set to go!

100th day necklaces for Kindergarten

If you like what I do here on KindergartenWorks, then be sure to subscribe today. I look forward to sharing ideas with you weekly.

More 100th day of school

  • 13 Kindergarten Ideas for the 100th Day of School
  • How to Plan a Not-So-Crazy 100th Day
  • 100th Day of School Emergent Readers for Kindergarten
  • « Go to Previous Page
  • Go to page 1
  • Go to page 2
  • Go to page 3
  • Go to page 4
  • Interim pages omitted …
  • Go to page 15
  • Go to Next Page »

Primary Sidebar

Let's organize, think and teach smart so you can make learning fun, age-appropriate and the cool thing to do.

Ready? Hold tight to the beauty in teaching kindergarten so they will love it and you will too. I'm Leslie - welcome! Have we met yet? ►

Popular Now

  • Free Editable Goodbye Letter for the End of the Year
  • Free, Editable Kindergarten Certificates and Graduation Diplomas
  • Retell Literacy Center: 20 Famous Story Retelling Ideas and Printables
  • 87 Cool Pete the Cat Freebies and Teaching Resources
  • Kindergarten School Supply List
  • 14 Alphabet Countdown Calendars: Here Comes the End of the Year!

My K Teacher Shirts

Footer

^ back to top

Learn to organize, think and teach kindergarten in smart ways. Make learning fun, age-appropriate, and the cool thing to do.

©2023 KindergartenWorks

  • Facebook
  • Pinterest
  • Newsletter
  • About
  • T-Shirts
  • Contact
  • Disclosure
  • Privacy Policy